

Blackboard’s Retention Centre alerts you to students who meet rules that may indicate their educational experience is at risk on each of your courses. Each course is set up with some predetermined rules and you may add your own.
Access the Blackboard Retention Centre
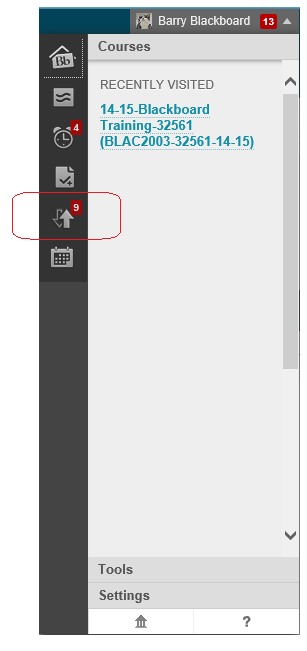
The quickest way to get an overview of the retention centre is to open the Global Navigation menu and click on the retention centre icon which looks like a pair of upward and downwardly pointing arrows. The number beside this icon refers to the number of risk rules that are currently matched.
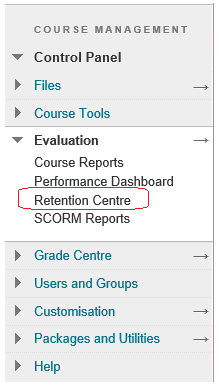
Another way to access the Retention Centre for a specific course is to expand the Evaluation part of your Course’s Control Panel and click on Retention Centre.
View Retention Centre Summary
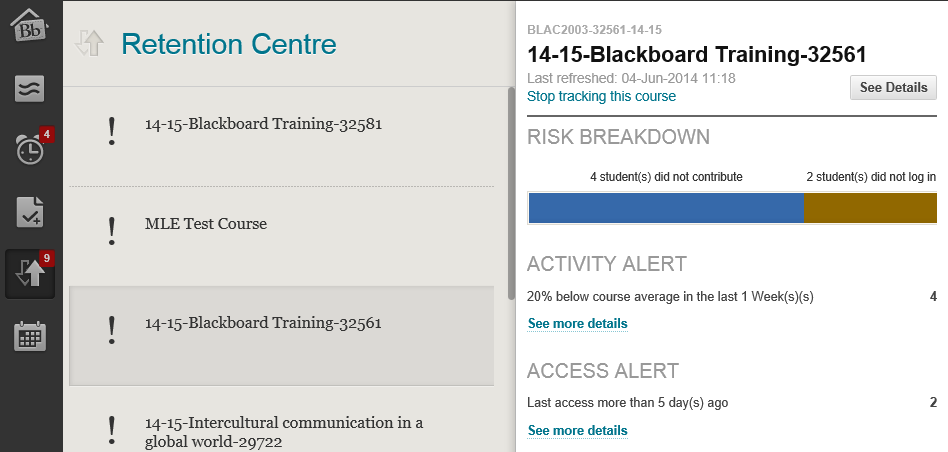
Viewing the Retention Centre Summary within the Global Navigation you can identify which risk rules are being met and by how many students for each course.
Click on See more details to find out more about each rule.
Click on Stop tracking this course if you no longer wish to be alerted about a certain course.
Understanding the Retention Centre landing page
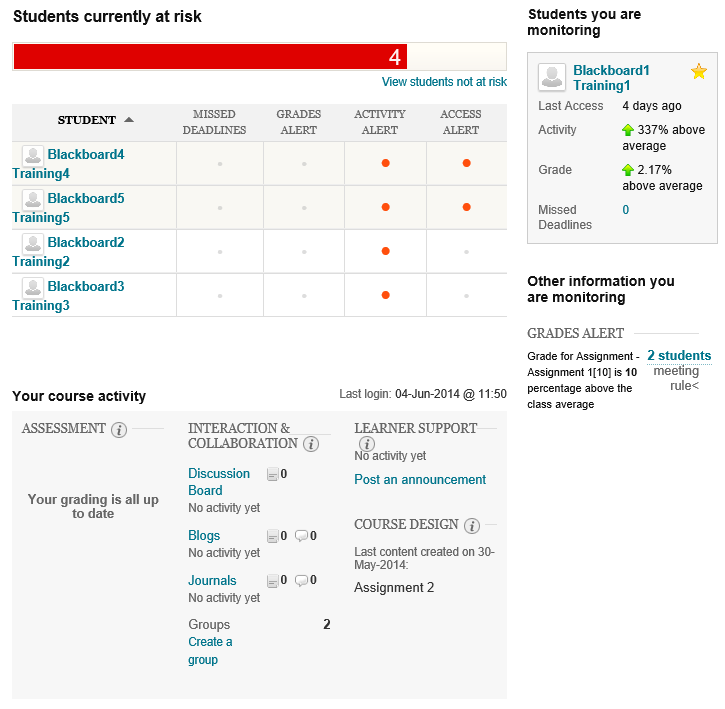
We see the full retention centre screen which focuses on the “Risk Table”.
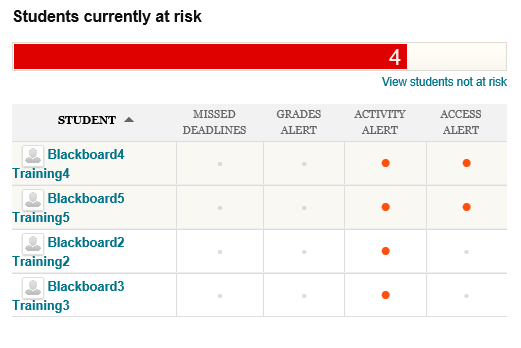
The risk table shows which students are meeting which risk rules. You can view the opposite by clicking on View Students not at risk.
The risk table has four columns for the four types of rules that are possible to set within the retention centre these are:
Missed Deadlines: The default rule is to show students who have missed 1 or more deadlines by more than 0 days. Deadlines are set using Due Dates and only apply to Blackboard features that allow you to set Due Dates. This does not include TurnItIn Assignments.
Grade Alert: The default rule is to show students who have an External Grade column (usually the running total) within the Grade Centre that is 25% below the average for the class.
Activity Alert: The default rule is to show any students who have access the course at a rate 20% below the average of all students on the course in the past week. The data for the course activity rule is recorded once a day.
Access Alert: The default rule is to show any students who have not accessed this course at all in the past five days.
All of these rules can be adjusted and new rules created. This is discussed in the related guide “How to customise the Retention Centre”.
Student focus
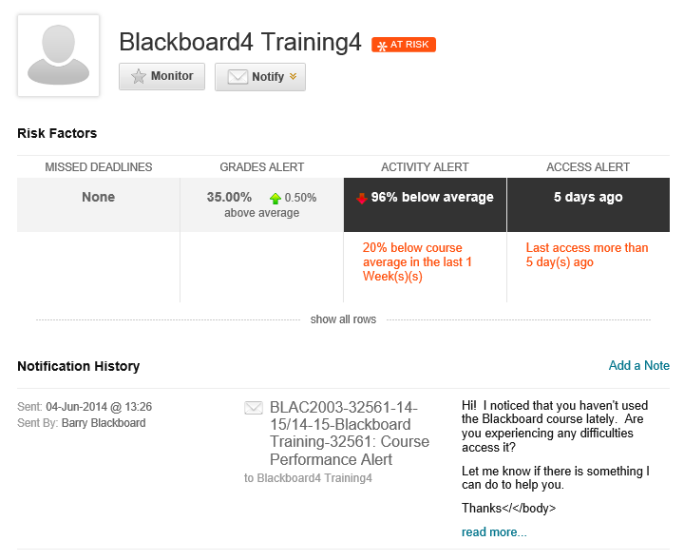
Clicking on the name of a student shows more detail about their alerts.
You can choose to monitor a student specifically by clicking on Monitor. Their details will then be shown on the main Retention Centre dashboard under the heading “students you are monitoring”.
You may choose to send an email to the student by clicking on Notify. A log of notifications you have sent to the student using this screen will appear below.
You can add your own private notes by clicking on Add a Note.
Students you are monitoring
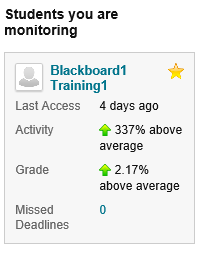
Looking again at the main Retention Centre dashboard the section Students you are monitoring will show any students you have chosen to monitor, as shown on the previous slide where you click on the Monitor button to monitor a particular student.
Other information
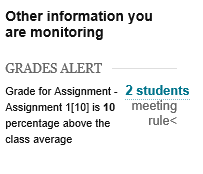
The “Other information you are monitoring” heading shows any rules that you have created but chosen not to have included in the “Risk Table”. Creating such rules is covered in the related guide “How to customise the Retention Centre”.
Your activity
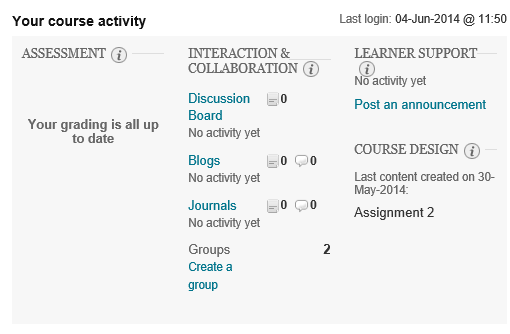
The final part of the main retention centre screen summarises your own activity. In the vendor’s words it, “provides a one-stop collection of your activity, engagement, and participation in your course. This data helps you become more aware of how your behaviours are (or are not) contributing to student success.”
This information is only shown to the instructor themselves and is not available in this format to other staff.
Information shown:
Your last login.
Whether there are any assessments to mark.
Your interactions with any discussion boards, blogs, and journals.
Recent announcements.
Recently added content.
Creating and Editing Retention Centre Rules
The retention centre in Blackboard contains a number of preset rules. This guide shows how to adjust those rules and set up new ones.
1. To enter the Retention Centre access the Blackboard course concerned and expand the Evaluation part of the Control Panel and choose Retention Centre.
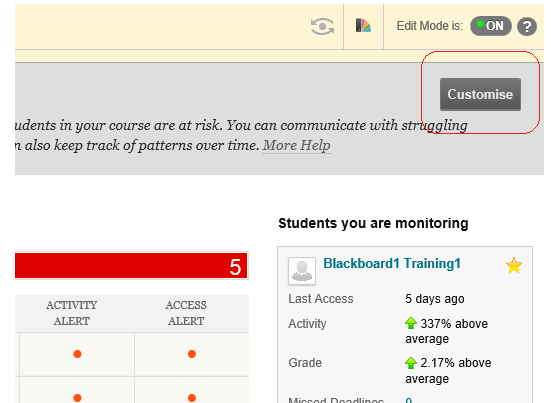
2. Click on the Customise button. This appears at the top right of the Retention Centre screen.
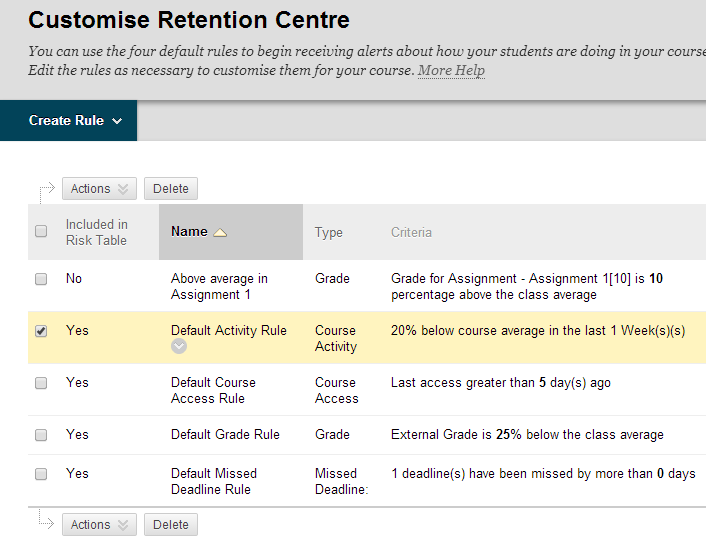
3. The Customise Retention Centre screen is shown. Here follows a break down of the interface.
Create Rule
Click on this button to create a new rule.
The rest of the interface details all existing rules:
Included in Risk Table
Yes: this rule is included in the risk table shown on the main Retention Centre screen. In this screen there will always be four columns, one for each of the rule types, i.e Grade, Course Activity, Course Access, and Missed Deadline. If there is than one rule for one of the above types included in the risk table then student who matches any of those rules will have an entry under that column.
No: this rule will not be part of the risk table and instead will appear within the Other information you are monitoring section.
Name
The Name of the rule. When you hover your mouse pointer over the name an action button appears. Clicking on this action button will bring up a menu allowing you to edit the existing rule.
Type
The type of rule. There are four rule types available: Grade, Course Activity, Course Access, and Missed Deadline
Criteria
Information about the criteria used to determine whether a student is affected by the rule or not.
Actions: Here you may choose quickly to exclude or include a rule from the rule table by ticking the box beside the rule concerned then clicking on the Action button.
Delete: This will completely remove the rule. Even if all rules of a certain type are deleted e.g. Grade, Course Activity, Course Access, and Missed Deadline, all four columns will continue to be shown in the Risk Table on the main Retention Centre screen.
Editing a rule
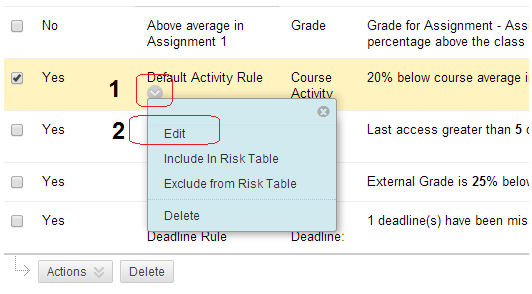
4. Next we will look at editing an existing rule. To edit an existing rule hover your mouse over the rule name and click on the Action button. Then click on Edit from the menu that appears.
Example
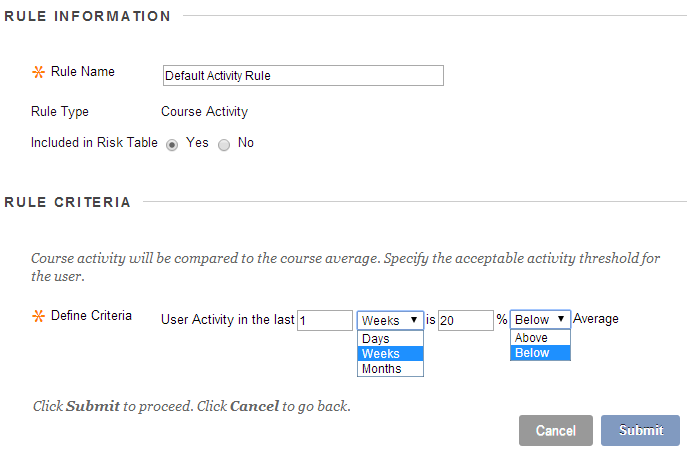
5. Each rule type will have a slightly different set of option but the above screen shot shows how simple it is to use this feature.
Creating a new rule
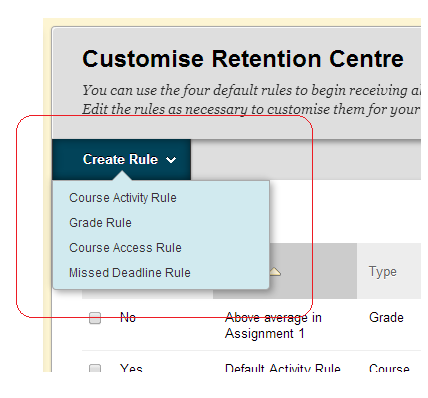
6. Next we look at creating a new rule. To create a new rule hover your mouse over the Create Rule button on the Customise Retention Centre screen and choose which type of rule you wish to create. The next set of slides cover how to create each rule type.
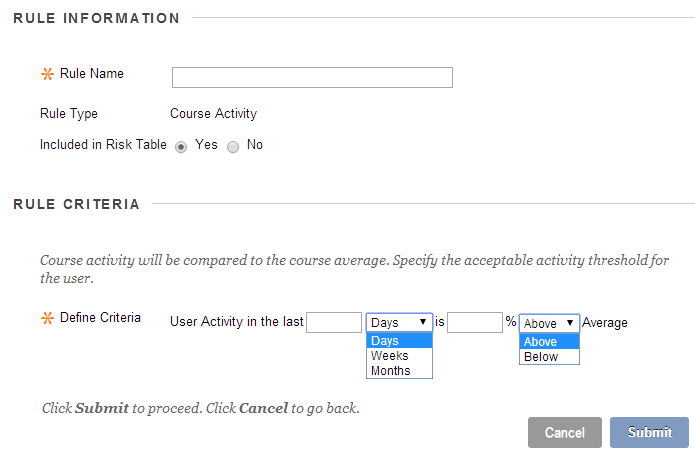
7. Course activity alerts are based on students’ overall activity within your course. Students who are below a defined level of activity trigger the alert.
Blackboard measures the time a student works in a course using the data generated from his “clicks.” A student is assumed to be working with a course from the time he clicks on something in the course until the time he clicks something outside the course or logs out. If a login session is timed out, Blackboard only counts the time until the last click within the course. The time is not counted between the last click within the course and the timeout.
No weighting of clicks is assigned to any areas.
Adaptive rules are not taken into account.
8. Set the criteria according to your preference.
Grade Alerts
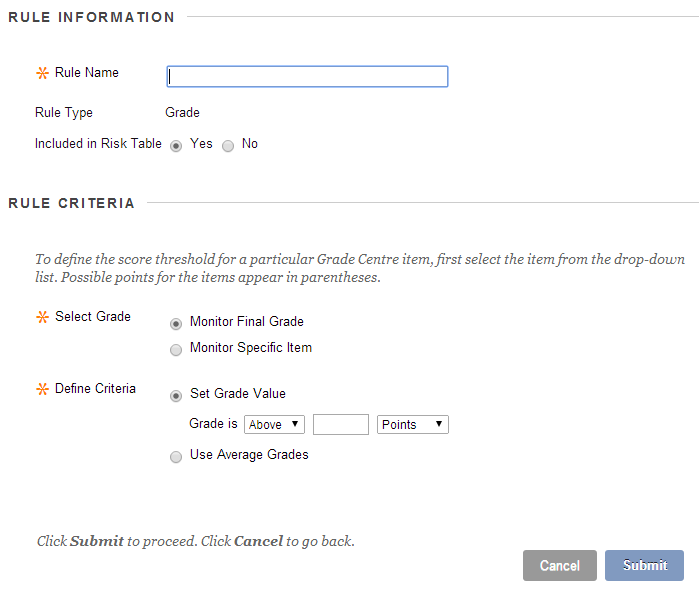
9. Grade Alerts are based on a defined score for any grade or calculated column in the Grade Centre. Students who score above or below the defined threshold for a specific grade item trigger an alert.
10. Determine when a grade triggers an alert:
Set Grade Value:
Use the drop-down lists to select above or below -AND- points or percentage. Type a value in the field.
Use Average Grades:
Type the percentage in the field and select above or below the average grade from the drop-down list.
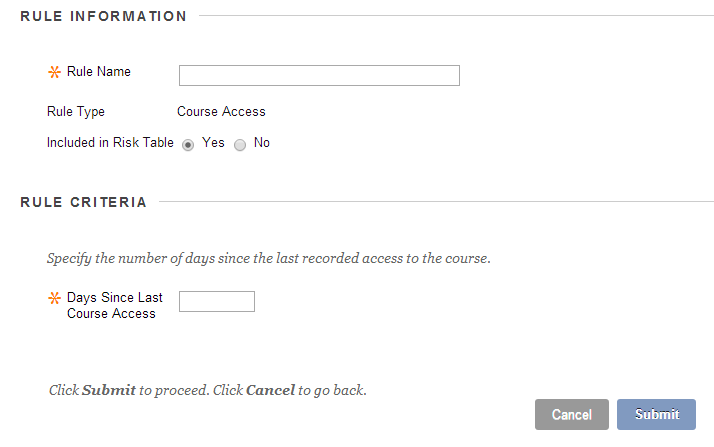
11. Course access rules can be used to set up alerts based on the date users last accessed your course. Students who have not logged in for a defined number of days trigger an alert.
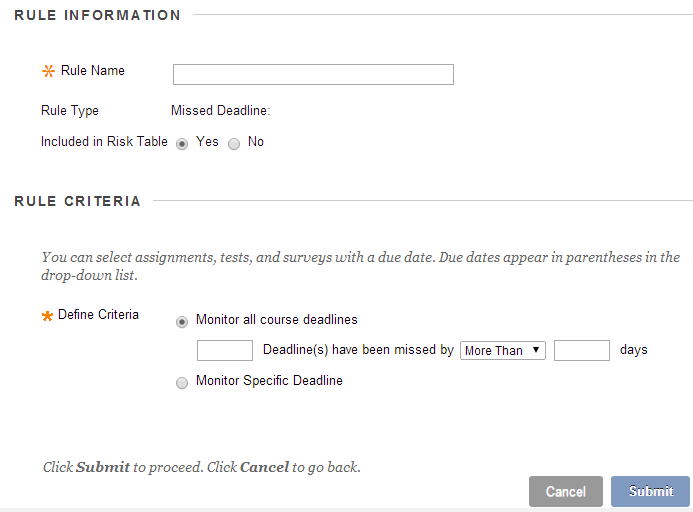
12. Missed Deadline Alerts are based on a defined due date for an assignment, test, or survey. Students who do not complete an assignment, test, or survey by the due date trigger an alert based on the option you choose:
Monitor all course deadlines: Determine how many deadlines must be missed and by how many days before an alert is triggered. From the drop-down list, select More Than or Less Than the number of days you chose.
Monitor Specific Deadline: Make a selection in the Select Course Item drop-down list. The due date for each item appears in parentheses. Then, select More Than or Less Than from the drop-down list and type the number of days to trigger an alert.
If you enter zero (0) for how many days, you are asking to be alerted if an item was not submitted before or on the deadline. No lateness is acceptable.
You can create missed deadline rules for Grade Center columns you create manually, but if you do not mark properly submitted items by the due date, a “false” alert is triggered. For manually created columns, students can submit items by the due date, but you must also grade them by the due date.

13. Remember that if you choose to include rules in the risk table then they will be covered within the risk table shown on the main Retention Centre screen. In this screen there will always be four columns, one for each of the rule types, i.e Grade, Course Activity, Course Access, and Missed Deadline. If there is than one rule for one of the above types included in the risk table then student who matches any of those rules will have an entry under that column.
If the rule is not included in the risk table then it will appear within the Other information you are monitoring section.