
Estimated Reading time: eight minutes.
Staff guide: this page explains what module accessibility statements are. It shows you how to complete and publish the statement for your module. The linked pages explain each question, how to answer it, and what students will see.
About module accessibility statements
A module accessibility statement gives students clear, positive information. It tells them how you have made your Blackboard module accessible and inclusive. By completing it, you show students that the module teaching team takes inclusive practice seriously. Students can then plan their learning with confidence.
Sharing this information removes barriers for students. This includes disabled students, students with long-term health conditions or mental health conditions, students with specific learning differences, and students who identify as neurodivergent.
You answer six questions about your module. The system turns your answers into a statement. Students can read the statement in the Module Information folder in Blackboard.
What students will see:
Every student on your module can open the statement. What they see depends on your answers and whether you have published them.
- Students always see general information, including key definitions, Blackboard accessibility features, and links to support services such as the Student Disability and Inclusion Team.
- Students see your answers only after you publish them.
- When you answer Yes to a question, students see a short, student-friendly explanation of what that practice means for them.
- When you answer No, students see nothing for that question.
- Students see the text you write in Other Steps word for word.
A future release will also show students accessibility data about the content in your module.
Before you start
- The statement system is available only for Blackboard Ultra modules in the pilot.
- Anyone with instructor access to the module can open, edit and publish the statement.
- The statement speaks to students as the module lead, so the module lead should complete it where possible.
Open the statement system
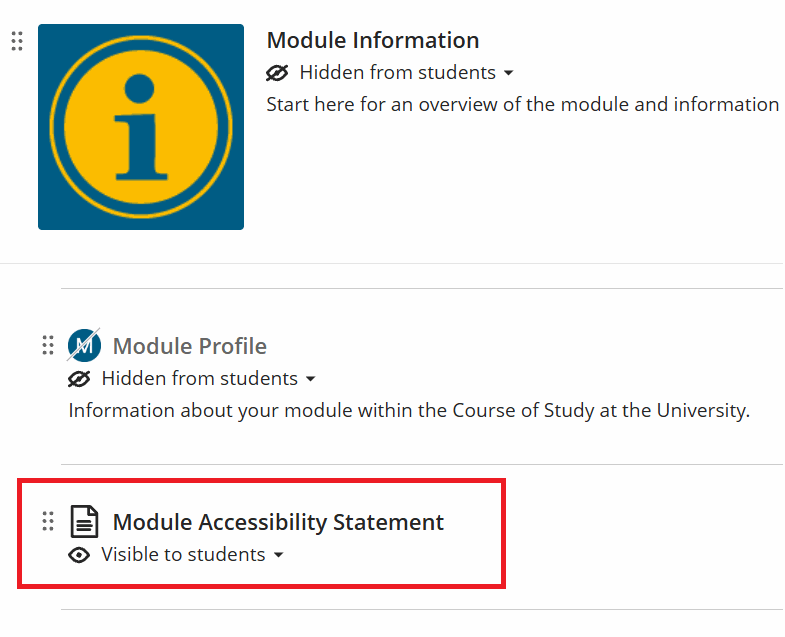
- Open your module in Blackboard
- Course Content page, open the Module Information folder.
- Select Module Accessibility Statement.
The statement system opens in the same browser tab. Staff see the staff view. You can edit and preview the statement here. Students who select the same link see only the student view.
Understanding the landing page
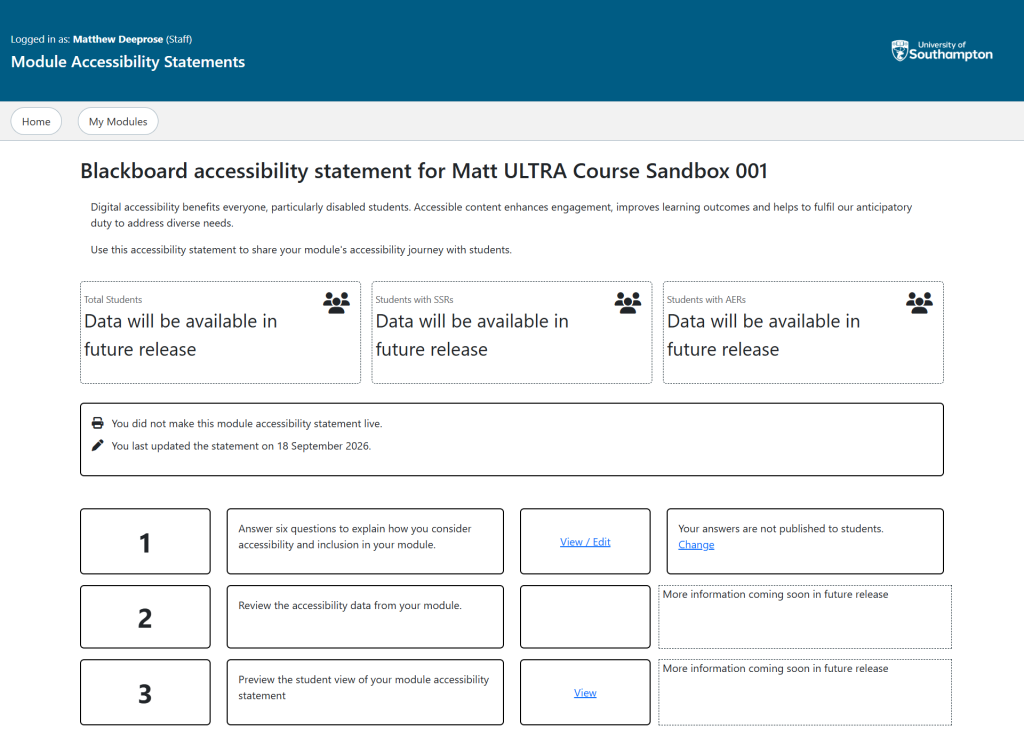
The landing page is the home page for your module’s statement. Its heading reads “Blackboard accessibility statement for” followed by your module code.
From top to bottom, the page shows:
- A short introduction to module accessibility statements.
- Three summary boxes for Total Students, Students with SSRs, and Students with AERs which show “Data will be available in future release” for now.
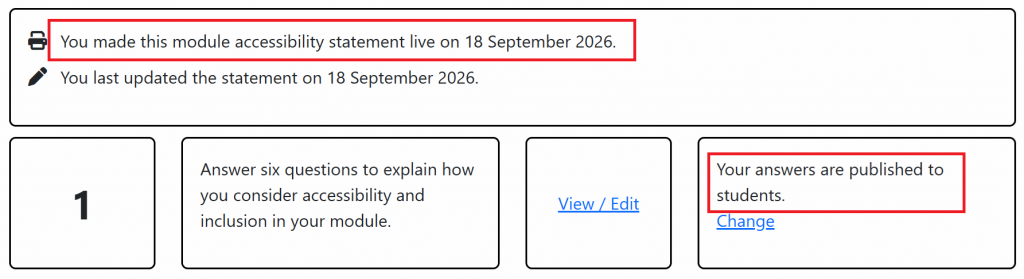
- A status box that tells you when you made the statement live and when you last updated it.
- Three rows that set out the steps to create your statement.
In this guide, SSRs means Student Support Recommendations and AERs means Additional Exam Recommendations.
The three rows work as follows.
| Row | What it’s for | Link | Status |
|---|---|---|---|
| Answer six questions to explain how you consider accessibility and inclusion in your module. | Answer, change and publish your answers | View / Edit | Tells you whether your answers are published to students. The Change link opens the REVIEW tab. |
| Review the accessibility data from your module. | Accessibility data for your module content. This arrives in a future release. | None yet | More information coming soon in future release |
| Preview the student view of your module accessibility statement. | See the statement as students see it. | View | More information coming soon in future release |
When you have published your answers, the first row shows, “Your answers are published to students.”
When you have not yet published your answers, the first row shows, “You did not make this module accessibility statement live.”
Answer the six questions
Open the questions
- In the row that begins “Answer six questions”, select View / Edit.

The questions page shows your module code, the module lead’s name, and a row of tabs. The tabs are:
- OVERVIEW, which introduces the statement.
- Six question tabs, one for each statement.
- REVIEW, where you check and publish your answers.
Above the tabs, a progress line shows you which tab you’re on. It also shows how many tabs you have completed. Each tab shows a symbol and a matching status for screen reader users: a circle for not started, a triangle for the current tab, and a tick for completed. The OVERVIEW tab changes to completed once you move past it.
During the pilot, the project team sets the module lead’s name. If the name is wrong, raise a ticket with ServiceLine.
Match each tab to its guide
The tab labels differ from the guide titles. Use this table to find the right guide for each tab.
| Tab | What the question covers | Detail guide |
|---|---|---|
| Support student accessibility | How the teaching team reviews and acts on Student Support Recommendations. | Statement 1: Student support recommendations |
| An inclusive experience | Whether the team checks new and updated content for accessibility. | Statement 2: Creating accessible content |
| Content signposting | Whether content explains its purpose and files have meaningful names. | Statement 3: Content signposting |
| Assessment clarity | Whether each assessment has clear weighting, instructions, rubrics and feedback dates. | Statement 4: Assessment clarity |
| Online reading lists | Whether the module has an online reading list with labelled items. | Statement 5: Online reading lists |
| Other Steps | Any other steps you have taken or plan to take, in your own words. | Statement 6: Additional accessibility and inclusion steps |
Answer a question
You can answer the questions in any order, and you do not have to finish in one session.
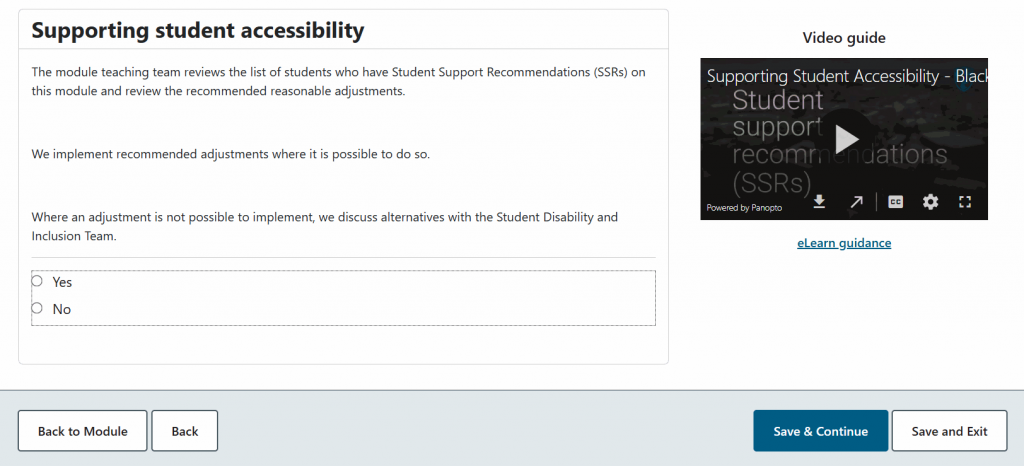
- Select a question tab.
- Read the statement.
- To learn more, watch the video guide or select eLearn guidance. The eLearn guidance opens in a new browser tab.
- Choose Yes or No.
- Select Save & Continue to save your answer and move to the next tab, or select Save and Exit to save your answer and return to the landing page.
Answer Yes only when the statement describes what your module teaching team does. No is a valid answer, and students see nothing for that question.

Write about other steps
The Other Steps tab gives you a text box instead of Yes and No. Use it to tell students about anything else you have done, or plan to do, to make your module accessible and inclusive. Students see your text exactly as you write it. The box has no word limit, but short, specific text works best for students.
Review and publish your answers
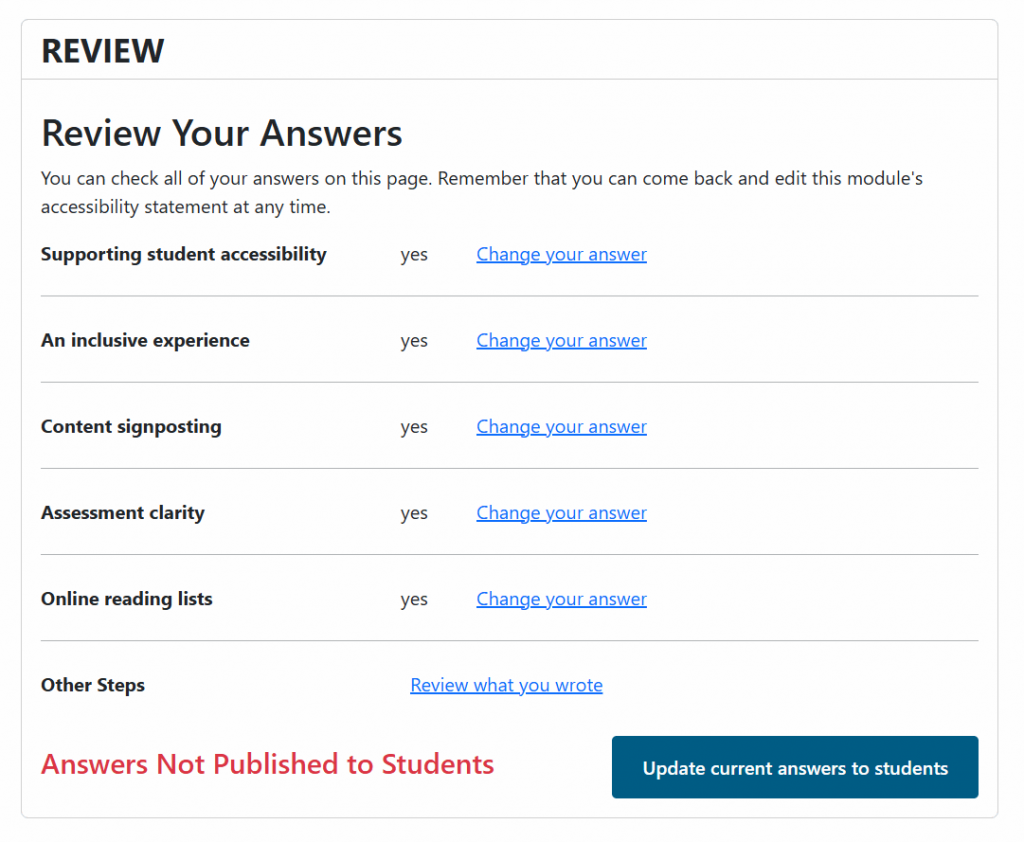
- Select the REVIEW tab.
- Check the answer shown for each question.
- To change an answer, select Change your answer next to it.
- To check your Other Steps text, select Review what you wrote.
- Select Update current answers to students.
You need to answer every yes / no question before you can publish. You can save and move on without answering. But the system will not let you publish until every question has an answer.
Check that your statement is published
You can confirm publication in three places.
- On the landing page, the status box says “You made this module accessibility statement live on” followed by the date.
- On the landing page, the first row says “Your answers are published to students.”
- On the REVIEW tab, the heading says Answers Published to Students.
Preview the student view
- On the landing page, in the row that begins “Preview the student view”, select View. Alternatively, on the REVIEW tab, select Preview module accessibility statement.
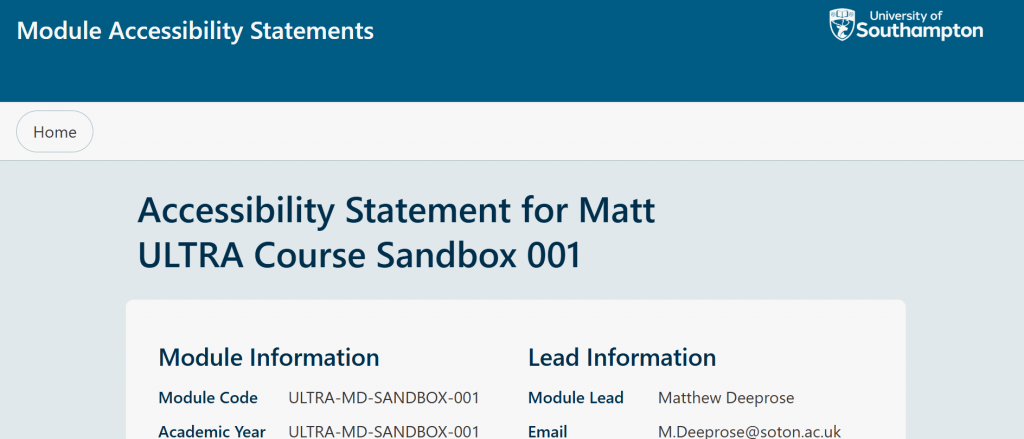
The preview opens in the same browser tab. It shows your published answers only. Answers you have saved but not published do not appear. To return to the staff view, select the Home.
Change or hide your published answers
You can come back and edit your statement at any time. To go straight to your answers, select Change in the first row of the landing page. This opens the REVIEW tab.
To hide your answers from students:
- Select the REVIEW tab.
- Select Hide my answers from students.
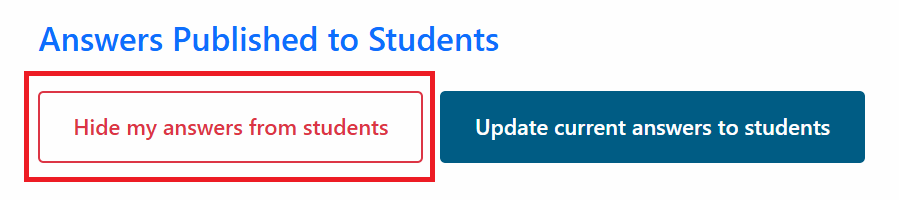
Students still see the general information and support links, but not your answers.
Common questions
Do I need to answer every question with Yes?
No. Answer Yes only when the statement describes what your module teaching team does. Students do not see questions you answer No.
What if no students on my module have SSRs?
Complete all six questions anyway. Accessible content benefits every student, whether or not they have Student Support Recommendations.
Will students see if I answer No?
No. Students only see your Yes answers and your Other Steps text. This keeps the focus on positive, helpful information.
Can I change my answers after I publish them?
Yes. You can edit your answers at any time. Changes you save to published answers appear to students straight away.
Who can edit the statement?
Anyone with instructor access to the module can edit and publish it. You do not need any other permissions. Because the statement speaks as the module lead, the module lead should complete it or agree any changes.
Where is my module’s accessibility data?
Accessibility data arrives in a future release. Until then, the landing page shows a placeholder row where the data will appear.
Why is this important?
Accessibility statements help students make informed decisions and feel supported. They also support the University’s commitments to inclusion and to meeting accessibility standards.
Get help
- Email ServiceLine at serviceline@soton.ac.uk.
- Raise a ticket on the University IT help website. This link takes you outside eLearn.
- If you would like support with improving the accessibility of your course please raise a ticket with a Learning Technologist who will be able to help.