These instructions are specifically for users of the Mac Panopto Recorder.
Pre-requisites: Installing Panopto
To use Panopto please make sure you have it installed first. To install Panopto on your macOS computer, go to our help guide on installing Panopto.
Creating a recording
Start by selecting the large ‘Create new recording button’ in the top left of the recorder.

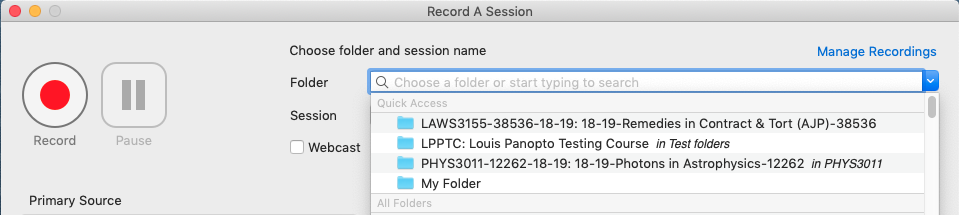
Next it is important to choose the Blackboard course that you want to record into, or your personal ‘My Folder’.
Note: It can be quicker to start typing in the module code name to find the folder.
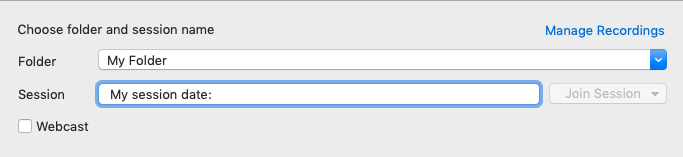
Give your session a name if you wish to do so.
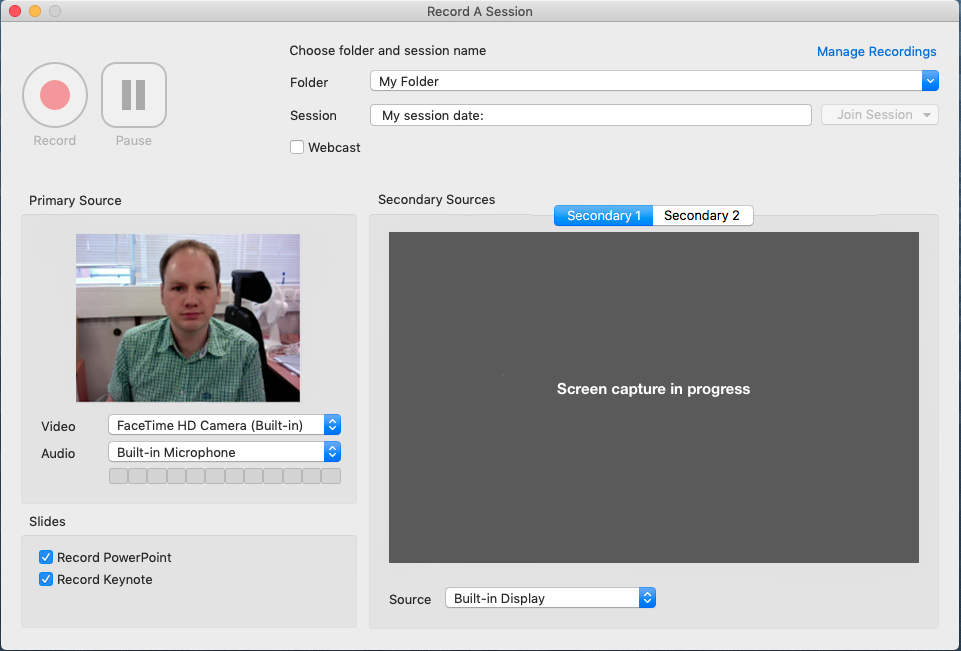
Under ‘Primary Source’ select the audio to be either the ‘Built-in Microphone’ or an external microphone if it is connected. At this point quickly check that you can see the audio meter show green bars that is working. You may or may not wish to have ‘Video’ enabled, but it is not essential to make a recording so it can be switched or left as ‘None’.
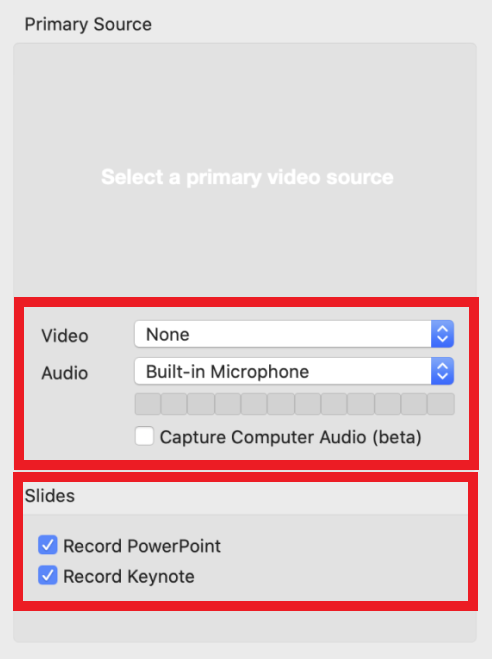
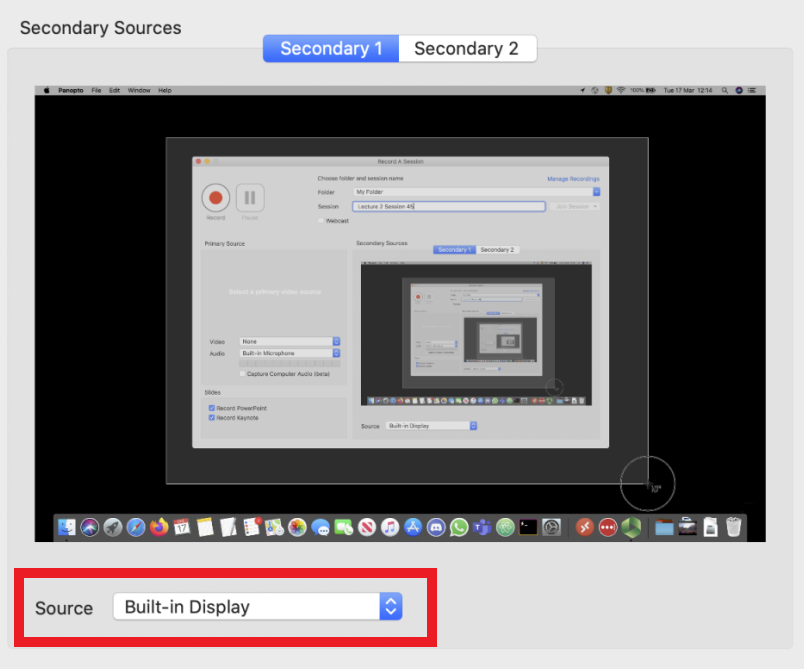
Screen capture is a bit different to the PC recorder as it is done as a secondary source. Under ‘Secondary Sources’ select ‘Secondary 1’ and on its source drop down menu select ‘Built-in Display’. This will be your main computer screen.
Once all checks have been made select the ‘Record’ button when you are ready to begin.
Once you have completed your session select the ‘Stop’ button. Your recording will start uploading automatically after stopping.
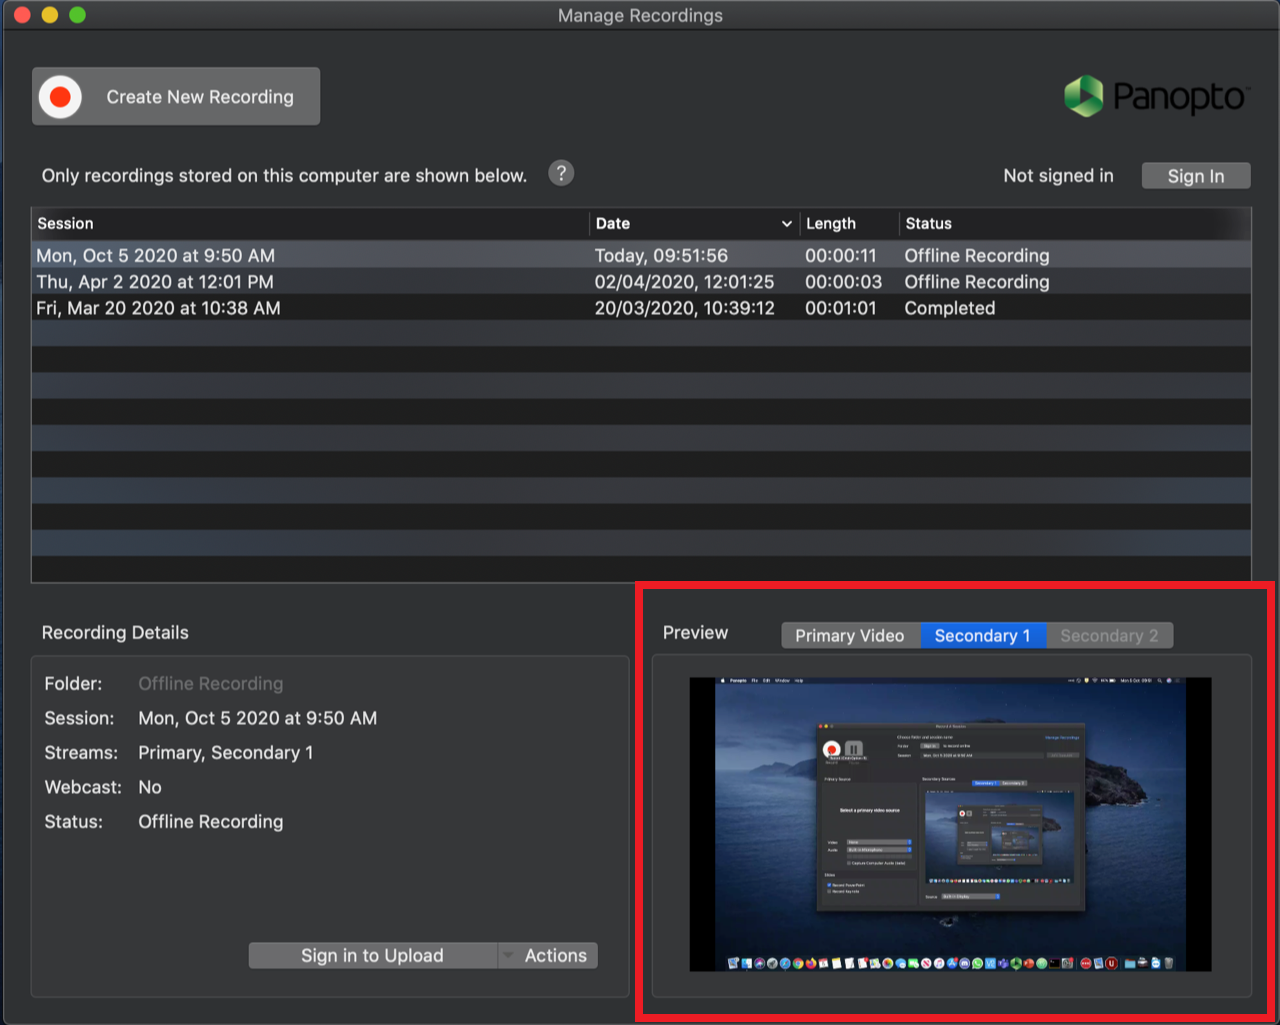
Important information about Preview