
Staff guide: How to locate timetable information and import this as a group in Blackboard.
Locate the timetable information
- Visit the timetable webpages and locate a session from your personal timetable, or look up a module using the By Module tab.
- Select the session and select More Information.
- You should now see a list of all the students registered to this session.
- Select Copy Student Email Addresses.
Create a list of usernames from the student email addresses
If you have a large list of students to import into the group, you may want to follow this guide to refine the list you have just copied:
- Open Excel and paste the student email addresses into A1. This may paste as one long list.
- Select cell A1.
- Select the Data tab.
- Select Text to Columns.
- Select Delimited and then next.
- Select Semicolon as the delimiter.
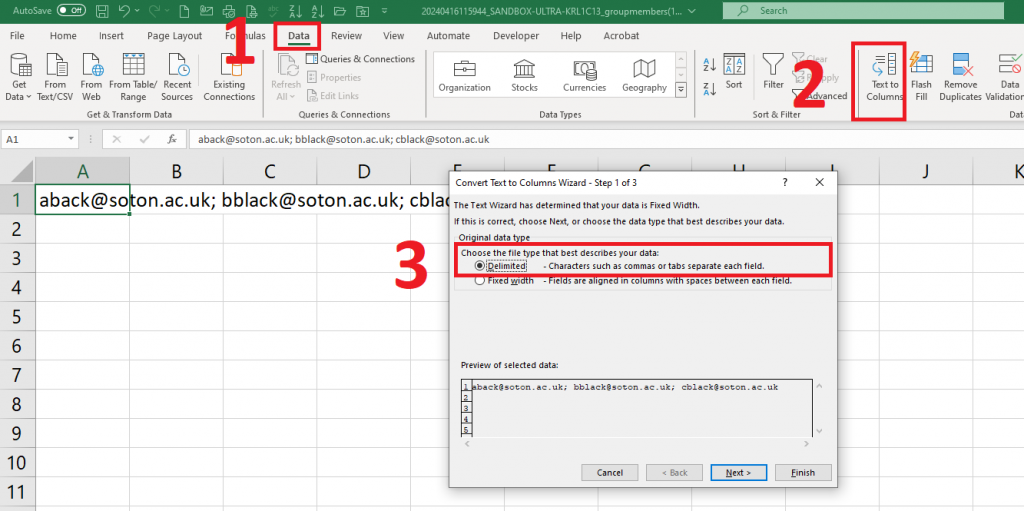
- Select next until you can finish.
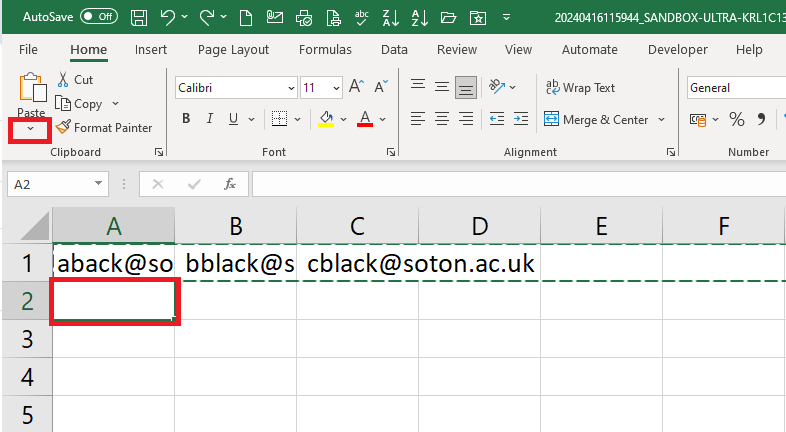
- Highlight row 1 and copy.
- Select Cell A2.
- Select the Home tab and then Paste Special (using the little down arrow below the Paste button).
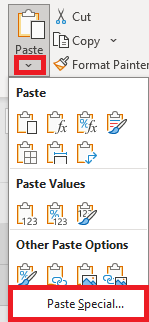
- Select Transpose.
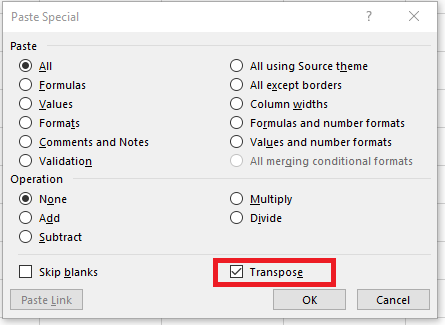
- Now you can delete the duplicate data in Row 1.
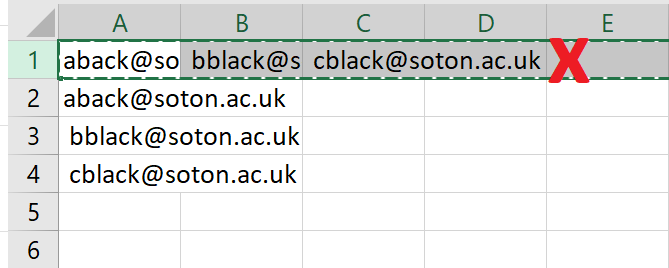
- You can now remove the “soton.ac.uk” to refine the list to usernames.
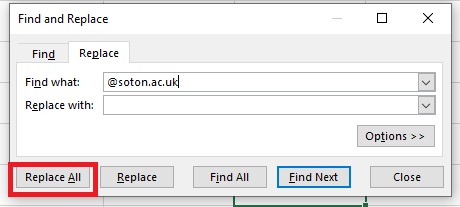
- Select CTRL+F to bring up the Find and replace menu.
- Select Replace.
- In Find What:@soton.ac.uk.
- Leave Replace with blank.
- Select Replace All.
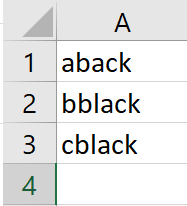
- You now have a list of usernames you can paste into your Group Members import file. Save this for later.
Create and import the Group Set file
Create the template groups you would like to add the students to.
- Go to the relevant Blackboard course site.
- Select Groups.
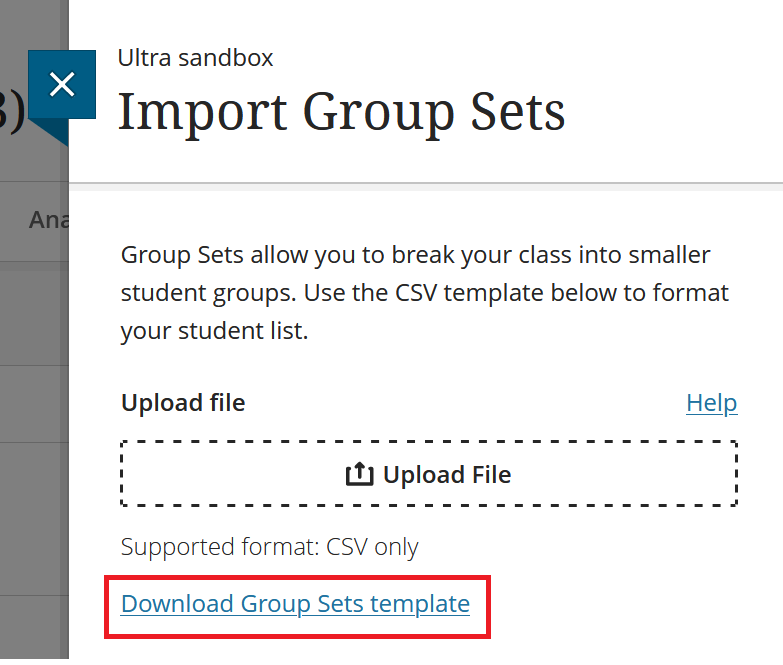
- Select Import Group Sets.
- Select Download Group Sets template.
- Open the file in Excel. Change the Title to your individual group names. Add and remove rows to add and remove groups.
- Change the Group Sets for all Groups to something like Seminars.
- When adding new groups, ensure they have a unique Group Code (column A) but the same Group Set (column D) as the other groups.
- Set Self Enroll to N to change this to No.
- Save the file.

- Return to Blackboard (If you have closed the page return to Course > Groups > Import Group Set).
- Upload the file and select Import.
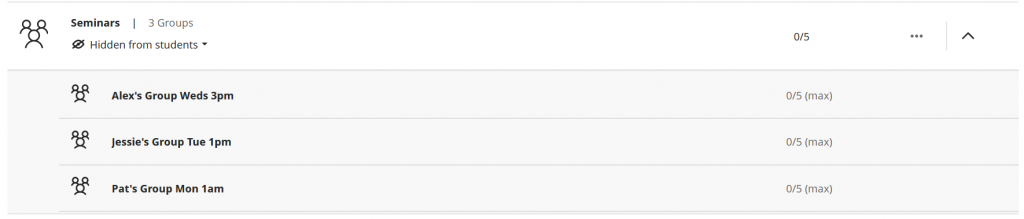
- You may need to wait a few moments and then refresh the page. You should see something like the image below:
Create and import the Group Members file
- Select the group name or three dots to edit the group.
- Select Import Groups or Members from the icons towards top right.

- Select Assign members.
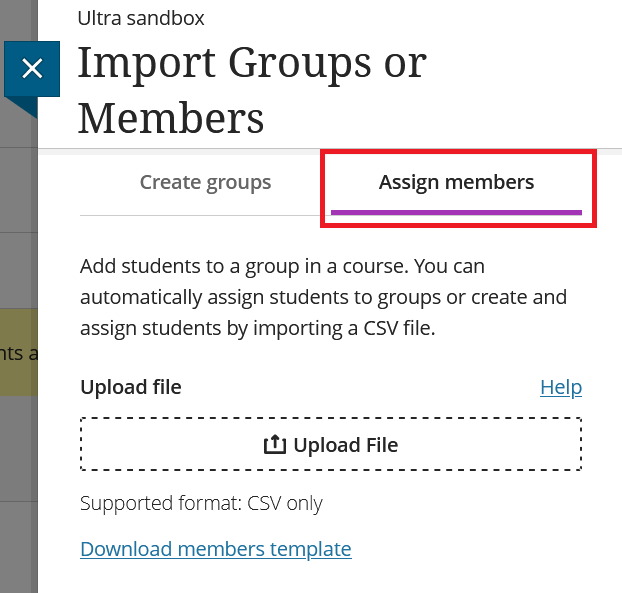
- Select Download members template.
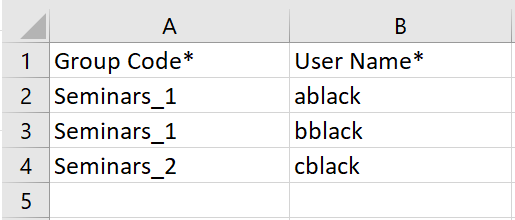
- Open the file in Excel. You can delete columns C, D, E and F.
- You will need to Group Code information from the Group Set import file. Add this to column A.
- Paste username details into column B.
- Save the file.
- Return to Blackboard (If you have closed the page return to Course > Groups > Import Group Set)
- Upload the file and select Import.
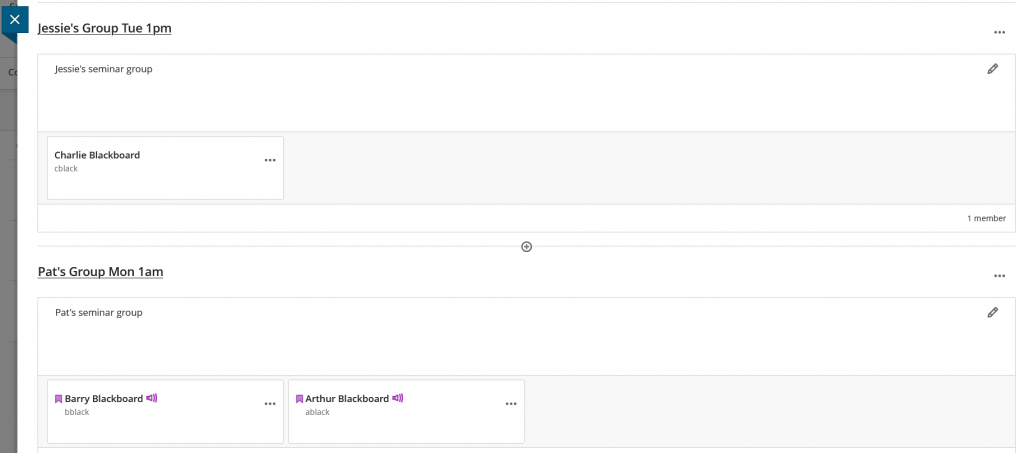
- You may need to wait a few moments and then refresh the page. You should see something like the image below:
Troubleshooting
I made my group set rather than importing it. How do I find out the group godes so that I can import members?
You can try exporting your group members to use this as a template file. You may need to add at least one student to each group for the export file to generate.