You may use Blackboard’s assignment feature to add an assignment item to any content area. Using this item you may provide details of the assignment including its name, instructions, point value, and any required files. Students may upload their submissions when viewing the assignment. Submissions are linked with the Blackboard Grade Centre and may be downloaded en masse. It is also possible to setup a Group Assignment.
Note that we recommend students uploading an assignment from home may find that their internet connection is not fast enough to upload a particularly large file (over 30MB) before the upload process times out. Therefore we recommend that if students wish to submit a file of over 30MB in size that they do so from a public workstation on campus or via SVE.
Create the Assignment
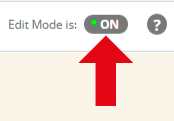
1. Check that Edit Mode is turned ON. This can be switched by clicking ON or OFF.
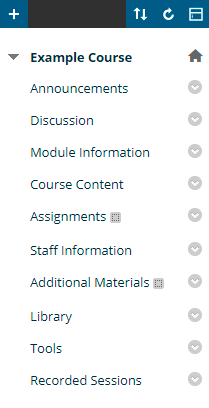
2. Choose the Content Area into which you wish to add your assignment. All the content areas work in the same way, if you have renamed or added content areas to your Blackboard course the screenshot above may vary from what you see.
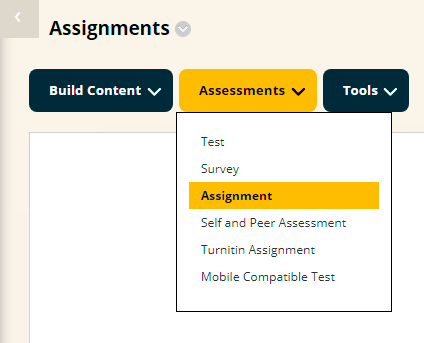
3. Hover your mouse pointer over Assessment and then click on Assignment.
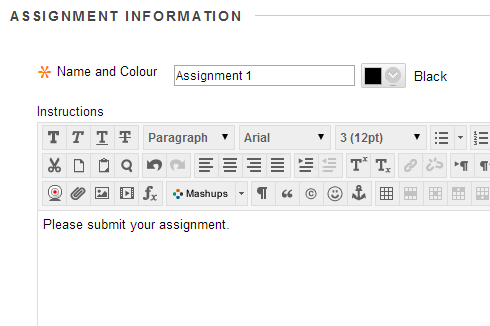
4. In section 1 you are required to type in a Name for your assignment. Please do not use special characters such as # ” ‘ / ! £ $ % ^ & * ( ) – = _ + [ ] { } ; : @ # ~ , . / < > ? | `¬ ¦ for the name. If you do this you will not be able to download student responses in batch.
You may also choose the colour in which you wish the name of the assignment to be displayed. Remember that the background colour will always be white.
The final part you may add is any extra Instructions such as how or when students are expected to submit their work.
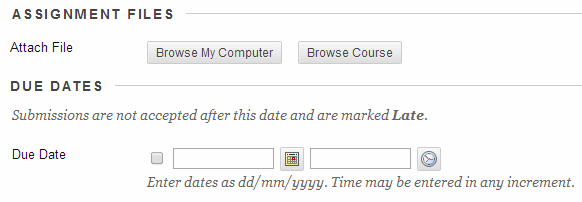
5. If you wish to attach a file for students to view you may do so by clicking on Browse My Computer. Do not attach a file that has an apostrophe in the file name.
6. If you wish to set a due date for the assignment tick Due Date and set the date and time of the due date.
Individual or Group Submission
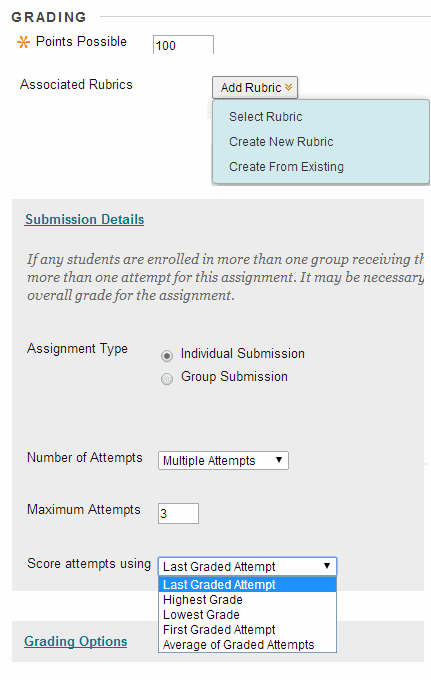
7. Enter the maximum number of points possible to achieve with this assignment. This forms part of the detail for the Grade Centre entry for the assignment. If marks are recorded as percentages, set the points possible to 100.
8. Expand the Submission Details section. Set the submission details according to your preference:
Individual Submission
An assignment where students each submit an assignment.
Associated Rubrics
Assign a rubric if you wish.
Group submission
An assignment where each group submits one collaborative assignment and all members of that group receive the same score. To use group assignments you should already have created groups within your Blackboard course and assigned members to each group. For more information see the following section “Group Submission”.
Number of attempts
How many attempts students may make, options available are single attempt, multiple attempts, and unlimited attempts. It can be useful to allow more than one attempt so that if a student finds their assignment upload fails they can submit again. If a single attempt is allowed and a student upload fails the instructor will need to clear that student’s attempt before the student may upload again.
Maximum Attempts
If multiple attempts have been enabled then the number of possible attempts can be set here.
Score attempts using
If multiple or unlimited attempts have been allowed then this option allows the instructor to determine which graded attempt’s score appears in the Grade Centre. Usually the Last Graded Attempt is selected.
Group Submission
Group Submission
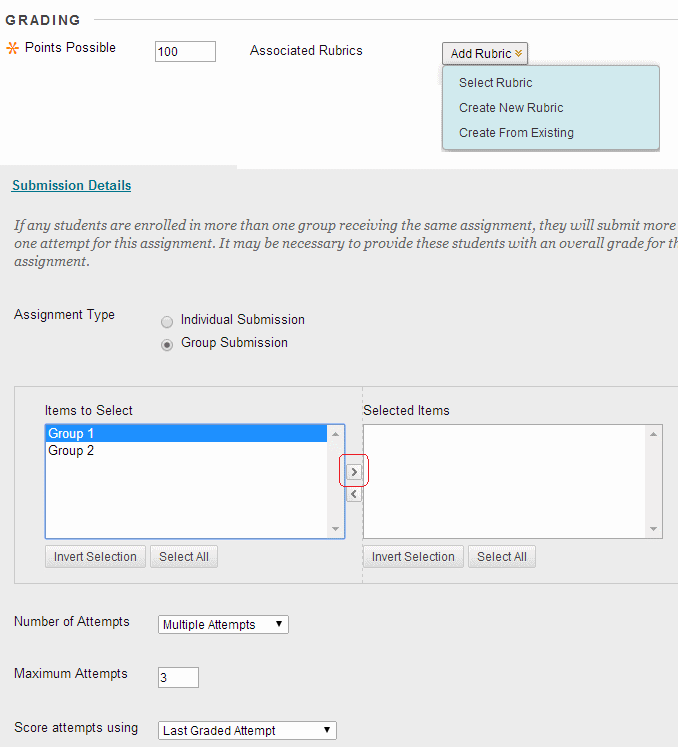
An assignment where each group submits one collaborative assignment and all members of that group receive the same score. To use group assignments you should already have created groups within your Blackboard course and assigned members to each group. One group member will submit on behalf of the group.
When this option is set you can choose which group/s should complete this assignment. Select the group/s and click on the right hand arrow icon to move into the group into the Selected Items area. You may hold down the Control key to select multiple groups at once.
The other options are described above.
Grading Options
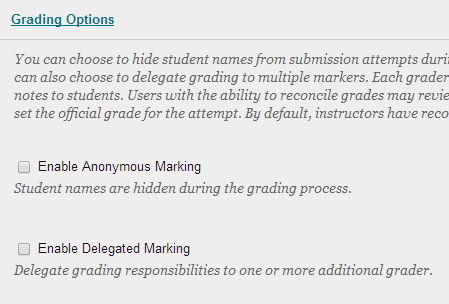
9. Set the Grading Options according to your preference. These are described in simple terms below and in more detailed terms below.
Enable Anonymous Marking
Set to No. If you set anonymous marking you will run into huge problems when it comes to releasing marks. Also this pairs extremely badly with multiple submissions. Please do not get this wrong.
Enable Delegated Marking
Delegated marking allows you to delegate marking of submissions to colleagues on your course. Delegated markers provide provisional grades which the course instructors may then review and determine a final grade or reconcile it. Do not use Delegated Marking if only one person will be marking. Instead hide the scores from students until they have been reviewed. Then reveal the scores to students when you are ready to do so.
| We do not recommend that you use Delegated Marking. We have received numerous tickets where Delegated Marking has been set incorrectly which have taken a large amount of time to resolve. Examples are where an instructor has set all possible markers to have to mark every single assignment before marks can be released. Therefore we do not recommend using Delegated Marking. |
Delegated marking
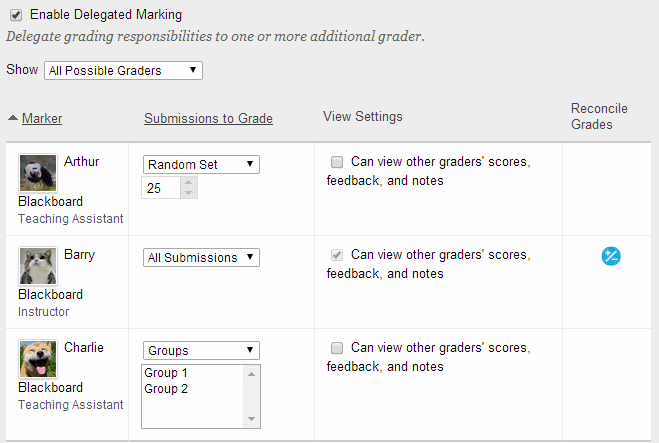
If you choose to enable Delegated Marking you are shown a list of possible markers.
| We do not recommend that you use Delegated Marking. We have received numerous tickets where Delegated Marking has been set incorrectly which have taken a large amount of time to resolve. Examples are where an instructor has set all possible markers to have to mark every single assignment before marks can be released. Therefore we do not recommend using Delegated Marking. |
Under Submissions to Grade you may set whether each marker should mark:
All submissions: the marker should mark each submission. Random set: the marker should mark a random allocation of submissions. The number can be set. If multiple markers are assigned to mark a random set then students will be distributed evenly before any student would be included in multiple random sets.
Groups: the marker should mark only the submissions of students belonging to a certain group. The group may be selected below.
Under View Settings you may set whether the other markers can view each other’s scores, feedback, and notes from their marking. Staff with an instructor role on the Blackboard course may always view these.
The Reconcile Grades column shows who in the list can reconcile the marks. All instructors may do this.
Display of Grades
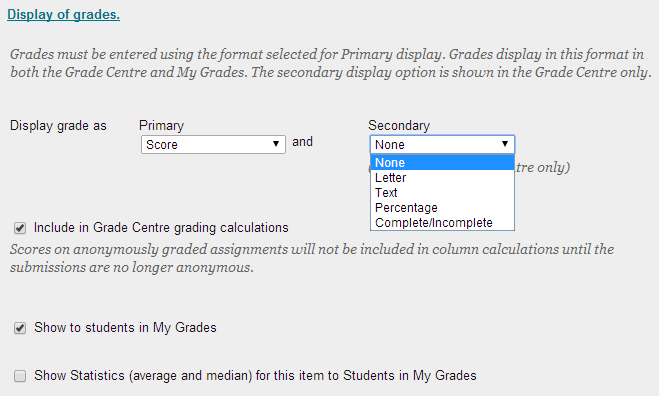
10. Expand the Display of grades and set the following options according to your preference.
Display Grade As
Set how the score should be shown to students, and if you wish set a secondary display of the score which is shown to you in the Grade Centre.
Include in Grade Centre grading calculations
If you do not tick this box then the score will not affect the running total shown to students, nor will it affect any other calculated grade columns that you have made in the Grade Centre.
Show to students in My Grades
Whether the score should be visible to students in the My Grades section.
Show Statistics
Whether statistics (average and median) for this assignment should be shown to students or not.
Availability
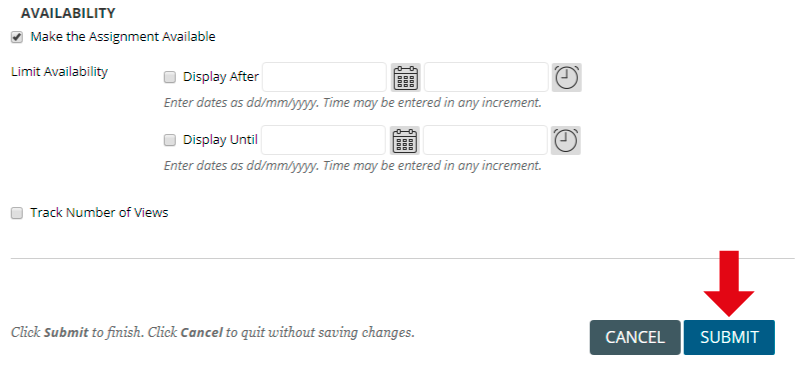
11. If you wish for students to be able to submit to this assignment ensure that Make the Assignment Available is ticked.
12. If you wish for the assignment link to be shown or hidden at certain times set the display after and display until boxes accordingly.
13. If you wish for the number of times the submission link is visible to students while they browse your course tick Track Number of Views.
14. Click on Submit to finish.
