
Staff Guide: What’s the difference between an Original and Ultra module – quick tour of Ultra.
Identifying module type on the Course Menu
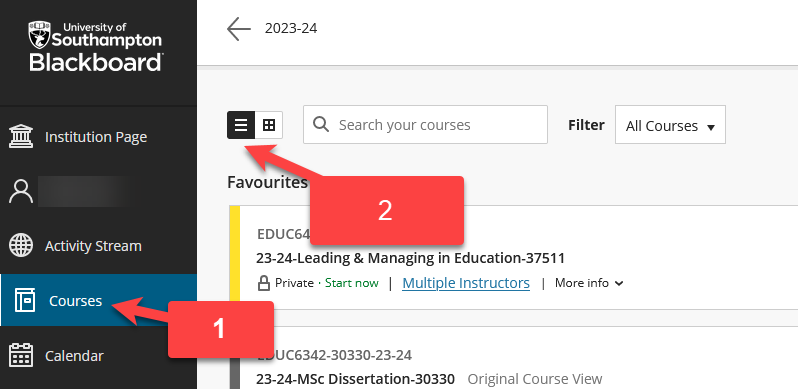
You can see if your module is an Original or Ultra module from the Course Menu by selecting Courses and viewing modules in a list.
1. Select Courses.
2. Choose the three horizontal lines (next to “Search your courses”) and this will arrange your modules in a list.
In a list view, you will notice that some modules have a coloured bar on the left of the module box and others are grey.
- Original courses have a grey bar.
- Ultra courses have a colour bar.
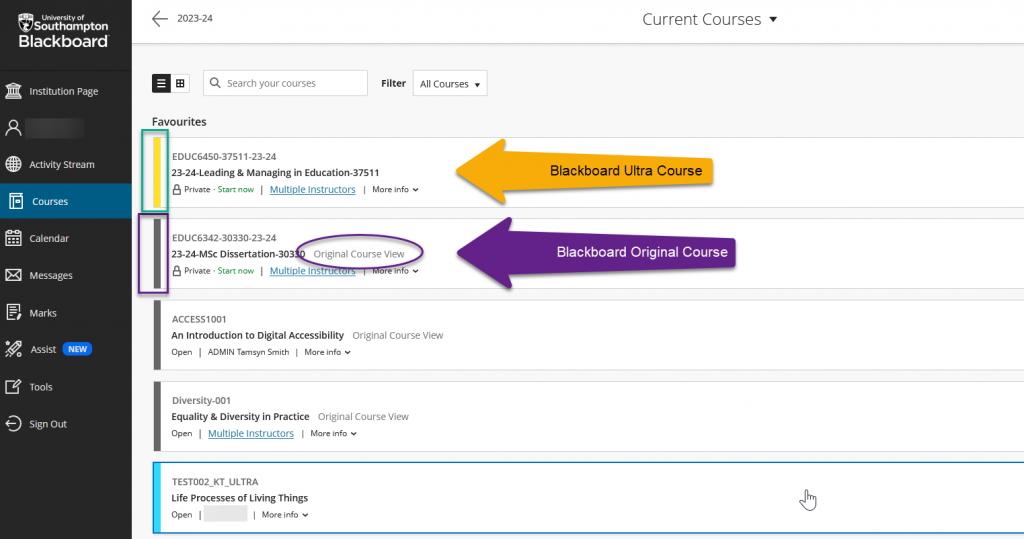
Blackboard Original modules have a grey bar to the left and also state “Original Course View” next to the module name.
The Difference between Original and Ultra Module Layouts
When you have selected a module, the layout of Original and Blackboard are very different.
The easiest way to differentiate the module is to look at the landing page when the module is opened.
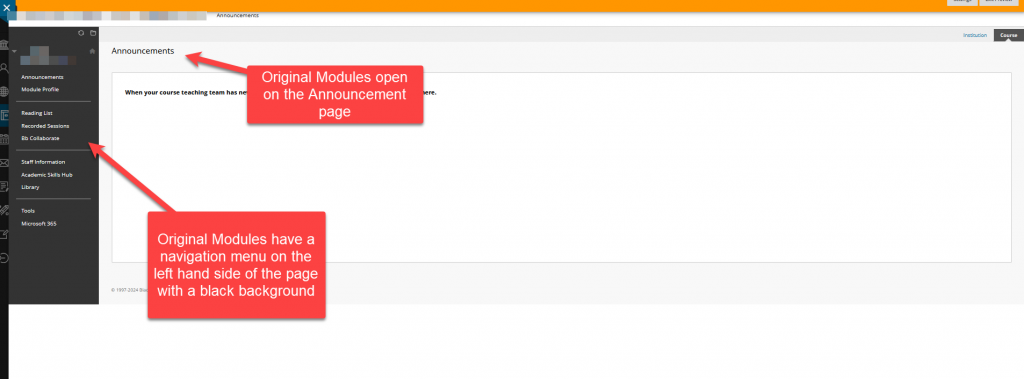
Original Module
Original modules have a layout with a left-hand navigation menu and usually open on the announcement page. See image (student view):
Ultra Module
Ultra modules open to the Course Content page and display the Navigation Bar at the top of the page with a right-hand Details & Actions menu. See image (staff view):
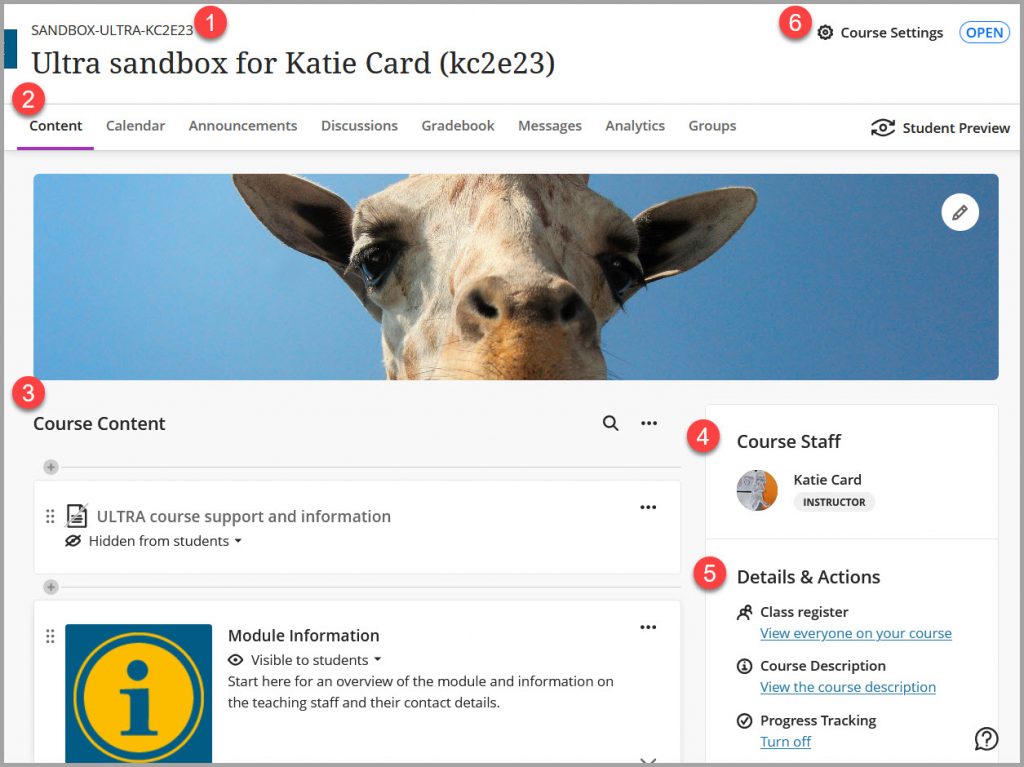
1. Course ID
At the top of an Ultra course, the unique Course ID is shown. This is useful for identifying specific courses on Blackboard especially where courses the first part of the ID but have different CRNs because they are taught at different times in a year or at different locations (e.g. Southampton and Malaysia). Always quote the Course ID when you raise a Serviceline ticket.
2. Navigation Bar
At the top of the page, you will be able to open frequently used tools in one step. Select the Content (home page), Calendar, Announcements, Discussions, Gradebook and Messages, Analytics or Groups to easily access those areas of the Course. This menu is uneditable and is the same for students but without the Analytics tab.
3. Course Content
Teaching content, resources, links and assessments can be added to the Course Content. Ultra courses are created with the Ultra template to create a more consistent design for students that aligns with Blackboard Universal Standards (BUS). This includes learning modules for Module Information, Resources and Support Materials, and Assessments.
4. Instructors
An instructor list appears on Ultra courses showing anyone enrolled with the Instructor course role. Instructors appear in alphabetical order but an instructor with Primary Instructor ticked (usually the module lead) in member information with appear at the top of the list. Staff can be added and roles can be edited by instructors by seeing this eLearn guide about manually enrolling staff.
5. Details and Actions
In this area, you can view course information and tools with these options:
- Class Register: shows all staff and students enrolled on the Course. Class Register is hidden from students by default.
- Progress Tracking: If turned on, allows instructors to see student engagement in course content items. This can help review course content for effectiveness and value.
- Course image: Allows you to update the Course Banner.
- Books and Tools: Displays education tools available such as Reading list, photo roster and Panopto.
6. Course Settings
Alongside Course Settings, you can see whether a course is Open or Closed to Students. Select Course Settings to make your Course available to students.