
Staff Guide: How to create and edit Ultra Documents which are like a webpage for teaching content.
Top Tips
- Don’t forget to make content available for students once finalised.
- Check accessibility of content using the Ally Tool.
- Consider building an Ultra Document rather than uploading multiple files.
- Preview Ultra Documents on smaller screen as many students access content on mobile devices.
Why use an Ultra Document?
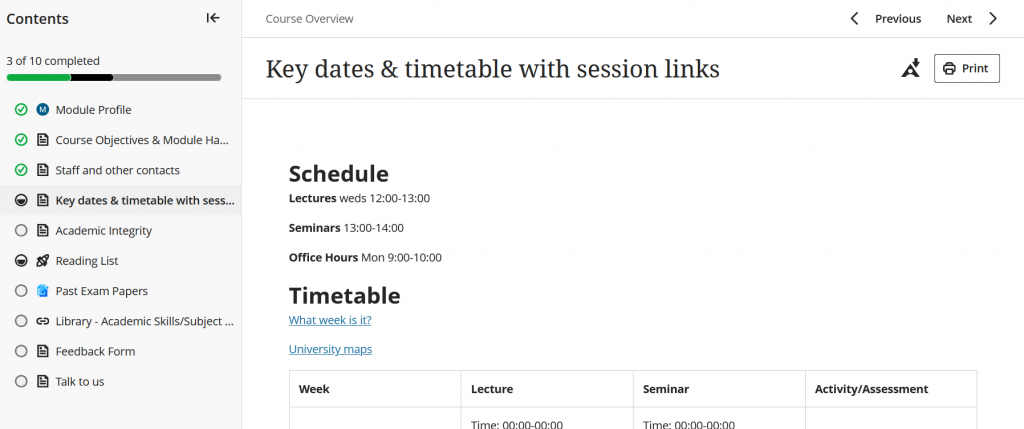
Blackboard Ultra Documents are a fantastic way to present mixed media in one place for your students. Think of them like a webpage for module content built into Blackboard Ultra. An Ultra Document can include text, images, embedded PowerPoint slides and other MS documents, embedded Panopto and other media and more.
User friendly content can be created to clearly introduce information, outline expectations, add images and video to engage students and include relevant resources for a specific week and task too.
Creating a new Document
Wherever you want to create content, select the plus (+) icon and choose Create and then Document from the Create Item menu.
Documents open as a panel across the page and are called ‘New Document [DATE]’ by default.
- Select the document heading to edit it. Use a clear naming convention to allow staff and students to easily search for content.
- You can then add content by choosing from a variety of blocks types.
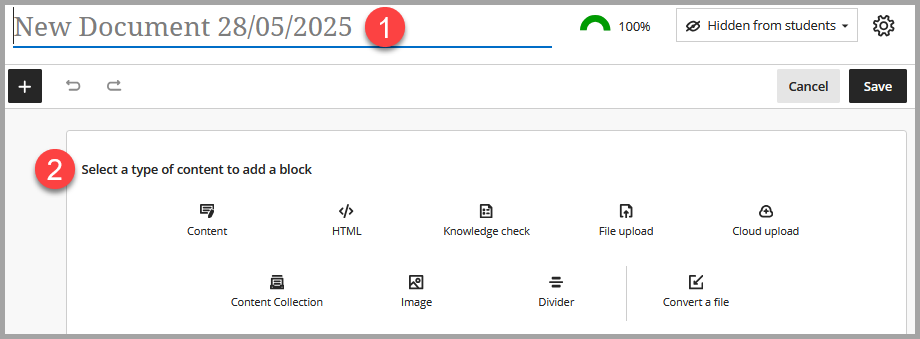
Types of Content Blocks
You can create Ultra Documents by choosing from a variety of block types. Here are some details about the most useful blocks available.
Content Editor (add text, images and access Content Market tools)
Add content via the content editor. Here you can type free text or copy and paste from a formatted document. The content editor also allows you to format text as well as embed images, attach files and insert equations. This is also where you can add Content Market items like Panopto videos via the plus icon.

HTML
Add content via HTML or CSS in the document. Opens a blank box to enter or copy and paste your HTML text.
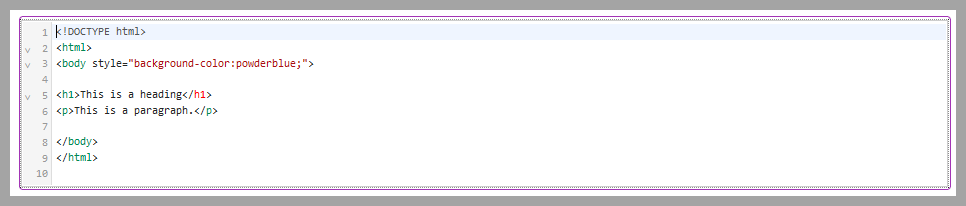
Note: It is important to check accessibility of HTML content when created and if there are any problems, please raise a serviceline ticket for Education Application Support.
Knowledge Check
This is a simple way to test students comprehension of document content by asking a multiple choice or multiple answer question. They are a great addition to an Ultra document as students get immediate feedback on their answer and can have unlimited attempts.
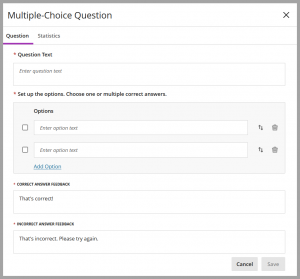
Note: whilst you can see how many students have engaged with a knowledge check, this information and student scores are not recorded in the Gradebook and individual students are not identified.
Coming soon: AI Generated Knowledge Checks for your documents.
File upload
Upload files from your device to the document for students to access alongside other information. These files will appear with the original file name so ensure that the original file is named appropriately. You can also allow file options for students to view and download, view only or download only.
Finally, if needed, you can edit file settings by selecting More Options (…) then Edit File to rename the document as well as change download/view options.
If View file option is allowed, students can view the file in the document by selecting the dropdown arrow.
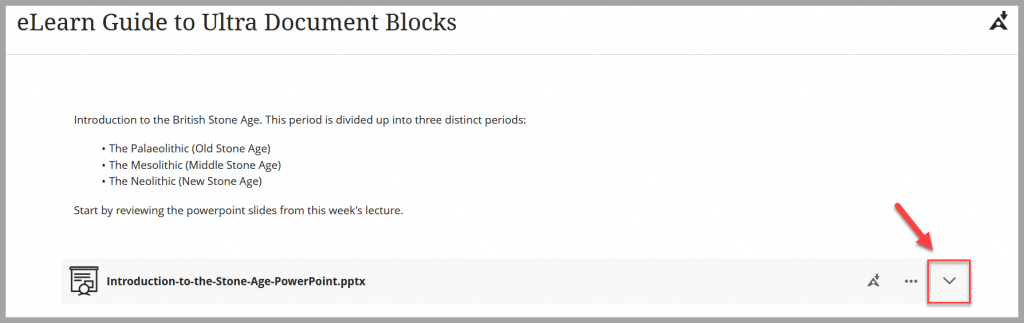
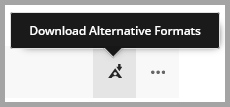
This expanded view can be opened or closed allowing viewer access to content without having to leave Blackboard or download the document. There is also an option allowing the viewer to download the document in current or an alternative format (A icon).
In the expanded view, students can scroll through the document to see all pages/slides in presenter mode from within Blackboard. Note that animations/transitions in a PowerPoint are not triggered, the view is more like a saved PDF view of the PowerPoint.
When should I upload documents?
Consider carefully which documents you upload, it may be better to copy and paste text from a word document into an Ultra document for better accessibilty and ease of reading rather than having to open another document.
A note on PDF files: PDFs are not always a good file type to upload due to their lack of accessibility. Please ensure that you are giving students the best chance of accessing resources by considering accessibility at all times through using Word documents and PowerPoint files over PDFs. If you need any help then see this guide on creating Accessible content.
Drag and Drop files
You can also drag and drop files from your computer into an Ultra document. These files will always be added to the end of a document but can be repositioned to the required location.
Image
Upload an image from your device and resize in one to four blocks. Allow students to view and download, view only or download only. Make sure you add a display name as well as alternative text for your image.
From July 2025, you are also able to add a caption above or below your image which can provide context for student engagement or image attribution. A caption is different to alternative text.
Divider
You can add a resizeable horizontal divider between blocks in an Ultra document. It can be resized across one to four block sections.
Convert a file
This allows a file to be uploaded which is then converted into an Ultra document. Supported files include PowerPoint, Word and PDF.
Editing Blocks
Once content has been added to the document, select Save. If you want to edit the content, select Edit content at the top right hand corner of the page then select the content you wish to change. Don’t forget to select save after each edit.
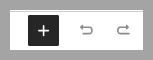
The menu bar (see below) remains visible in the top left hand corner of the page allowing you to add blocks (plus icon) and undo/redo actions.
New blocks added from this menu are automatically to the end of the document. Alternatively, you can select the plus icon between any two blocks to insert a new block in a specific location.
Resizing and moving blocks
Blocks can be used to create engaging layouts by resizing and dragging/dropping blocks into rows and columns.
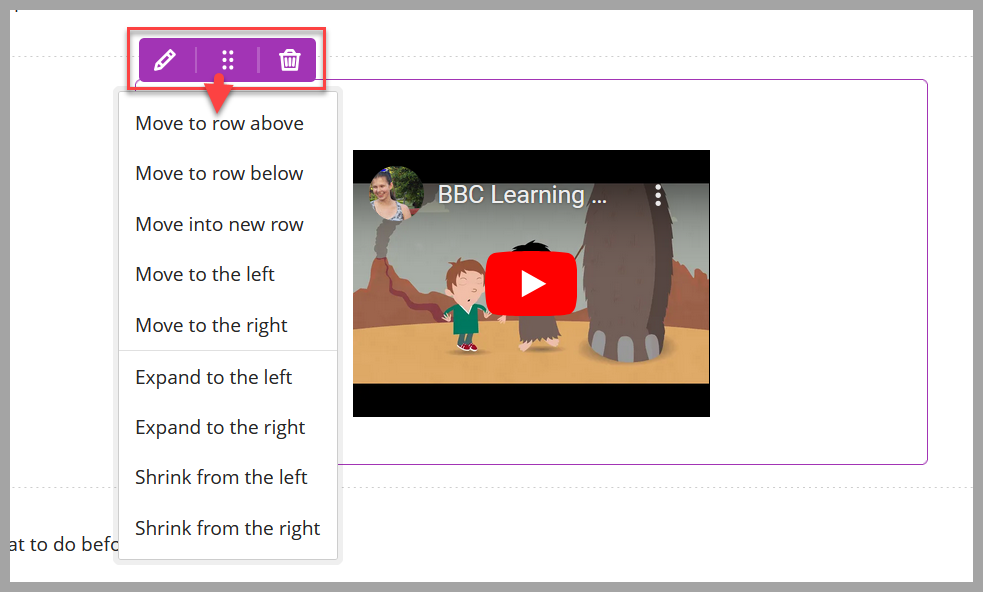
Each content block item has a menu which allows you to move rows and/or expand and shrink the item.
Select edit content and hover over a block to reveal the block edit menu.
Select the pen icon to edit the content.
Select the 6 dots to show options to move or resize the block.
Select the bin icon to delete the block.
By moving and resizing content, you can create engaging and varied content to combine text, images, files, videos and knowledge checks.
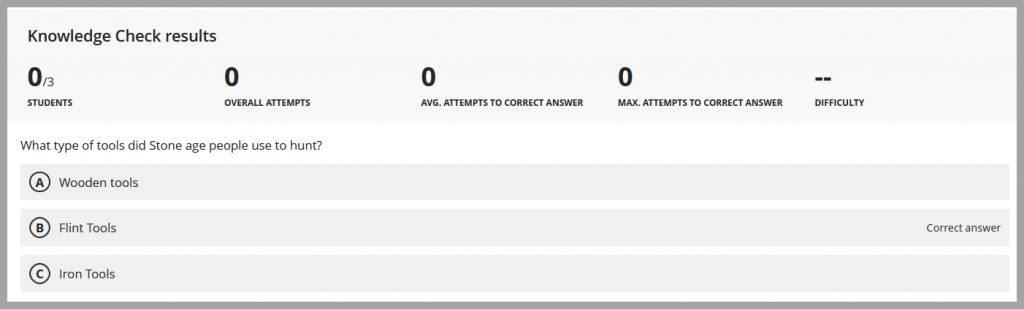
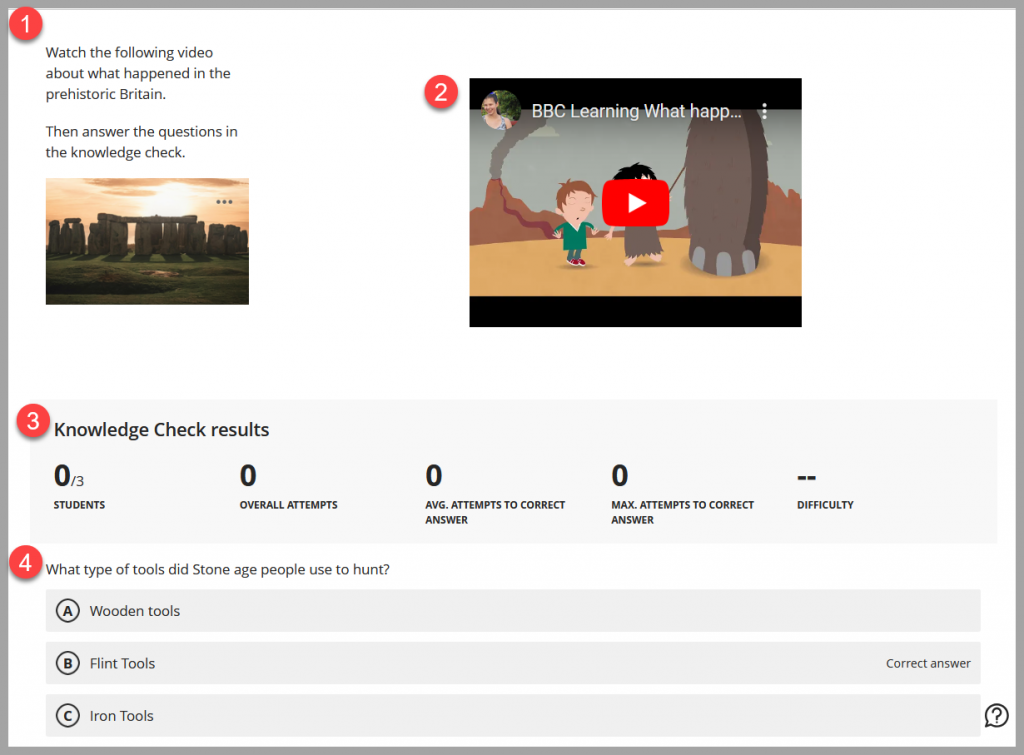
In the example below, the first section (1) is a content block with text and images, the second (2) is a content block with a Youtube video, the third section (3) (only visible to staff) shows Knowledge Check results and the fourth section (4) is a Knowledge Check block. Blocks 1 and 2 have been resized to fit on the same row as each other to instruct students to watch the video. Then a knowledge check block sits below this for students to answer after watching the video.
Block Styles
Add block styling to your Blackboard Ultra Documents. The styling options feature both colour and icons. The style options include:
- Question (blue border with a question mark icon)
- Tip (yellow border with a lightbulb icon)
- Key points (Purple border with a pin icon)
- Next steps (Green border with an arrow icon)
- Highlight (Light blue shading with darker blue border, no icon).
You can select styling options from a dropdown menu that appears in Edit mode on all block types.
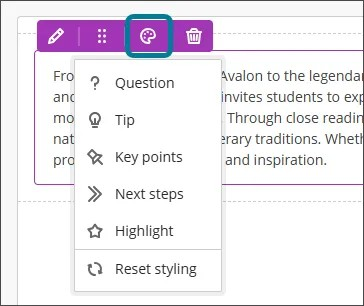
Each style will add a colour border and an icon to the block. Blocks can be resized as usual. Selecting “Reset styling” will remove the block styling but will not delete any of your block content.

Block styling is a way of adding visual appeal to your documents, but you should not rely on the block style to convey meaning. Add headings, context and signposting to your Documents to guide students through your Blackboard course.
Changing View of Ultra Documents with different devices
It’s important to check Ultra documents not only with Student Preview but also by resizing the screen as many students access Blackboard content on a variety of devices including small screens like a mobile phone. When the screensize is reduced, document blocks are organised vertically based on reading them left to right and top to bottom.
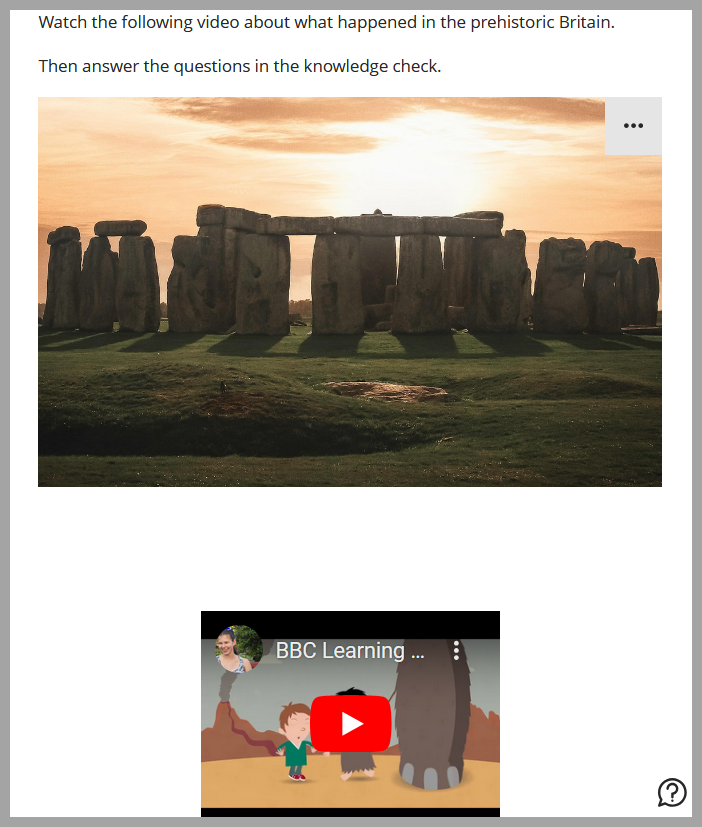
So content that was arranged from left to right like this text and video below:
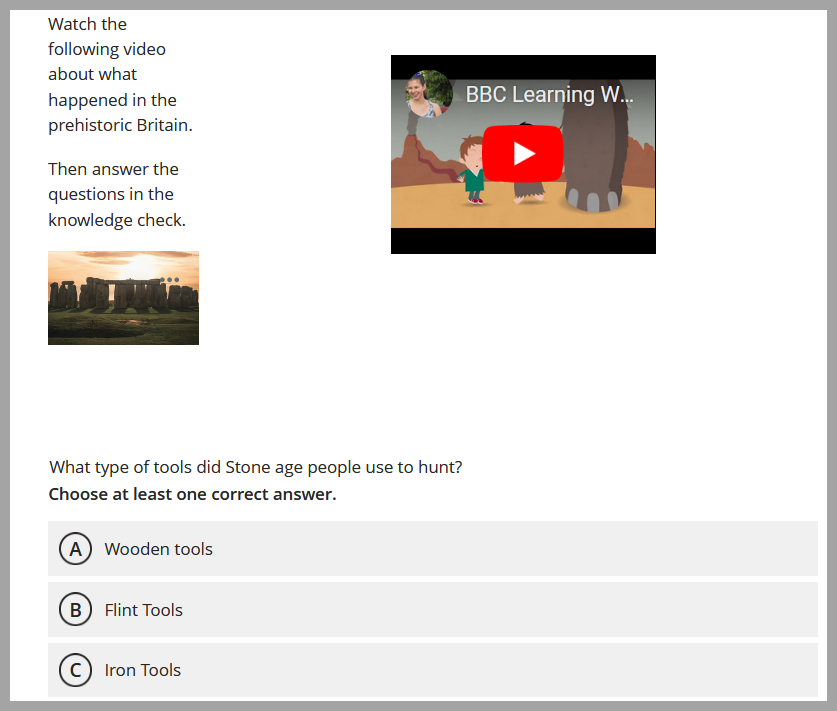
Would appear stacked vertically when the screen size is reduced as shown below, note that the image has also been resized to fill the width of the page:
When a student views a document within a Learning Module, they can also see a collapsible table of contents on the left-hand side. Be aware that when they expand or collapse this panel the appearance of your documents may change depending how your document is resized on their screen to fit the adjusted space:
If you would like more information or help with designing Ultra Documents using blocks then please raise a Serviceline ticket.