
Staff guide: Blackboard Gradebook is changing. The Blackboard gradebook will introduce a new “Grid View” that will look a little different. Existing marks, gradebook columns and assessments will all remain. This guide covers the changes and a FAQ for staff.
What do you need to do?
The new Gradebook view will appear in Blackboard from Friday 7th August 2026.
No changes are required to existing courses, marks or assessments. All existing marks and feedback, gradebook columns and calculations will remain.
To get used to using the new Gradebook Grid View, please review the videos from Blackboard and a summary of changes below:
- Gradebook – Navigation and Layout
- Gradebook – Grade Details Panel
- Gradebook – Column Header and Assessment Details panel
- Gradebook – Filter
- Gradebook – Manual Grade Entry and Posting Grades
- Gradebook | Accommodations, Exceptions, and Exemptions
What has changed?
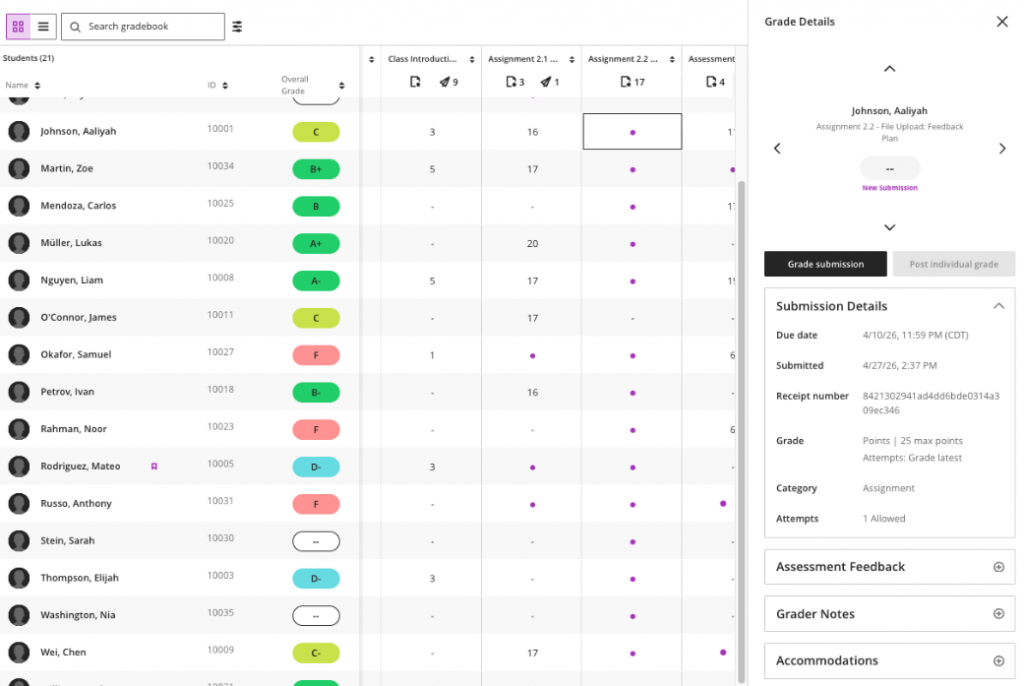
- *Overview of posted marks: A count of posted marks per assessment can be seen by column, not by cell. Select the cell to view further details in the mark submission panel.
- Overview of assessment visibility: Columns will not appear “crossed out” to indicate whether the assessment is visible to students. View assessment visibility in List View instead.
- Filters do not create a unique URL: Blackboard are working to bring back “smart views” functionality in the future.
- Student view – sort by date of last student access: This was previously possible on the students view of the gradebook. While missing from initial release of grid view, Blackboard are aware this feature is missing and will release additional features shortly. This will include the ability to sort and filter by date of last student access. Days since last access is visible in the Analytics tab, and detailed access can be reviewed per student in the student overview page or assessment logs.
*Feedback from the tech preview told Blackboard that the grid was cluttered and hard to scan. Additionally, a common ask was for easier access to bulk actions. Therefore, individual labelling of “posted” marks has been removed in favour of an actionable column-level count.
1. Navigation & Layout
Views & tabs
The four tabs for Overview, Markable Items, Marks, and Students, will become two views: Grid View and List View.

To Do / Overview
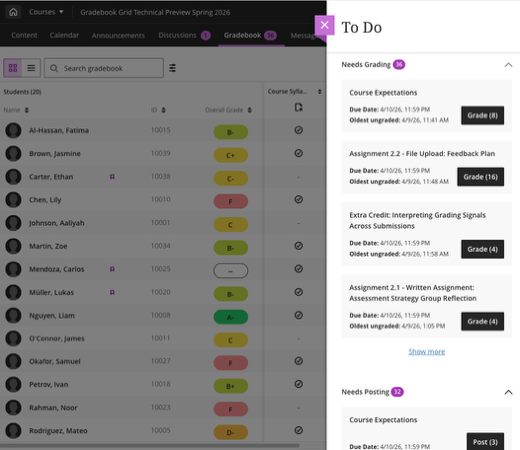
- Instead of the Overview tab, keep on top of your marking tasks using the “To Do” button towards the top right corner of the page.
- Assessments flagged as “Needs Marking” and “Needs Posting” appear in this panel.
2. Student Display & Name Options
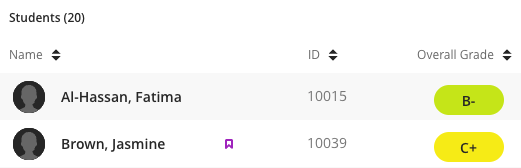
- The accommodations flag has moved to the right of the student name.
- You can now sort the gradebook by student name, ID, overall mark or any gradebook column.
3. Gradebook Filter
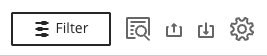
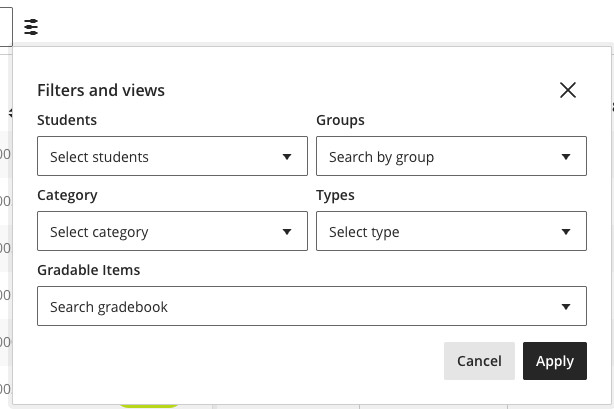
Select the filter button to open a dropdown menu.
The same filter options remain to filter by student, group, assessment category, assessment type or assessment item.
4. Column Headers & Assessment Details
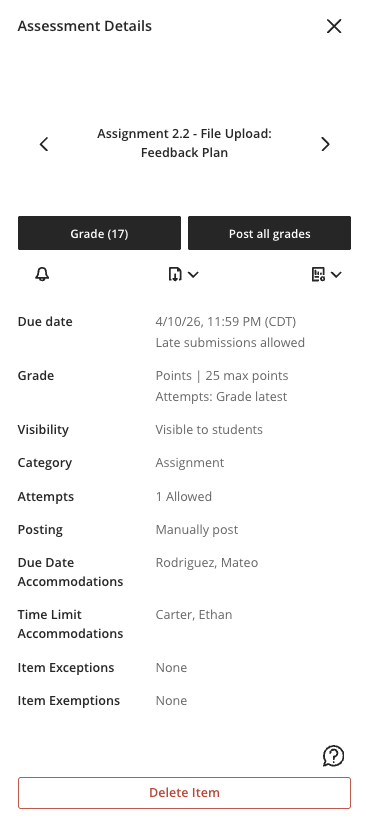
- Bulk actions now appear in the Assessment Details panel.
- You can navigate between columns with right/left arrows to move between assessments.
5. Mark Entry & The Mark Details Panel
Mark a column:
- Hover the cursor near the top of the assessment column and select the purple pen edit icon. The column now enters edit mode.
- Type marks into each cell.
- Use the Enter key to advance to the next student. Press Esc to exit edit mode.
Post all marks:
- The indicator (paper airplane icon) at the top of the column shows how many marks need posting. Select to post all marks.
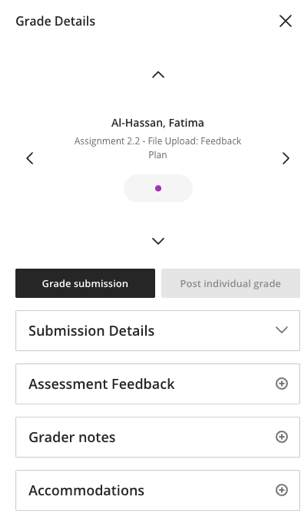
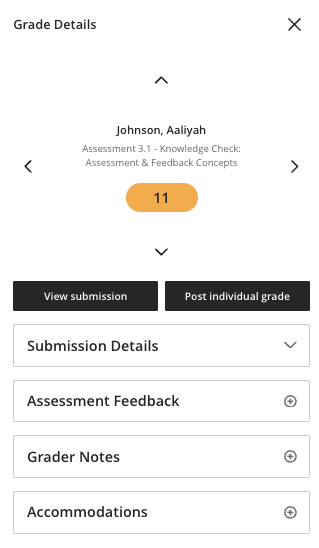
Individual marking & posting: Select a cell to open a Mark Details panel.
- Select a cell to open the Mark Details panel. This will show the student name, the Gradebook column/assessment name, the mark, the posting status, submission details, feedback, marker notes, and any accommodations, exceptions or exemptions applied.
- View and edit assessment marks and feedback directly within the panel. Changes here will sync with the submission.
- Marker notes are not visible to students.
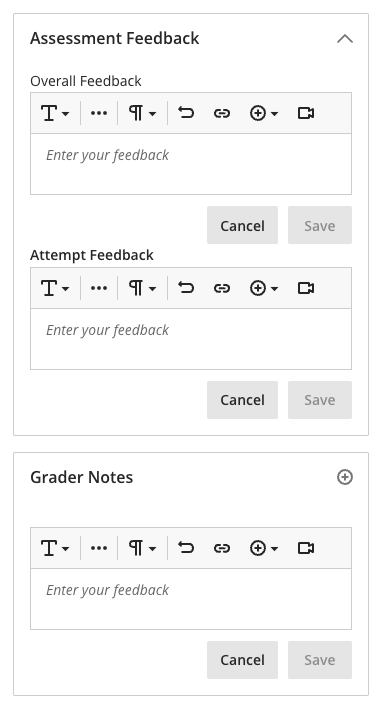
6. Accommodations, Exceptions & Exemptions
Accommodations can only be applied from the student register or marks page, by users with approved course roles. However, accommodations will be displayed in the marks details panel for easier reference.
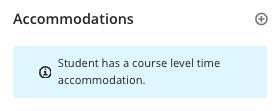
Exemptions and Exceptions can be applied from the Marks detail panel
- Change a student’s due date, access dates and attempts allowed.
- Exempt a student from the assessment (student will not receive due date or late reminders)
FAQ
No. None of these settings are impacted. Marks and calculations, including automatic zeroes, will continue to work exactly as configured.
The underlying gradebook data structure has not changed. LTI grade passback and custom integrations should be unaffected.
No. Your marks, mark calculations, and overall mark configuration are untouched. Only the visual interface of the Grid View is changing.
The Students tab has been removed. To view a student’s individual details (progress, activity), click the student’s name in the gradebook. This takes you to the same student-level information.
In the new Grid View, the top of each column shows the number of marks that still need to be posted (via the paper airplane icon). To see whether an individual student’s mark is posted, click that student’s cell to open the Grade Details panel; it shows posting status clearly. We know this is different from the green ‘Posted’ text in the current view, and documentation / help materials have been prepared to help with the transition.
To enter edit mode, hover near the top of the column until the purple pencil icon appears and click it, or tab to the icon using your keyboard. The column enters edit mode and you can type marks directly into each cell. Press Enter to advance to the next student or use the down arrow key. Click the checkmark in the column header or press the Esc key to exit edit mode. Marks will autosave .
Download and upload have moved to the Gradebook Settings panel. Click the settings icon (gear) in the top right of the gradebook to access them. The functionality is the same; only the location has changed.
They’re still there just reorganised. In the new gradebook, exceptions (due date changes, access date changes, additional attempts) and exemptions are all accessible from the Mark Details panel under a section called Accommodations. Click any student cell to open the panel. There are no changes to how course-level accommodations are set. New in this release: if a student has a course-level accommodation, the details are now displayed directly in the Grade Details panel, so you no longer have to navigate away to check.
A purple dot in a student’s cell indicates there is a new, ungraded submission. You can click the dot or the cell to open the Mark Details panel and then navigate to the submission from there. The number at the top of the column shows how many items need grading for that assessment. For group submissions, you may notice more purple dots in the grid than the number shown in the column header. This is expected — each student in a group shows their own dot, while the column header counts the number of groups that need grading.
Yes. The List View (Markable Items) is unchanged. You can toggle between Grid View and List View at any time using the buttons at the top of the gradebook.
Yes. All column types continue to work. Note: editing text column settings from the Grid View is not available in this release; you can still edit them from the List View. Text column delete/add functions normally.