
There might be some instances where you wish to restrict access of your students from seeing some Panopto content, or another where you wish to restrict the access to the whole Panopto folder.
The following guide shows how to restrict access to a whole Panopto folder, but the same principle can be applied to individual recordings as well.
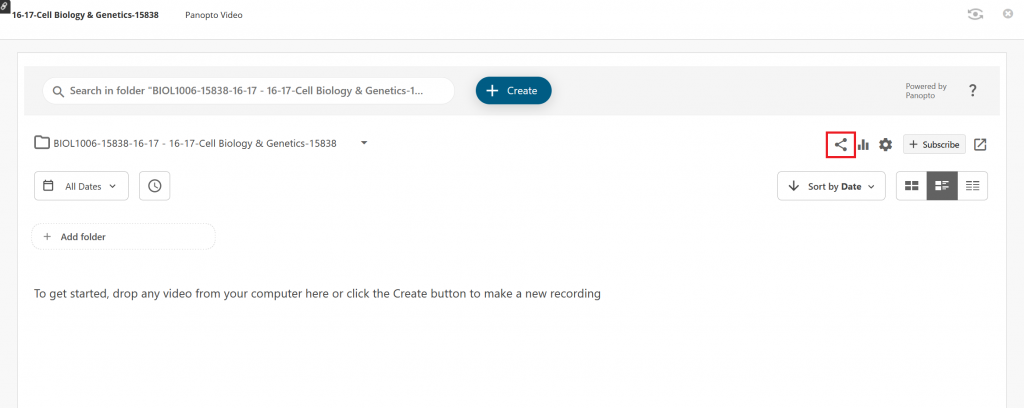
To start you can go to your courses ‘Recorded Sessions’ area or log in to Panopto directly and locate the folder that you wish to restrict access to.
Once you are in the folder locate and select the ‘Share’ button that is in the top right of the folder overview.
For an individual recording, move your mouse over the recording for the ‘Share’ button to show, then select the button.
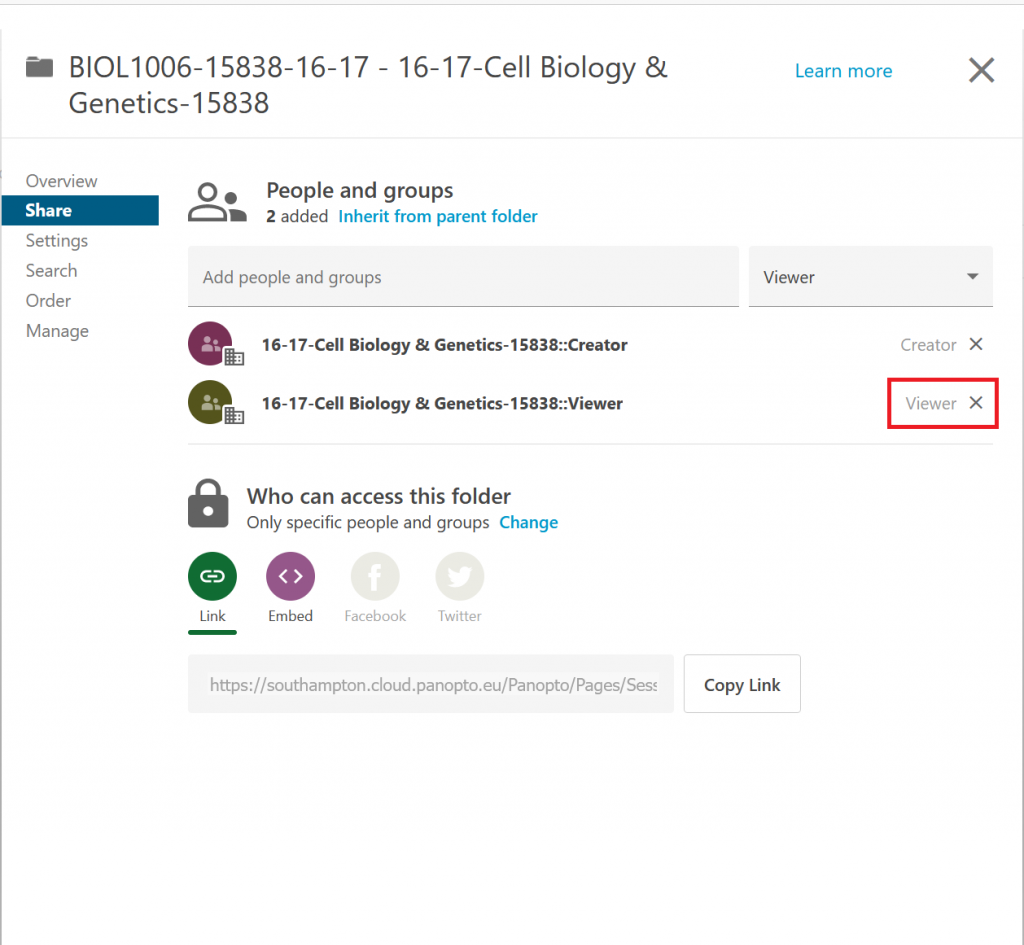
The share menu page will now show, from here you need to change the default setting of having it accessible by all students. You will see two groups, ‘Creators’ – which controls your and other instructors’ access, and ‘Viewer’ which controls the students’ access.
To remove your students’ access select the ‘X’ button next to the line where it talks about the ‘Viewer’ group.
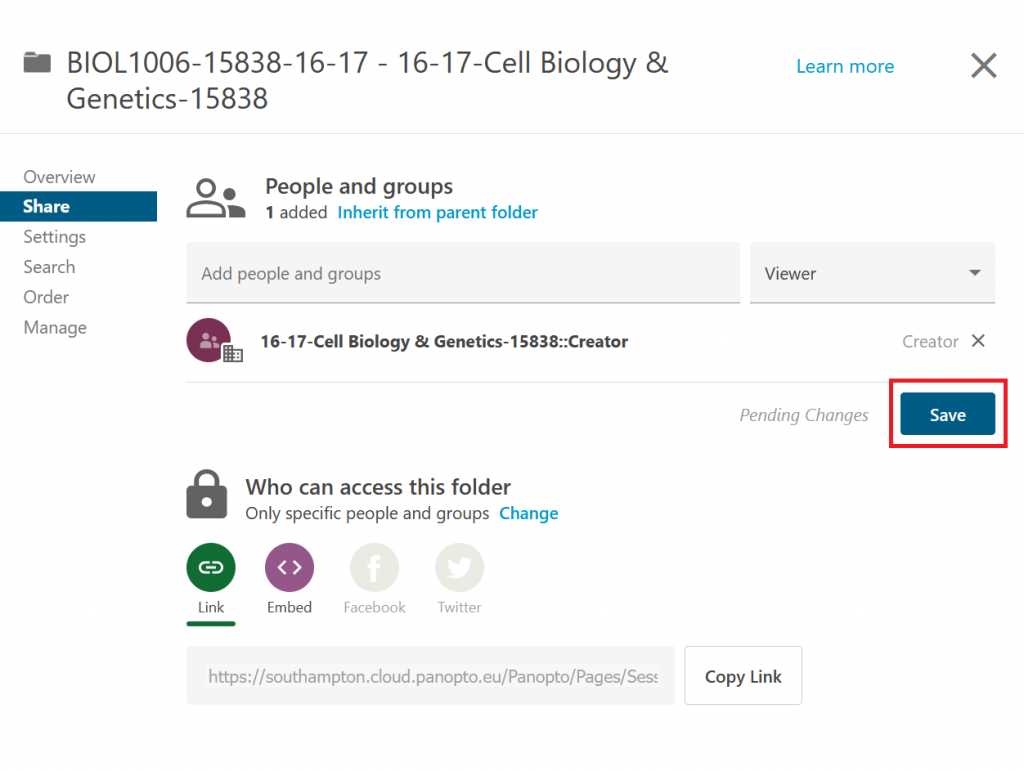
Once you have double-checked that you have selected the ‘Viewer’ group to be removed, select the blue ‘Save’ button, which will show when you have made your access change.
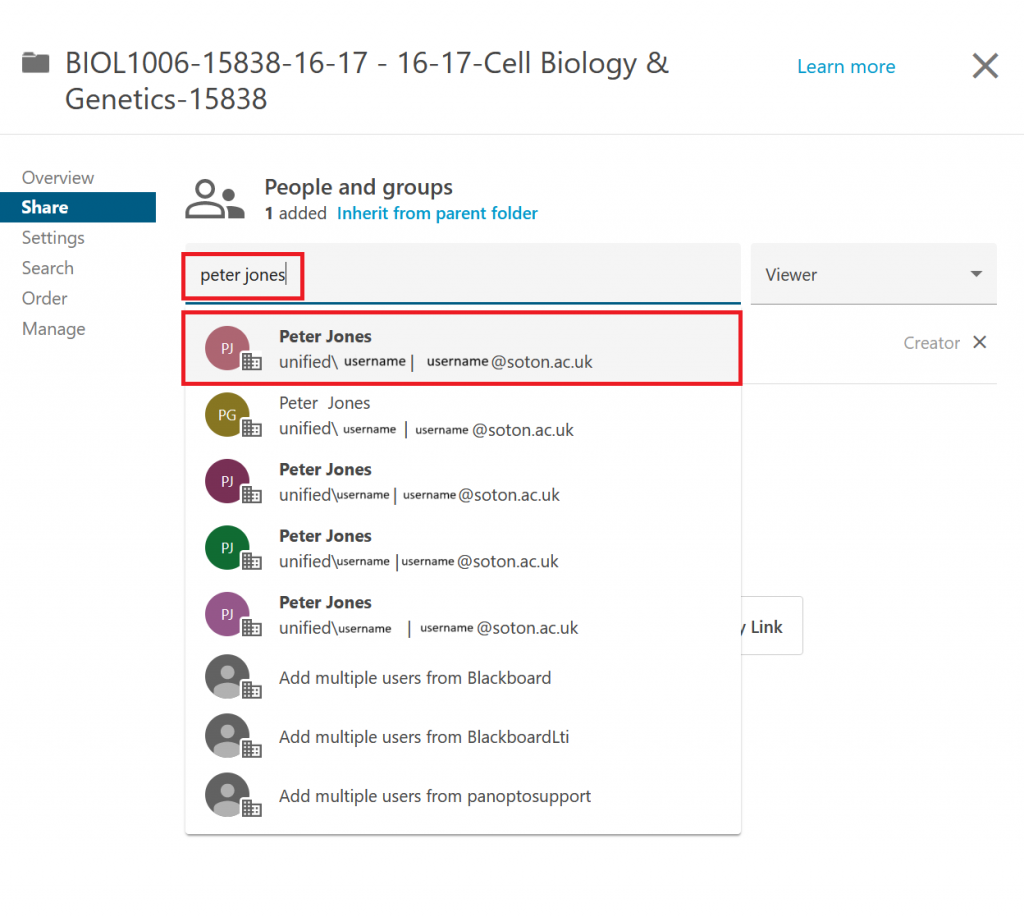
Now the access has been restricted to just the ‘Creator’ group, you can add back in access to individuals to gain access.
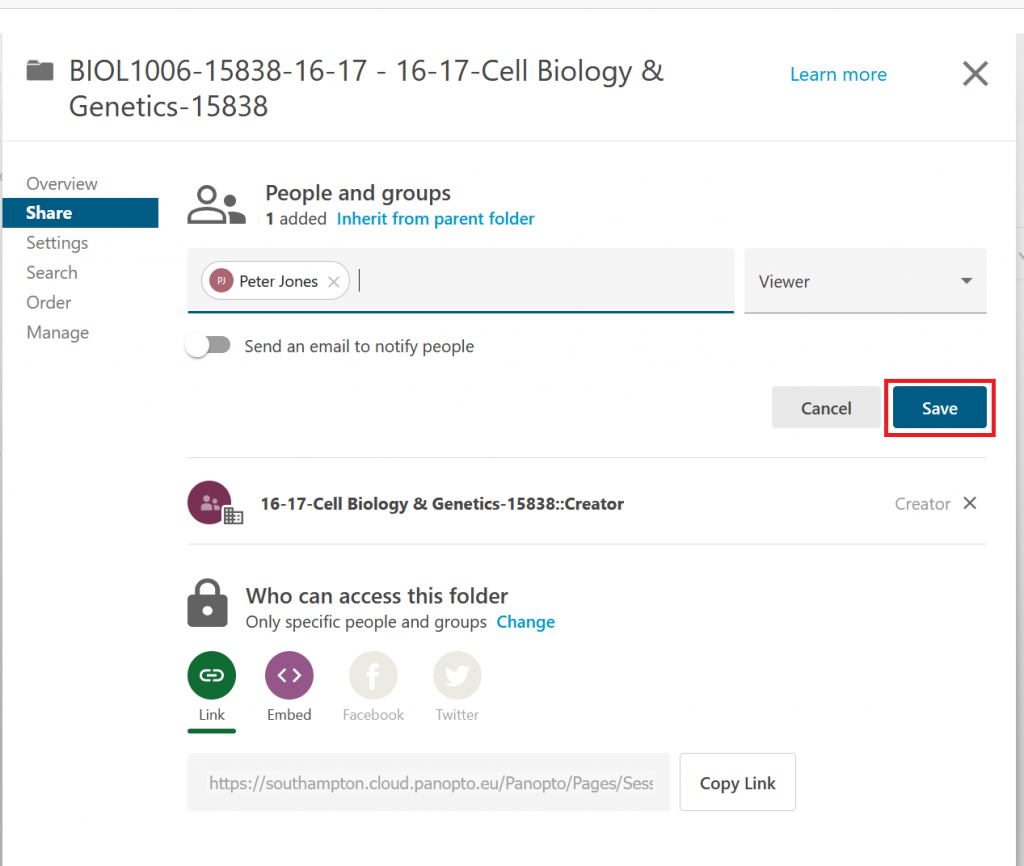
To do this you can start typing in the ‘Add people and groups’ text box the students’ name, or for best results type in the students’ username. Doing so will cause a list of matching names to show underneath, from the list below the text box select the correct students name.
Once the student has been selected from the list you will see that they will now show in a bubble in the text box. From this point, if you wish to add additional students you can do so by repeating the previous steps and continue to populate the text box.
When you are happy with that the students that need to be added are added, you can now select the ‘Save’ button.
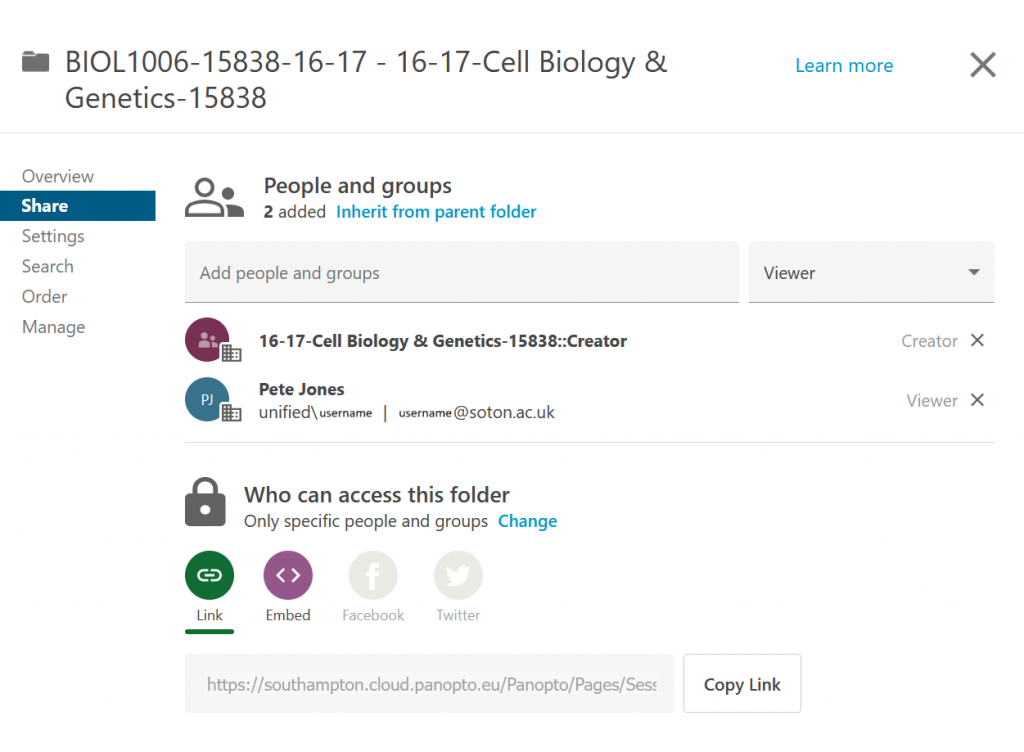
When the access rights have been successfully saved and updated you will then see that the student has now has been added to the list.
If you wish to remove individuals from the access rights list you can select the ‘X’ button to the far right of their name to remove them.
8