Staff guide: This article will show you how to add a Turnitin LTI assignment to your Blackboard course and explain what each setting can do for you.
Blackboard Learn
To create an assignment using the original Learn View of Blackboard, follow these steps:
Edit Mode
- Check that Edit Mode is turned ON. This can be switched by clicking ON or OFF.
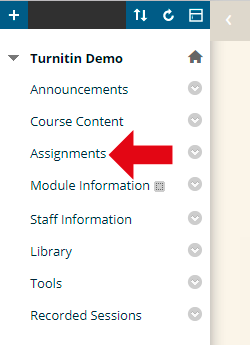
- Choose the Content Area to which you want to add a Turnitin assignment link. All the content areas work in the same way, if you have renamed or added content areas to your Blackboard course the screenshot above may vary from what you see. We recommend placing all of your assignment links in the same place to make locating them easier.
Add Turnitin LTI Assignment

- Select the Assessments from the content option menus at the top of the page.
- Select Turnitin LTI Assignment.
Blackboard Ultra
To create an assignment using the Ultra View of Blackboard, follow these steps:
From the Courses page in Blackboard, click on the name of the course you’d like to create an assignment for.
- Under Course Content, select the + sign.
- From the dropdown that appears, click Content Market
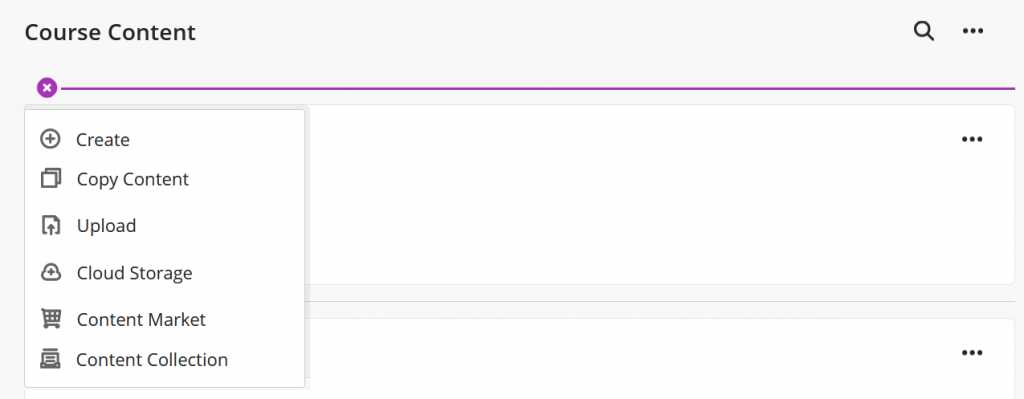
- Select your Turnitin tool.

Using Assignment Copy [External Link]
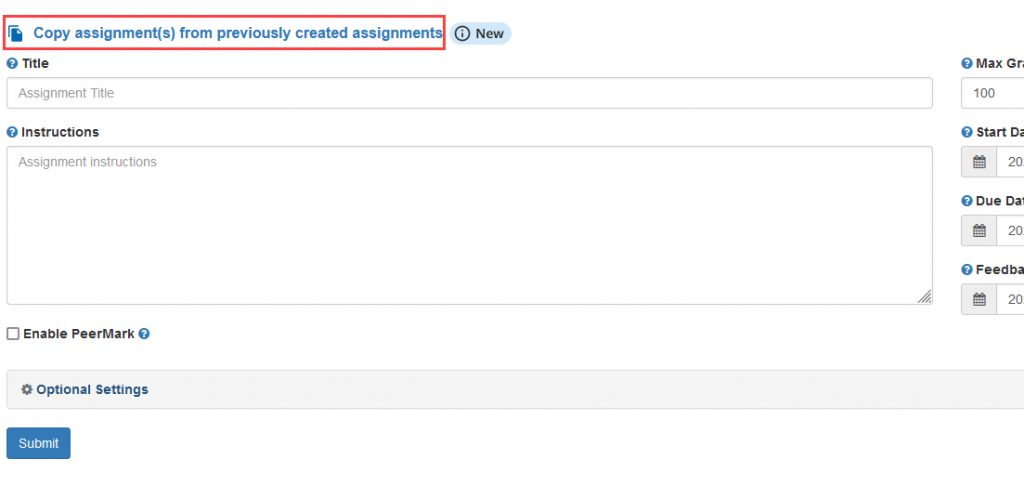
Assignment Copy is a feature that makes it easier for instructors to copy assignment setups from previous courses for use in new courses.
Click here to learn more about using Assignment Copy
Enter Basic Assignment Details

- Enter an Assignment Title, we recommend that the name makes it obvious to the student that it is an assignment inbox.
- Add instructions for the assignment. This could be to remind students not to use their names in case of anonymous assignments, and how to format their work.
- Enter a Point Value (the maximum points which will be awarded for this assignment). If you do not wish to add a points value, you do not have to, simply leave this blank.
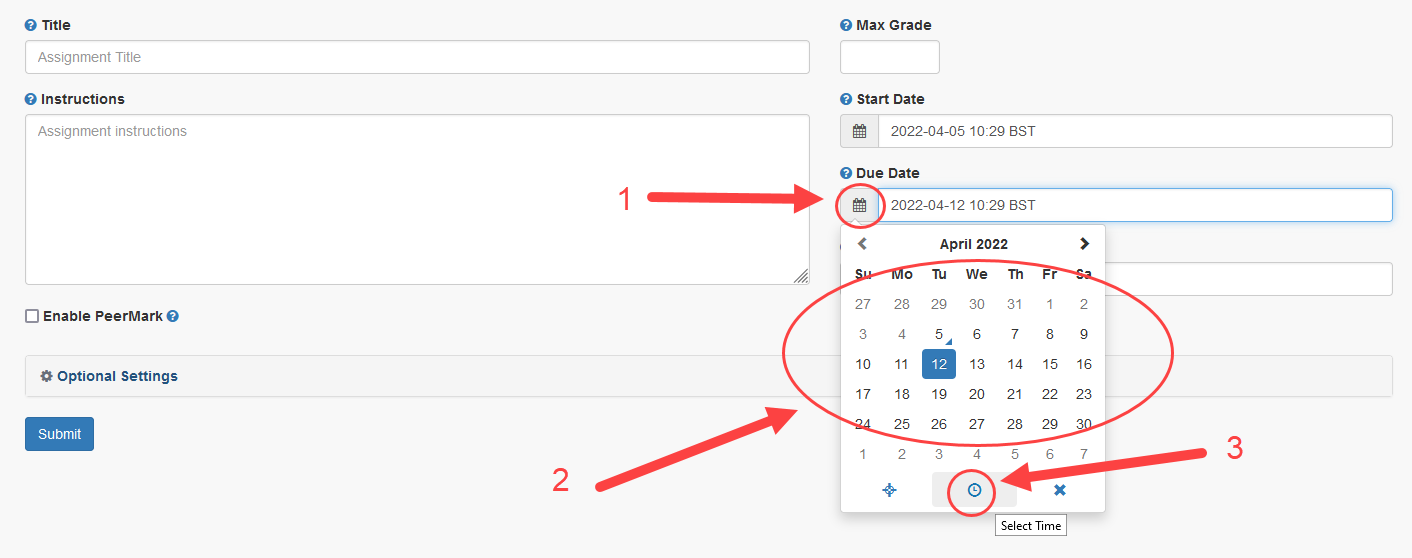
- Select Start, Due, and Feedback release dates and times for the assignment.
- The Feedback release is the date on which grades and feedback entered using Feedback Studio become available for students to view. It must be set to AFTER the due date. Note that changing the Post Date once you have entered marks and feedback may result in marks being temporarily hidden. In order to avoid this, make sure you only change the post date to at least THREE HOURS from the current date and time (from the point at which you are changing the post date)
- Select Optional Settings to view the rest of the options.
Submission Settings
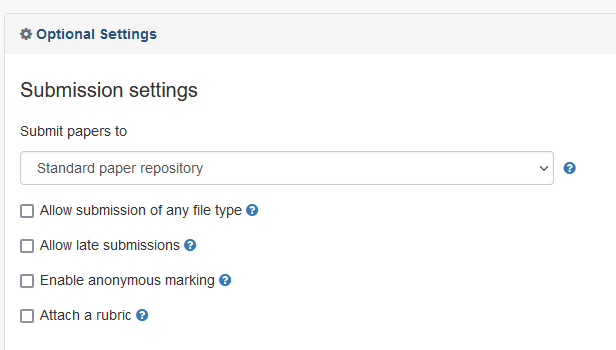
10. Submit papers to: From the drop-down menu select Standard paper repository when you would like the papers to be included in future originality searches. Select Do not store submitted papers when you do not want them added to the database, this is usually for formative or draft assignments which will be submitted again when finalised in the future.
11. Allow submissions of any file type: Only use this option when you do not need a similarity report. If the assignment is set to accept any file type, Turnitin will only generate Similarity Reports for the following file types: Microsoft Word, PowerPoint, WordPerfect, PostScript, PDF, HTML, RTF, OpenOffice (ODT), Hangul (HWP), Google Docs (submitted via the Google Drive submission option), plain text files.
12. Allow late submissions: If this setting is enabled, students will only be able to submit after the due date if it will be their first submission. This setting does not allow for students to make resubmissions after the due date.
13. Enable anonymous marking: Select the checkbox to obscure student names within the assignment inbox, Similarity Report, and online grading until the assignment’s feedback release date. Student names may be revealed for an assignment by clicking on the anonymous marking enabled button to reveal the author’s name for the paper. Once it has been revealed you cannot re-anonymise it.
14. Attach a rubric: To attach a rubric tick the box and select the desired rubric from the drop-down menu.
Compare Against
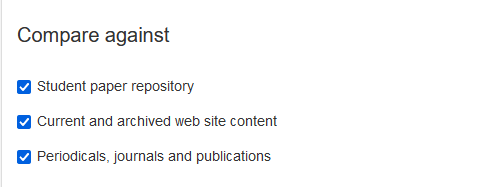
15. Choose which sources to check when comparing submissions. You can check against existing papers which have been submitted to the system, as well as a number of Internet sources.
Similarity Report
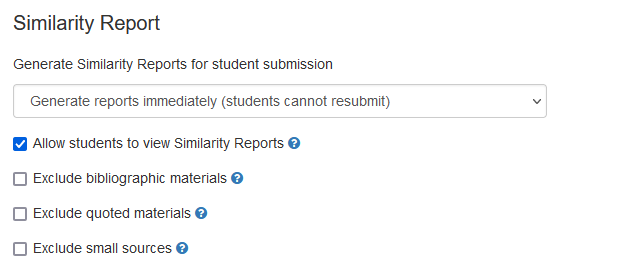
16. Report generation and resubmissions drop-down selections explained:
Generate reports immediately (resubmissions are not allowed)Originality Reports for all submissions will be generated immediately. Students cannot resubmit papers. If, for any reason, a resubmission is required when this setting is selected, you must manually delete a student’s submission from the assignment inbox to allow the student to submit again.
Generate reports immediately (resubmissions are allowed until due date). After 3 resubmissions reports generate after 24 hours.This option is typically used when students are self-reviewing and revising their submissions and able to view the Similarity Report. Similarity Reports will be generated immediately for each student’s initial submission to this assignment.
- Students may resubmit as often as they wish until the assignment’s due date.
- As all previous submissions are removed upon resubmission, only the latest submission is available to both you and the student.
- Similarity Reports will regenerate within an hour of the due date and time to allow student submissions to compare against one another within the assignment.
- This report regeneration may cause a change in a paper’s similarity score. No resubmissions are allowed after the due date and time of the assignment.
Generate reports on due date (resubmissions are allowed until due date)Originality Reports will not be generated for any submission until the due date and time of the assignment is reached. Students may resubmit as many times as needed until the due date and time, but will not receive reports during this period. No resubmissions are allowed after the due date and time of the assignment
17. Allow students to view similarity reports: Select the checkbox to allow your students to view their Similarity Reports for submissions to this assignment.
18. You can tick Exclude bibliographic materials, Exclude quoted materials and Exclude small sources to prevent the report from checking references and shorter sources now, but you are able to include or exclude them when viewing the finished report.

19. Exclude assignment template: Follow this link to learn more about the exclude assignment template feature
20. Save these settings for future use: If you tick this box the settings you have entered will become the default settings for future Turn it in assignments.
21. Submit: Once you are happy that your settings are correct you can submit the assignment.
Making changes to an existing Turnitin LTI Assignment
This section will show you how you can make changes to an existing Turnitin LTI Assignment in Blackboard.
Change the settings within your Turnitin LTI Assignment inbox
Learn:
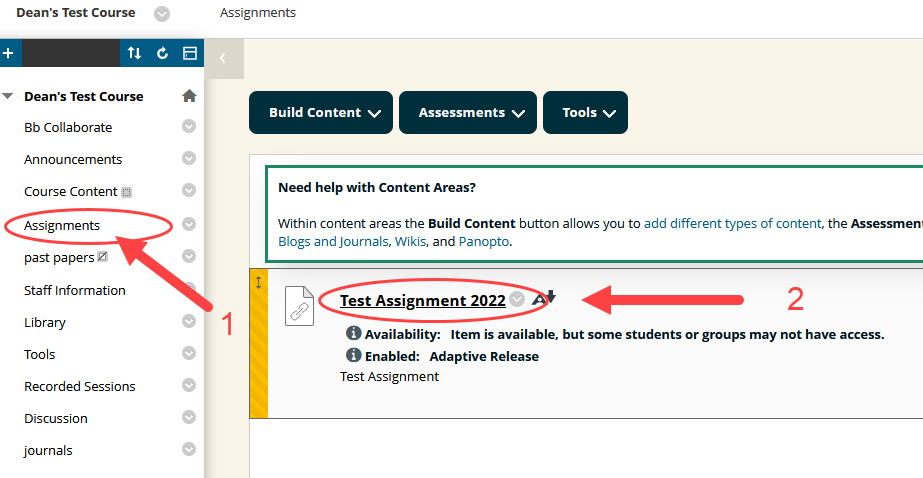
Navigate to the content area where your assignment is located (1), Select the title of your assignment which is a link to the inbox (2).
Ultra:

Navigate to the content area where your assignment is located and select the assignment name to load the inbox.

Select the settings cog icon found in the top right of the window.

You can now edit the assignment settings. To change the Title, Description, Max Grade and Due Date follow the instructions in step 1 above.
You can change the Name, Due Date, and Max Grade in Blackboard.
Learn:
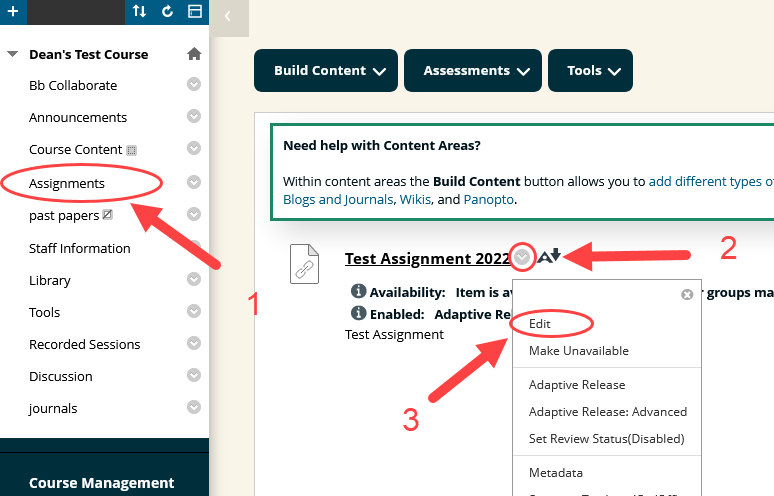
Go to the content area where your assignment is located (1). Select the context menu arrow (2) and choose Edit (3).

Amend the details in the Web Link Information section as desired and select submit.
Ultra:

Under the Course Content section for your course, select the three-dots menu on the right side of the assignment and click Edit.

Once you have made your changes select Save
