How to upload a video to the Panopto and Blackboard, and ensure this is released to students at a certain date and time.
Record or Upload the video
Add the recording to the module panopto folder (known as Recorded Sessions).
You can use the Panopto app to create a recording. Alternatively, record using your prefered computer software and upload a video file to Panopto.
Change the video availibility setting
While the recording is processing, amend the availability settings:
- Hover over the video in the video library, and select the Settings button.

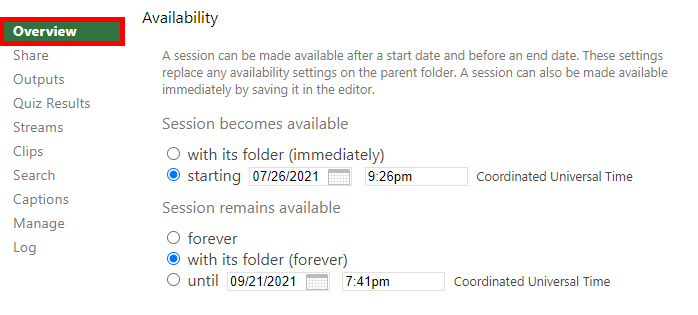
- On the Overview tab, scroll down to the Availability section.

Setting an Availability start-time: Under Session becomes available, there are two options for when a video can be made available. Please note: If you are recording a webcast, the video must be set to available at that time, otherwise, viewers will not be able to access it. The availability workflow also applies to webcasts and until published by lecturers, students will not be able to view this.
- Under Session becomes available, enter a starting a date and time.
- To restrict the video after a certain amount of time, also enter a date for Session remains available.
- Close the settings box. You can now see that the video has a message that indicates the date and time when students will have access to it . Students will not see the video in the library until the indicated time.

Release the video to students
Direct students to view the video in the Panopto Recorded Sessions area on Blackboard, which is included in the course tempate in the Resources and support materials Learning Module.
You can also provide a direct link to the video, or embed it into a Blackboard Ultra document. See our guide Panopto – Add content to Ultra course.
