
Some rooms are better equipped with technologies that support delivery through linked teaching rooms.
Main linked classroom
These are rooms from where a lecture should be delivered.
These rooms are equipped with:
- Whiteboard camera
- Audience Camera
- Catchbox microphone
These rooms are (more room details are linked):
Linked teaching rooms
These are rooms that can more suitably receive a delivered lecture.
These rooms are equipped with:
- Audience Camera
- Catchbox microphone
These rooms are (more room details are linked):
Setting up linked teaching rooms
It is recommended to have the main speaker in the main linked classroom and a TA or other staff in the linked classrooms.
Refer to the guidance on your preferred tool:
- Guidance for linked teaching rooms delivery with Panopto.
- Guidance for linked teaching rooms delivery with Teams.
More detail to test and adjust Teams in both rooms:
- You will both need to check the Device Settings in Teams (via the ellipses at the top of the screen). Ensure that the audio, speaker and camera feeds match those you are using in the room.
- In the main linked classroom, you will have the following camera options in Teams:
- Board cam – Select this to share your physical whiteboard over Teams.
- Wolfvision cam – Select this to share the visualiser output.
- Content_Capture – Select this to share the PC screen (Default selection).
- Audience_Cam – Select this to share a view of the room.
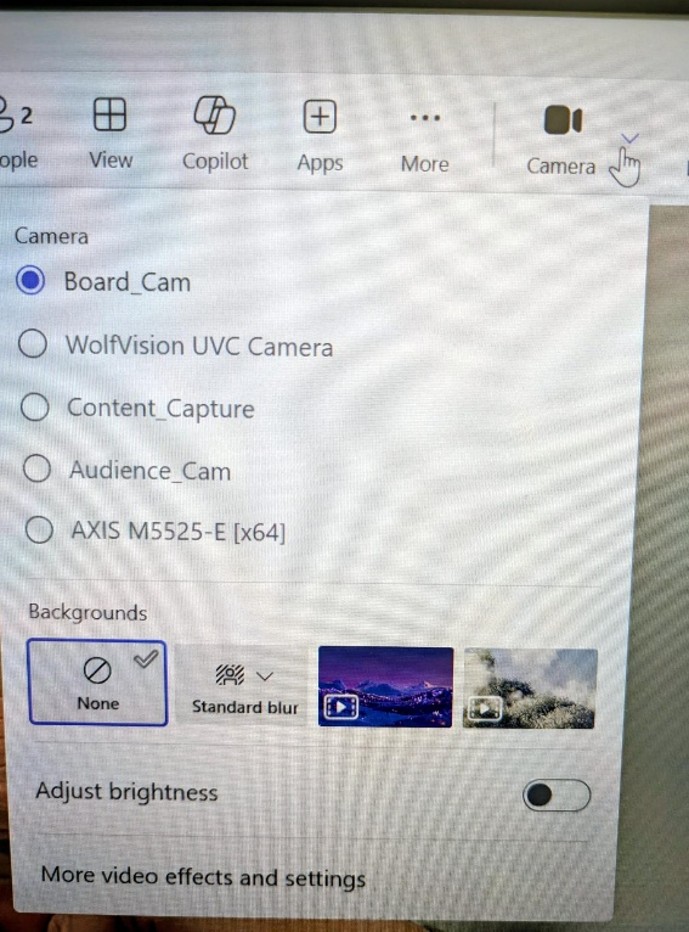
- Select the appropriate camera as the video source for Teams.
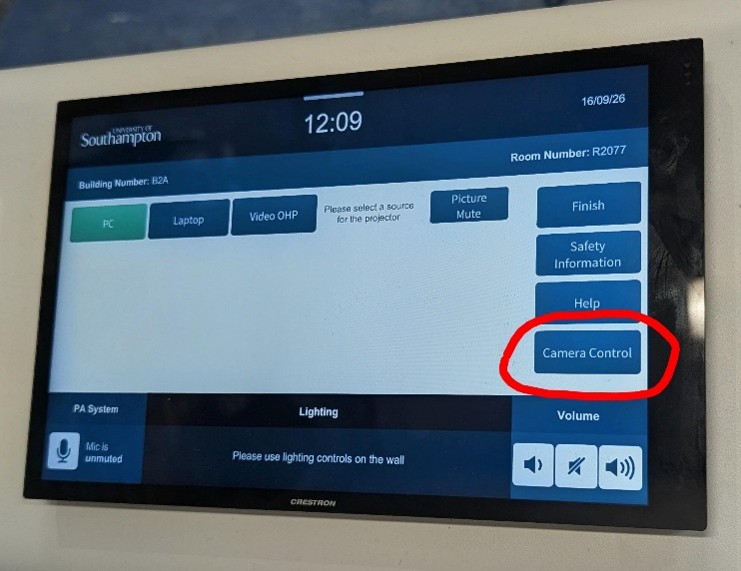
- Utilise “CLS Camera Control” (icon on the desktop) to make camera view adjustments from the options available. The Board cam will have a few different presets depending on number of physical whiteboards in the room. You can change the view using the ‘Camera Control’ button on the touch screen.
 There will be presets that you can select to focus on different whiteboards.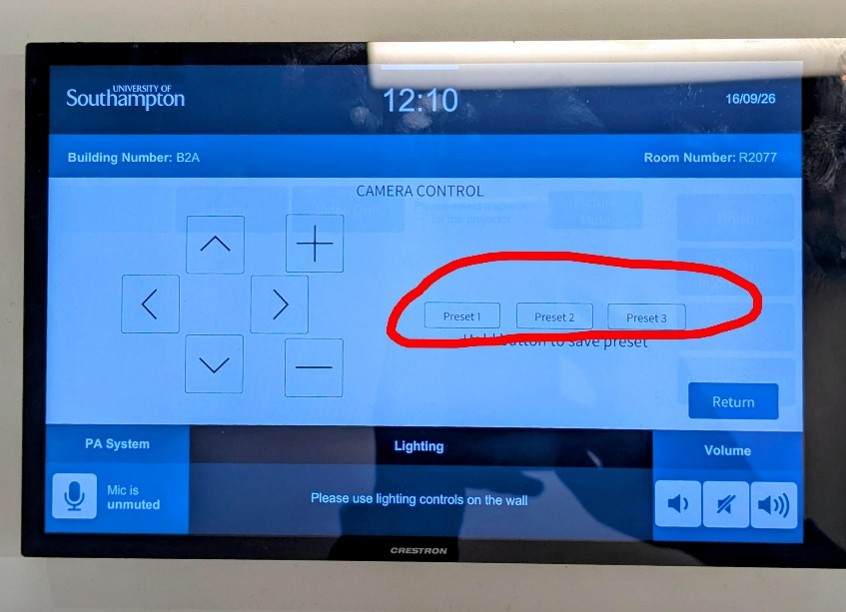
- You will both need to check the sound is turned up on the room audio-visual Touchscreen/ button control panel.
- Once you have confirmed that the device settings are correct, conduct an audio test between the linked rooms. This is of particular importance for the main linked classroom (if the Mic level is set too low, or too high, the viewer experience will be compromised).
Begin the session:
- When ready start recording (for more detail refer to the specific tool guidance).
- Deliver the lecture session to the linked rooms. Refer to the further Information (below) for options to enhance the video call and introduce interactivity.
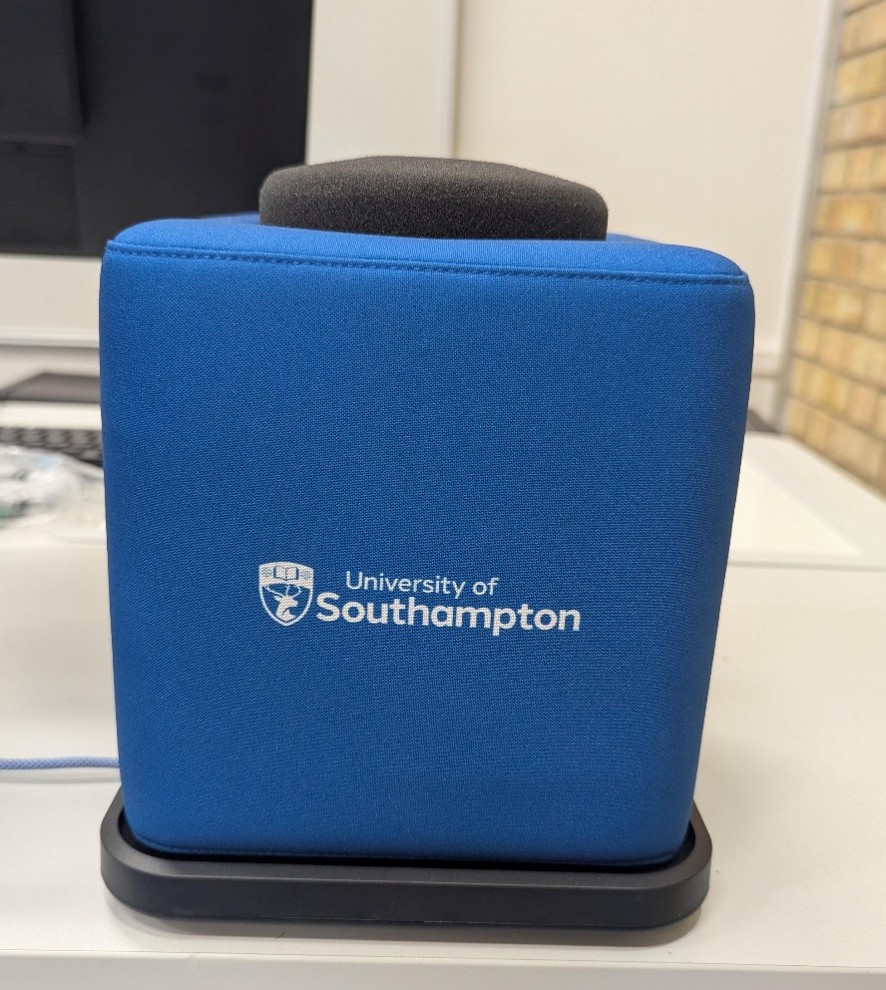
- For staff/ student interaction between the rooms, you can use the Catchbox (the cube mic on the teaching desk). It will automatically switch on when removed from the base and spoken into.
- When the session ends, stop recording.