
Staff Guide: How to create and manage Groups.
You can organise students into groups so they can interact with each other in group discussions, work together on group assignments, or use self-enrol groups as sign-up sheets.
You can also make groups which are not visible to students to delegate marking, or release content to groups of students.
Types of groups
Custom groups
You control the number of groups and which students are allocated to each group.
- Useful for: marking groups, groups where the students are pre-defined (tutorial groups), group work.
Randomly Assigned groups
Select the number of groups, or the max number of students per group and let Blackboard work out the allocation.
- Useful for: group work, marking groups.
Self-enrolment groups
Select the number of groups, the max number of students per group, and let students select which group they want to join. Students can switch groups in the enrolment period. At the end of the enrolment period, students who did not join a group can be added automatically, manually or excluded.
- Useful for: Sign-up sheets, group work.
Reuse Groups
- Useful for: creating duplicates of existing groups, or for using an exisiting group as a template.
Visible and non-visible groups
- Visible groups enable students to see other group members in the group. Certain features will only work if the group is visible to students (self-enrolment, group discussions and assessment, sending messages to groups).
- If a group is not visible to students then the students are unaware of the group. A group does not need to be visible for course administration purposes only – for example, allocating marking groups, and using release conditions.
What can you do with groups?
- Use release conditions to release content to groups.
- Filter the grade book by group for external examiners to review work of selected students only.
- Delegate marking to groups to manage multiple markers.
- Assign group assignments so one member of the group can submit and all members can view to submission, mark and feedback.
- Create marked or unmarked group discussions.
- Communicate with groups by message and email.
- Create a sign-up sheet.
- Create tutorial groups from timetable information.
Automatic groups in merged modules
COMING SOON. If you have merged one or more Blackboard modules into single parent course we will create automatic groups for each module CRN included in the parent course.
See the guide to merged enrolments for more information.
Create groups
You can manually create a groups, or import groups and group members from a CSV file (spreadsheet).
Create a group set manually
- Select the Groups from the top course menu.
- Select New Group Set.
- Set the visibility of the group set.
- Self-enrolment groups must be visible groups. Set the group to visible if you wish to use the group for assessment, disscussions or sending messages to groups.
- Select the Group Students type of group you wish to create.
- Use the purple plus to create new groups in the group set.
- Select the three dots (…) to the right of a group to delete it.
- Hover your cursor over the group name and select the pen icon to edit the group name.
- Select a student (or multiple students) and then select the three dots (…) to the right of their name. Allocate them to a desired group.
- Save the group set.
- *When you save a new Self-Enrolment group set, all students on your course will recieve an automated course annoucement and message notifying them of the self-enrol group.
Import groups
When importing groups there are two steps:
- First, create the group set.
- Then add the students to the groups.
- Select the Groups from the top course menu.
- Select Import Group Set.
- Download the Group Sets template.
- Columns with a star* are mandatory. You can leave the Description field blank but you must enter details for Group Code, Group Title, Group Set and Self-Enrol.
- Enter Y for Yes or N for No for the Self-Enrol field.
- Save the file to your computer as a CSV file.
- Upload and import the file.
- You will recieve an email confirming the group set import. Refresh the Manage Groups page.
Import group members
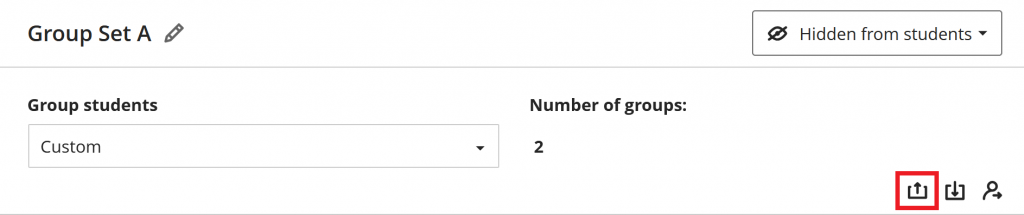
- Select the Groups from the top course menu.
- Select the group you wish to import members to.
- Select the Import Groups or Members icon.
- Select the Assign members tab and download the members template.
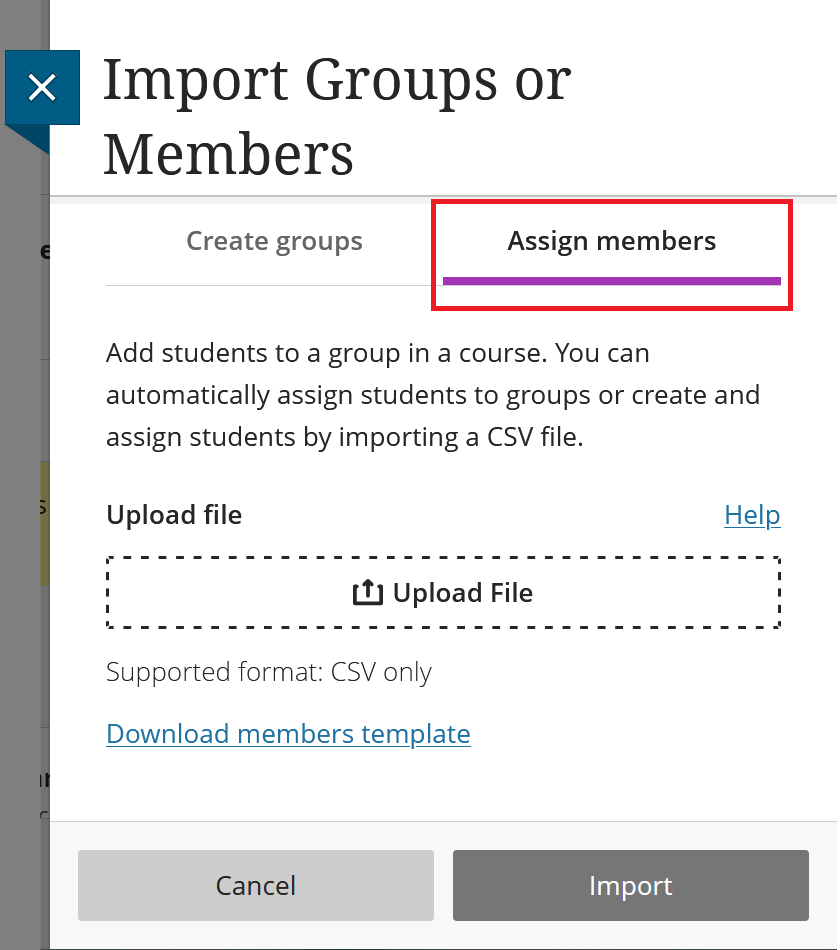
- You will need to know the group codes, group set name and the username of students. Complete the spreadsheet and save it as a CSV file.
- Columns with a star* are mandatory. You can leave the Student ID, First Name and Last Name fields blank but you must enter details for Group Code,Username and Group Set.
- Upload and import the file.
- You will recieve an email confirming the group set import. Refresh the Manage Groups page.
Creating CSV file templates from existing groups
If you want to reuse the same group structure accross courses, you can export the groups to use as a template to import.
If you are stuck on Import group members step above, you can export groups from Blackboard to find out hidden information such as group codes, or use the export group members file as a template.
Export groups
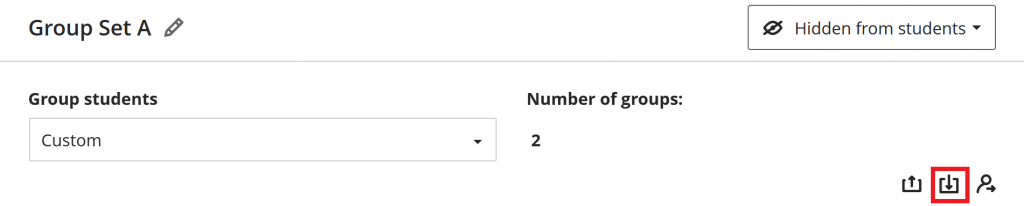
- Select the Groups from the top course menu.
- Select the group you wish to export.
- Select the Export Groups icon.
- You will see the Export from Groups panel. Select Group sets only or Members only (or both). And then select Export File.
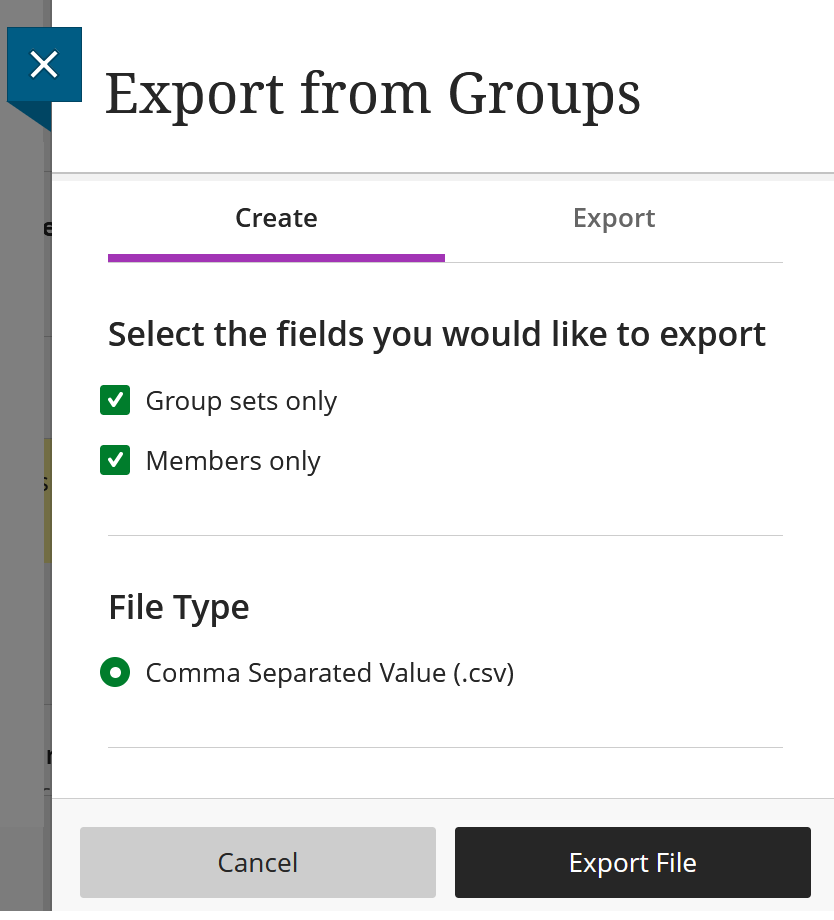
- You will recieve an email when the files are ready to be downloaded.
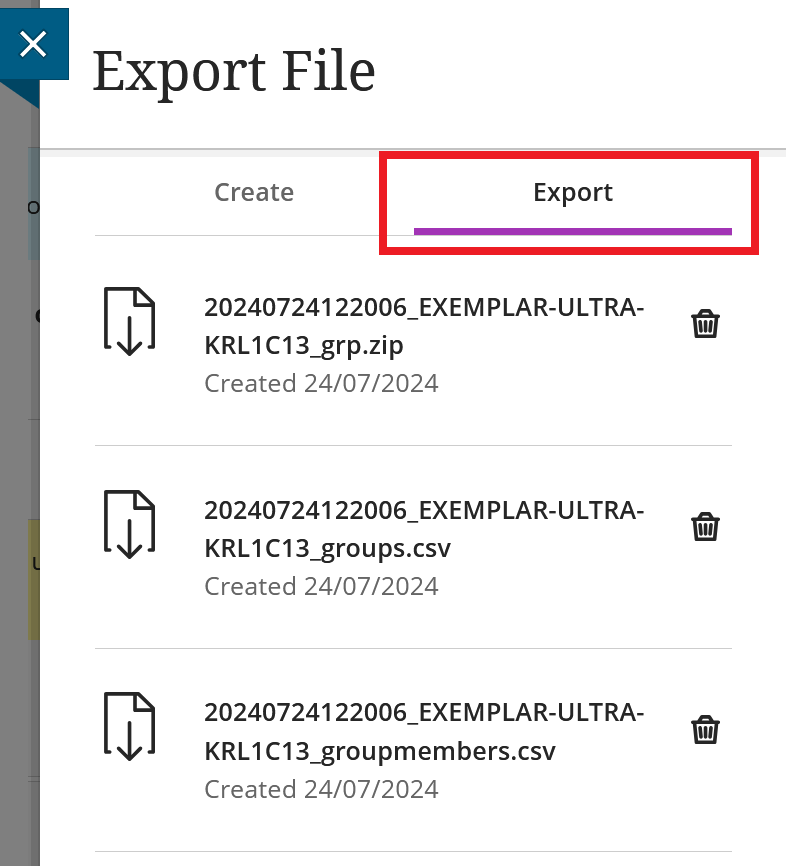
- Select the Export Groups icon.
- Select the Export tab.
- Select the files to download.
Using student preview and groups
Print Student List by Groups
Use the Blackboard Photo Roster tool to print a student list with ID card photos, by Blackboard group.