
Staff guide: How to mark a test in Blackboard, add feedback and post marks to students. Tests can be marked and posted automatically, but you may need to manage attempts, add additional feedback or mark essay questions.
Automated marks and feedback
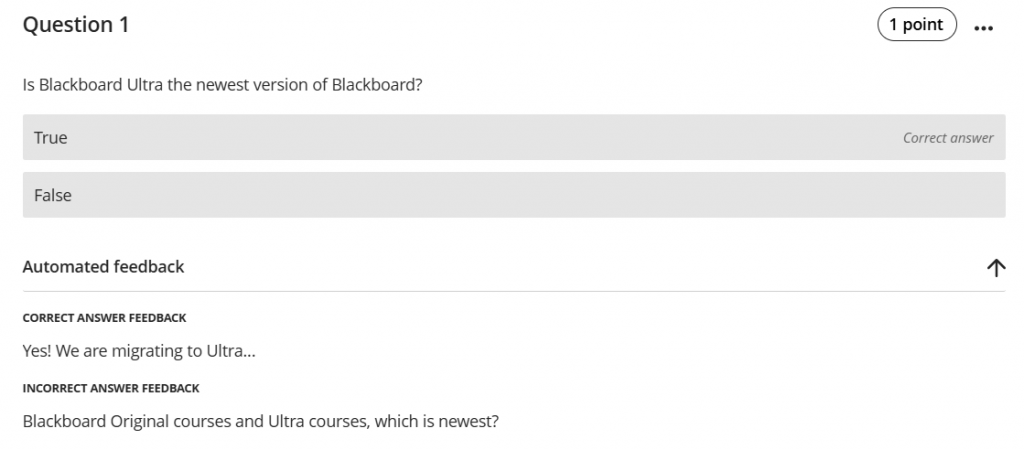
Most test question types can be marked automatically.
When you create the test, you assign the point value and automated feedback depending on how the student has answered.
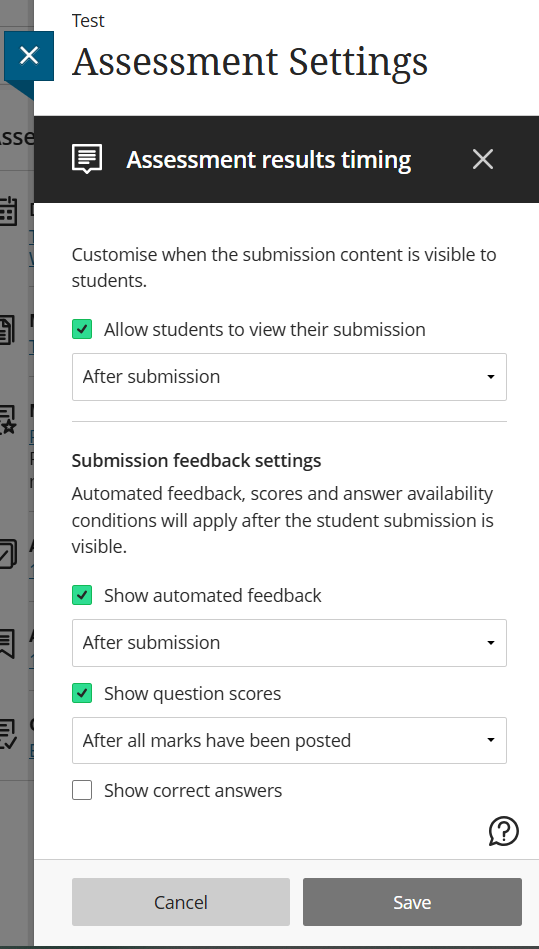
Control when the student can view their submission, feedback and marks from the Assessment Settings. Select any setting the section Assessment Results to bring up the following Assessment results timing menu.
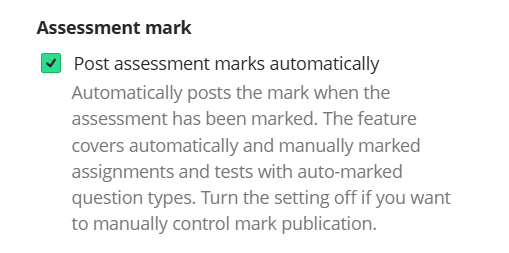
Post assessment marks automatically
Check if you have ticked “Post assessment marks automatically” in the assessment settings. You can change this default in the course Gradebook.
Untick this if you want to control or delay the release of marks to students. This may be helpful if you need to mark file response or essay questions, or add additional feedback.
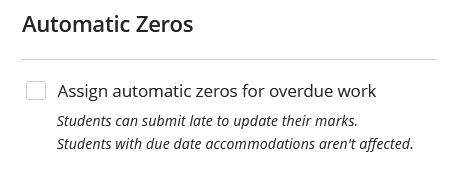
Check Gradebook setting “Assign Automatic Zeros”
Check your course Gradebook settings. If “Assign automatic zeros for overdue work” is slected, all students who submit late will immediately see a zero mark for their work.
Untick this box if you do not wish zero marks to be automatically applied and posted.
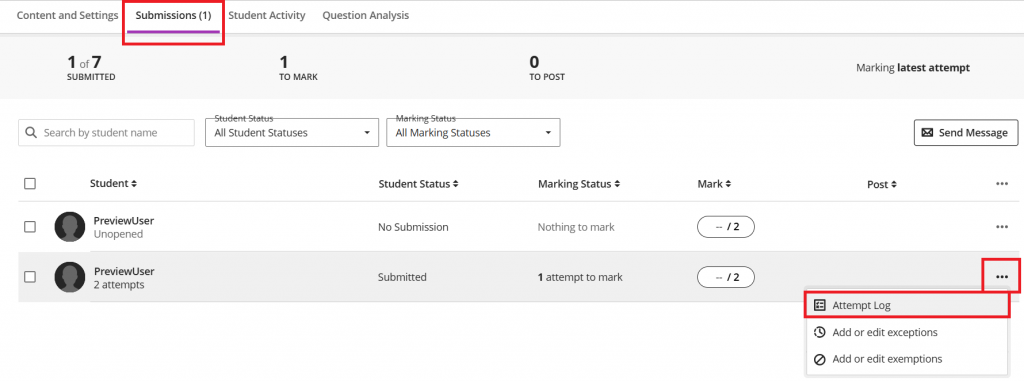
Review the Test Submissions Page
Open the Blackboard Test you wish to mark and select the Submissions tab.
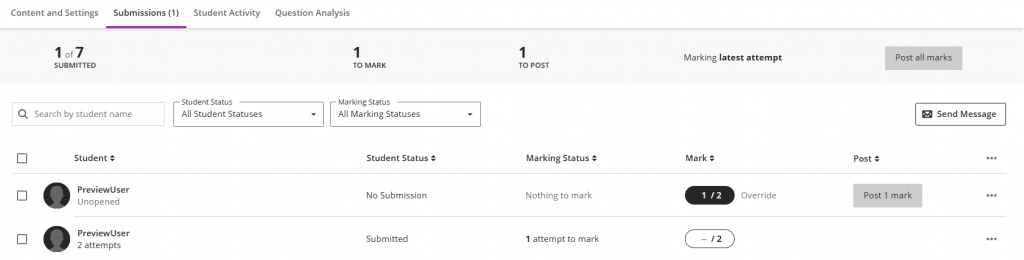
- Towards the top of the page, you will see a summary of submissions, marks, posts and the marking methodology.
- You can search for a student or filter the page by student status (All, No Submission, Draft Saved, Submitted) or marking status (Needs Marking, Needs Posting, Completed, Nothing to Mark).
- The student status/number of attempts will show below the student name.For anonymous tests, students are assigned a random ID number instead of a name.e.g. Anonymous Student 5080796
- Send a reminder to students who have not yet submitted. Reminders are sent to the student or group as a blind carbon copy (BCC) course message. Instructors receive a copy of the message too.
- For anonymous marking, students always receive reminders via email to preserve anonymity.
- Select the More Options menu (…) to download a ZIP files of submissions. The student username, submission date and time will be in the file name.
Marking a Test Manually and adding Feedback
- From the assessment, select the submissions page then then the student you wish to mark.
- You can also access a student attempt to mark from the Overview, Markable Items, Marks views of the Gradebook, or from the Student Marks page.
- The left-hand panel swaps between mark by student or mark by questions. This panel can be minimised. You can post marks when marking by student.
- The right-hand panel allows you to enter overal feedback. This panel can be minimised.
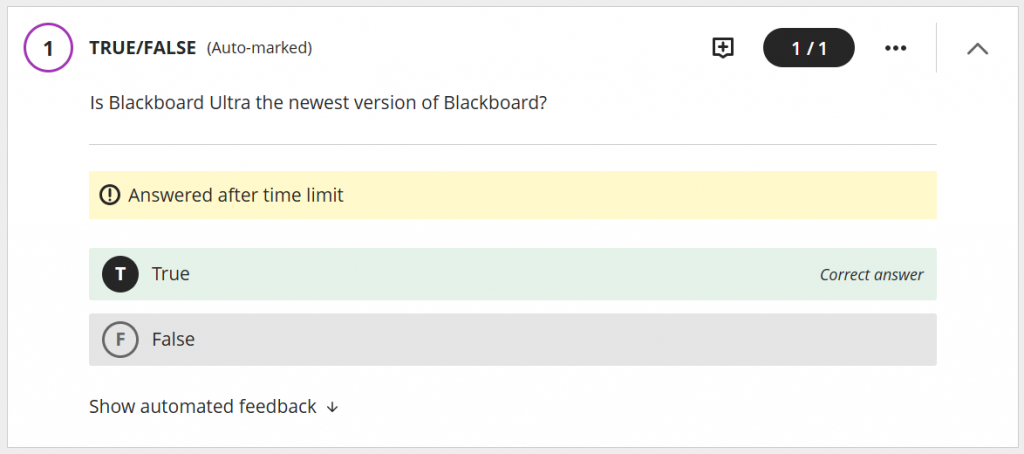
- You can provide a mark and feedback for each question. Questions that were answered past time will be indicated. Extra credit questions will be indicated by a purple badge icon.
- The students total mark will appear in the top right as a calculation from the question scores. You can override this mark.
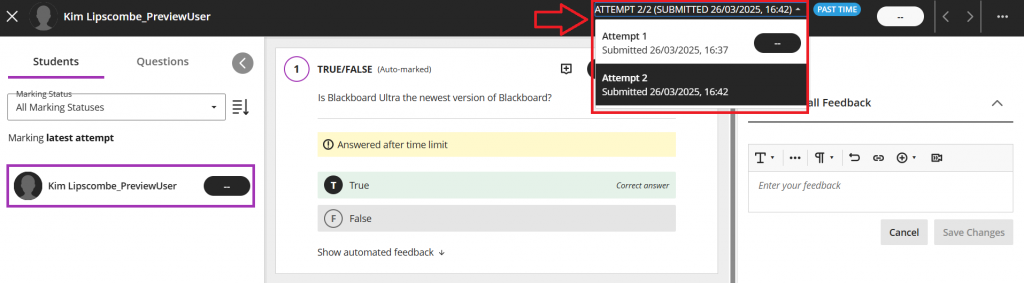
- You can swap between attempts. Late and Past Time attempts will be labelled.
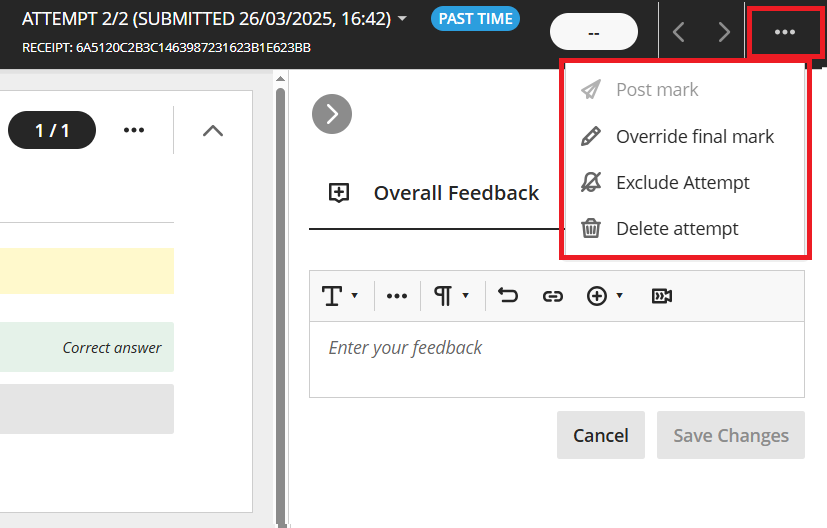
- The More Options menu in the top right corner allows you to post an individual mark, provide an override mark, exclude or delete an attempt.
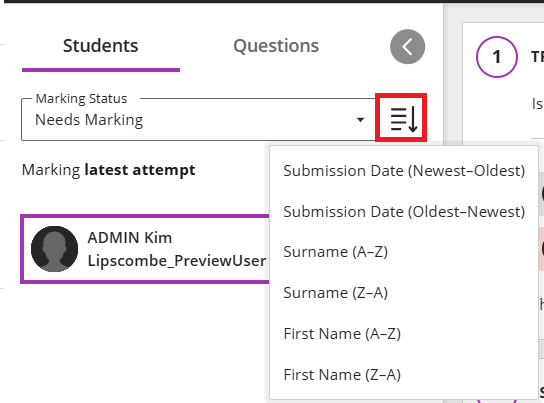
Marking by Student
On the left-hand panel, select Students to view each student’s test in full. You can arrange the list of student submissions by date or name.
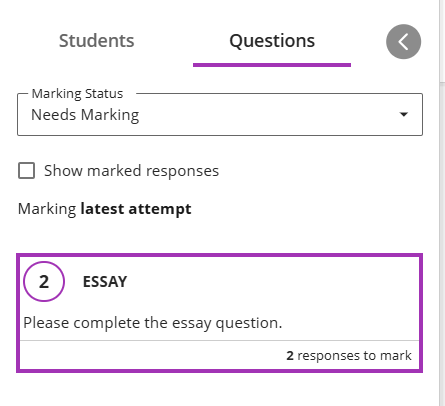
Marking by Question
If you would prefer to mark all submissions to a specific question, select Questions on the left-hand panel.
You can filter out the marked responses to easily see what you have left to mark, or included previously marked responses in the list for comparison while marking.
Marking a Group Submission
- All students will be able to see the Group Feedback.
- Only the specific individuals will be able to see their individual feedback.
- By default, students will all recieve the same mark. However, you can assign individuals different marks using an override mark. You can assign an override mark from the Test submissions page, or the marks view of the Gradebook. When assigning the override mark you will see this pop up:
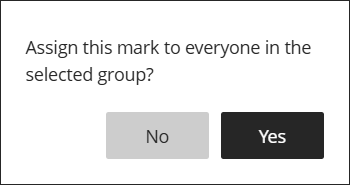
- Select No to assign an individual an override mark.
- Select Yes to assign the whole group a new override mark.
Negative scoring and Partial Credit
Some question type can have negative scoring or partial credit. This can result in the student having a negative or decimal number score.
- Blackboard will show the score to two decimal places.
- You can control the student view of their score using a mark schema.
Extra Credit
A purple badge icon will indicate that the question is marked for extra credit.

A correct answer results in adding the extra credit question points to the points earned for the assessment. Students are not penalized for incorrect answers to an extra credit question.
If a student answers extra credit questions correctly, it may be possible for the student to earn a score greater than 100% on the assessment.
Timed Test: Marking questions answered after the time limit
Questions answered after the time limit will be indicated by a yellow warning message “Answered after the time limit”.
- You can check the student’s attempt log for more detail on when the question was saved and submitted.
- You may wish to provide an override mark if questions after the time limit should not be counted.
Managing Attempts
You set the number of attempts in the test settings. Or you can grant additional attempts for a student by giving them an exception.
You can see how many attempts a student has in the test submissions page, and also the marking methodology applied.
When marking the student submission, you can swap between views.
Attempts that are late or past time have an indicator.
You can delete or exclude an attempt.
Review student activity and attempt log
Access a student’s attempt log from the Assessment Submission page
The attempt log will show the time and date the student started the assessment, when they saved each question and when they submitted.
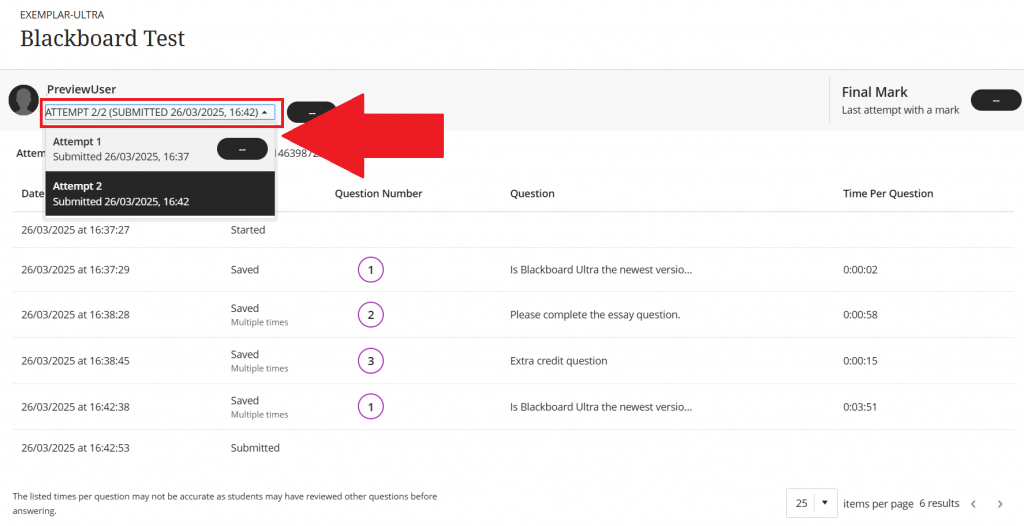
If the student has made multiple attempts, you can swap between attempt logs.
You could also review Progress Tracking and Student Activity Reports for the assessment, although some features may not be available for Anonymous assessment until after the marks are posted.
Posting marks
You can post marks from:
- The Overview, Marks or Markable items views in the Gradebook
- The Submissions page of the assessment
To publish a mark, select Post mark, which appears next to each mark you haven’t released yet. Posted marks are labeled Posted. You can also mark all submissions for an item and then select Post all marks to release all marks in one action.
When you post marks, students can view them, along with any feedback you provide. All feedback for all attempts, even ungraded attempts, is shown to students.
You cannot hide a mark once it has been posted, unless the entire assessment is hiden from students.