
If you’re new to Panopto or would like to refresh your memory, this page will explain how to use the Panopto Recorder for Windows. This page explains how to capture a video of yourself and the computer screen.
Pre-requisites
Install Panopto
Panopto is pre-installed in all our lecture theatres. Just search for Panopto in the Start Menu.
To install Panopto on your University Windows staff PC use our guide Installing Panopto on a University Windows PC
We also have guides to install Panopto on your non-University Windows computer or your Apple Mac.
Provision a Blackboard course (Staff only)
Each year you will need to activate Panopto within your Blackboard course. This gives you an area within Panopto to make recordings. For each course follow the guide How do I provision Panopto in Blackboard.
Alternative to using a Blackboard course
Everyone has a “My Folder” that they can record Panopto content into. You can record into this folder without provisioning a Blackboard course but no-one, except yourself, will be able to view it.
Loading the Panopto launcher
- There are two ways to launch Panopto in a CLS space, the easiest is to double click the Panopto icon on the desktop. If for some reason you cannot see the icon you can use the following steps:
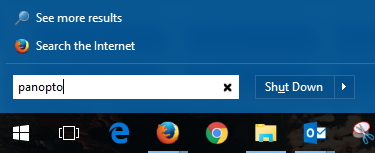
- Select the ‘Start’ menu (or press the Start key on the keyboard).
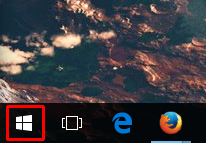
- In the search box that appears type “Panopto” (or find Panopto within “All programs”).

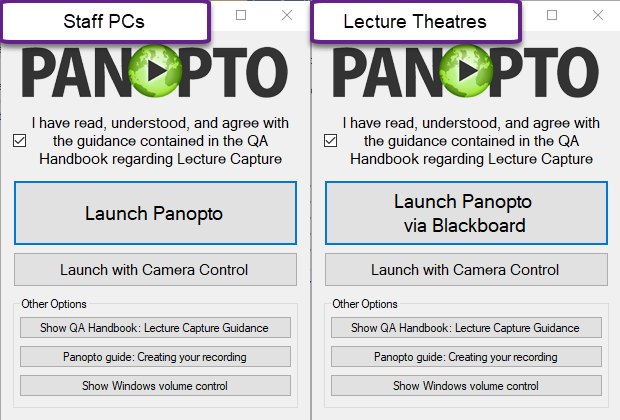
- Tick the “I have read, understood, and agree with the guidance contained in the QA Handbook regarding Lecture Capture” and you will then be ready to press the Launch Panopto button. It is at this point you stop and want to load the “CLS Camera Control”.
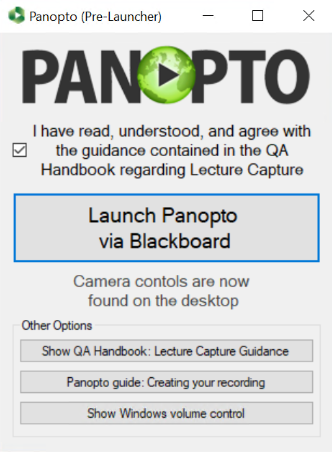
- Note, the launcher says that the camera controls are on the desktop.
Loading the camera control
The camera controls are on the computers desktop, the icon is of a camera and has the words CLS Camera Control under it. This is normally found in the top left of the desktop screen.
Next double click on the icon to load the camera control site.
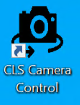
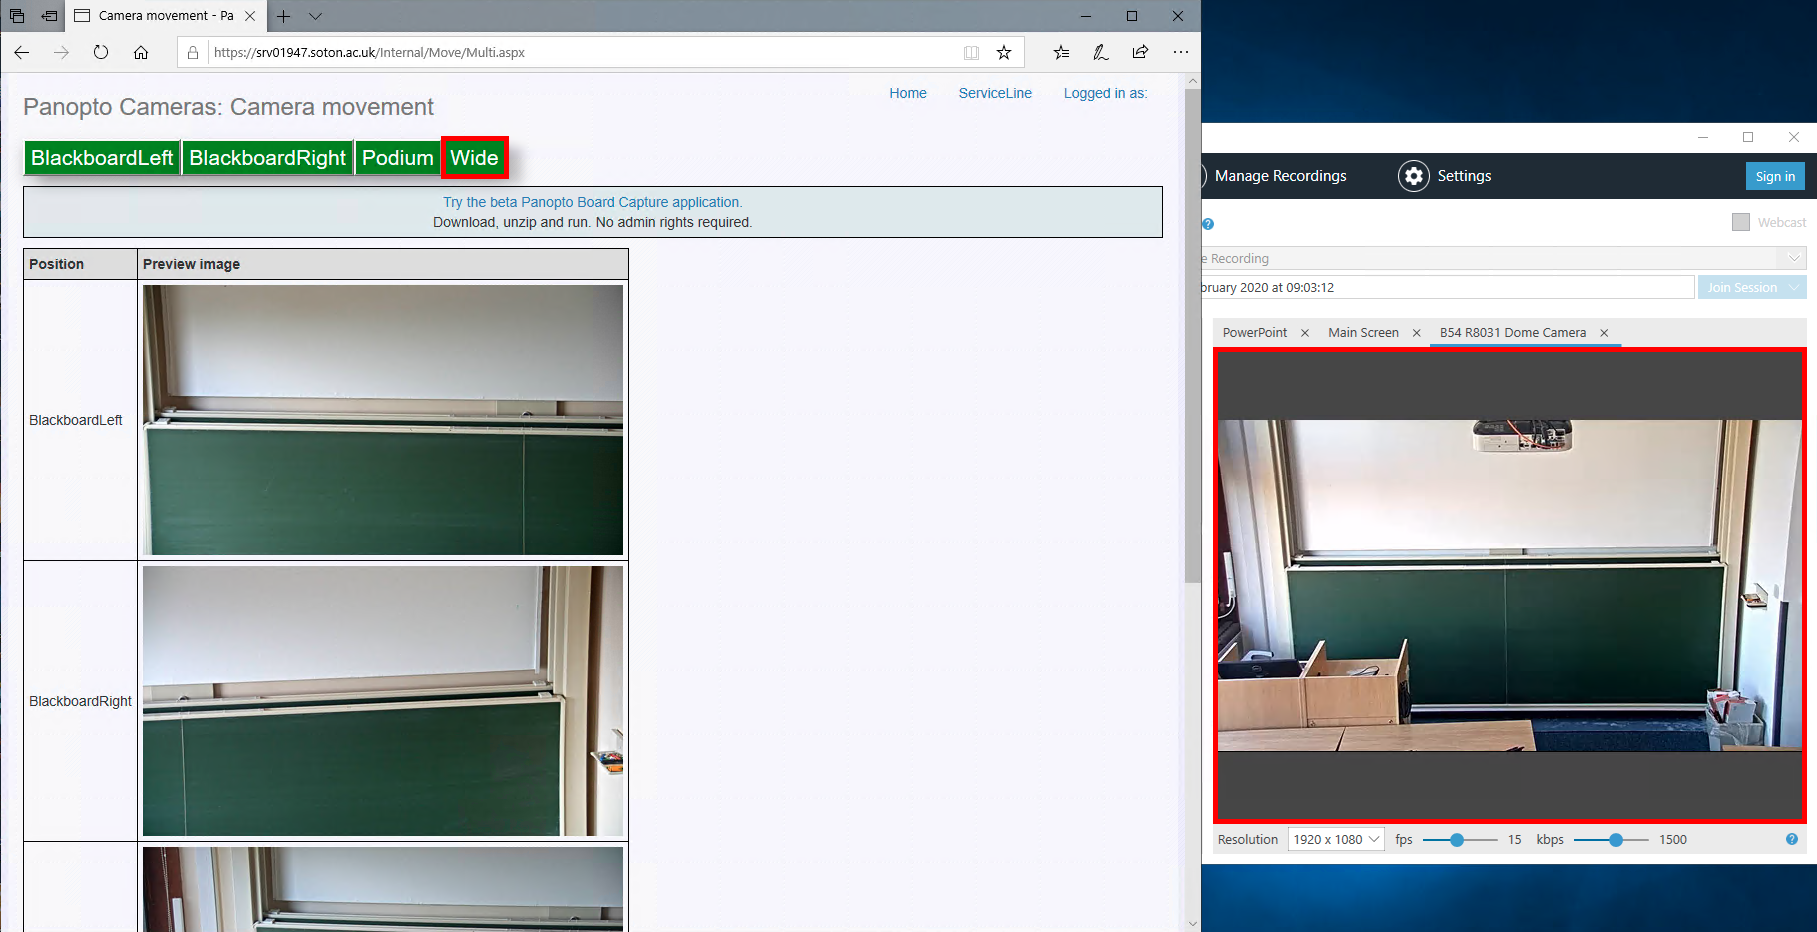
The camera control website will now load.
On the camera control page you will see green buttons at the top for each possible position to move the camera to, selecting one of the buttons will instantly move the camera. Below that is a set of preview images to help you decide which would be the best area to capture the whiteboard.
Launching Panopto
- Now go back to the Panopto launcher and load Panopto as normal.
- If you are not signed in to Panopto you will be directed to Blackboard to sign in.
- Log in with your normal University username and password.
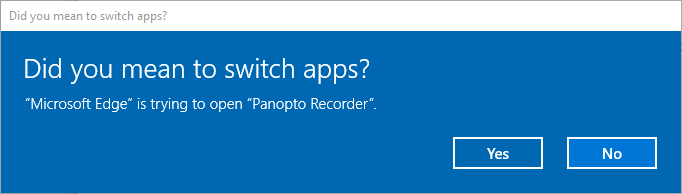
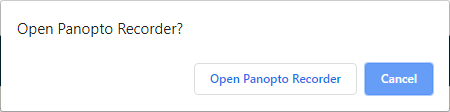
- Your web browser will then try to load the Panopto recorder.
Example in Microsoft Edge:
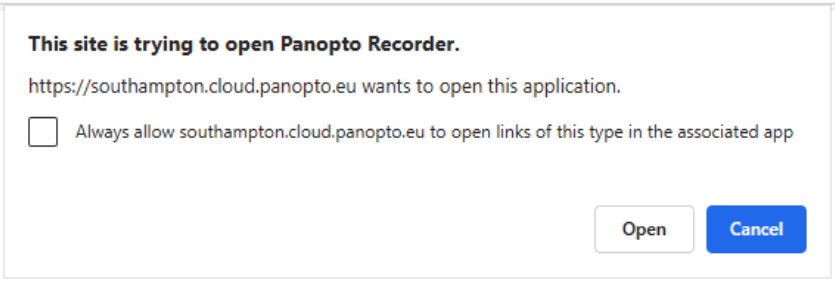
Example in Chrome:
Setting Panopto up to capture whiteboards in high quality
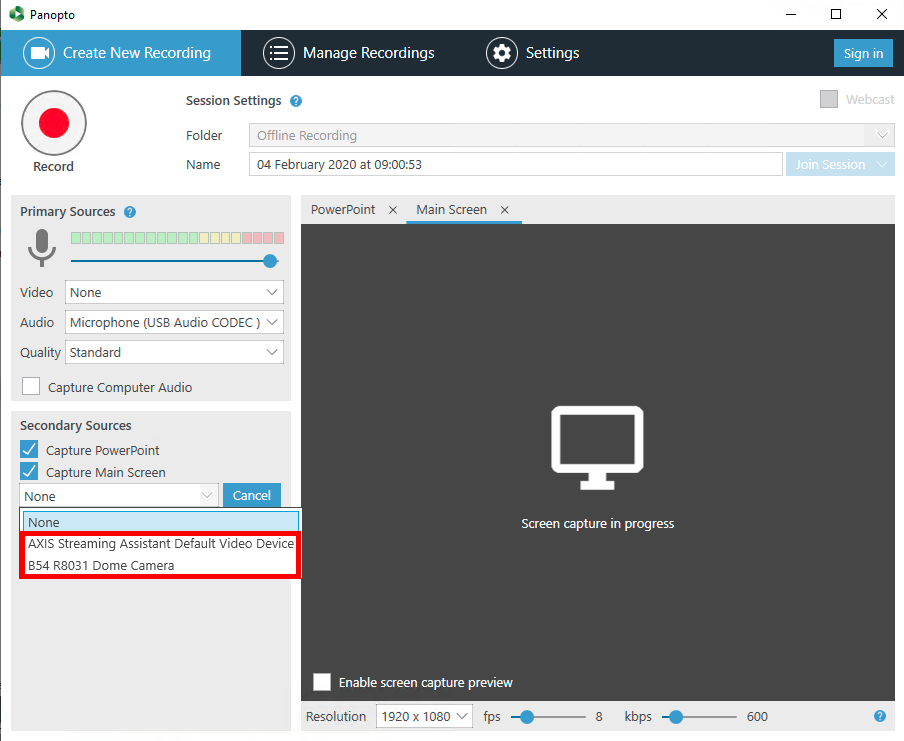
Once the Panopto recorder has loaded, perform the normal folder and audio checks. However this time, under ‘Primary Sources’ ‘Video’ make sure it is set to be ‘None’. Then select the blue button for ‘Add Another Video Source’.
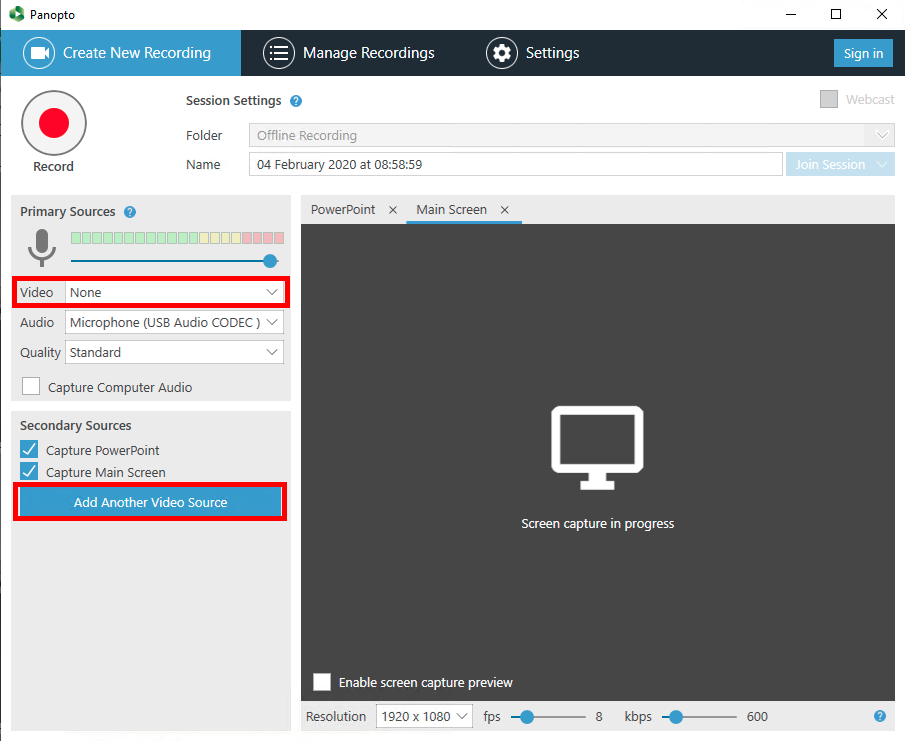
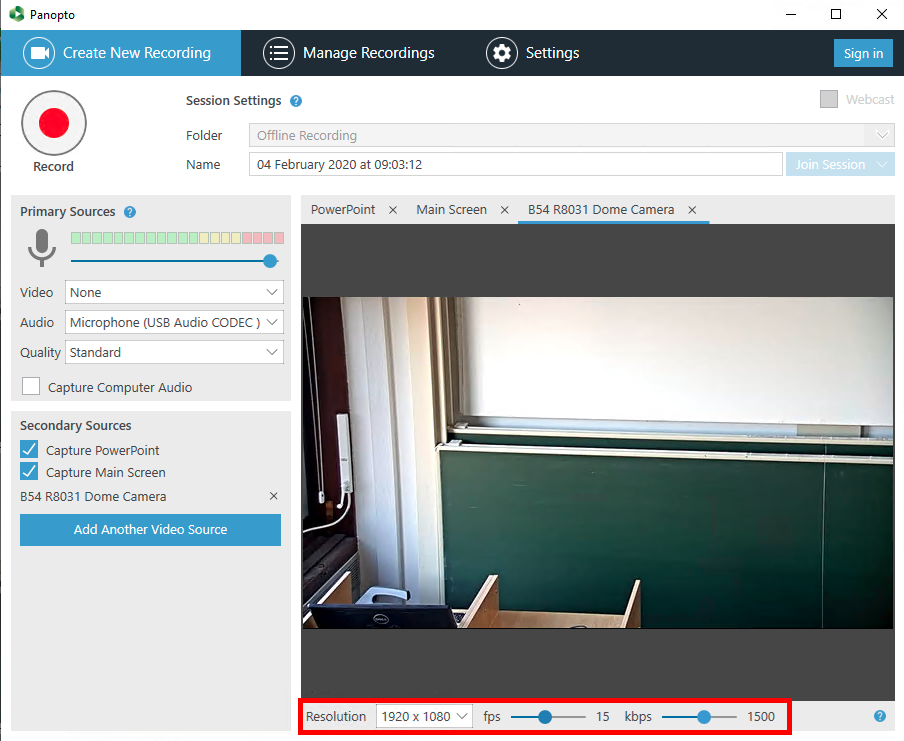
Once selected you should now see at least the option for ‘Axis Streaming Assistant Default Video’, or the camera name as a location ‘B54 R8031 Dome Camera’. Select either one of these options.
Now increase the slider for the camera ‘Resolution’ to be 15 fps and check that the kbps is around 1500, this will maximise the capture quality without overloading the recording PC.
The camera can be repositioned, going back to the camera control page, select the camera position that looks to capture the best area. You will then see that the camera feed on the Panopto recorder instantly repositions itself to the new view as you select an option.
You are now ready to record your session as normal on the Panopto recorder. You may wish to close the camera movement page, or if you keep the page open you can reposition the camera to any other preset you like as often as you like.
Recording and Pausing
Recording
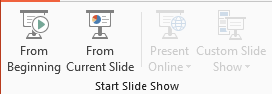
When you are ready to record
- Press “Record” on Panopto
- Start the slideshow in PowerPoint (if required)
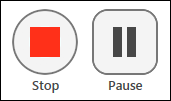
- Once you have finished your recording press the Stop button
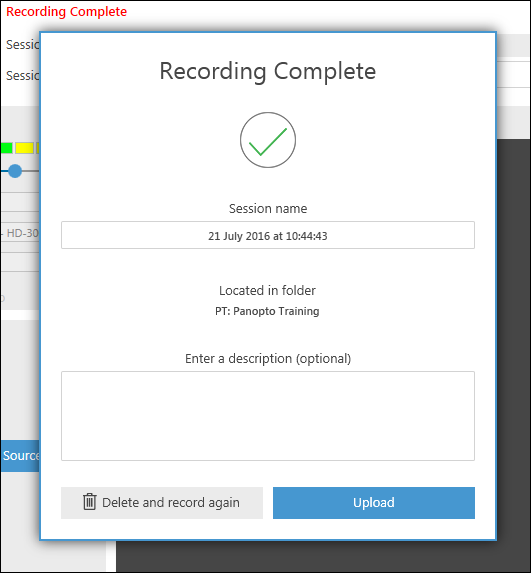
- You will then be given the opportunity to rename your session or add a description
Pausing
Pressing pause does not stop Panopto from recording. Instead it automatically tells the editor to remove the paused section before making the session available to students.
Uploading
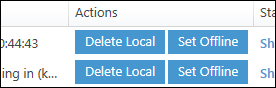
The progress bars show the recording uploading to Panopto. Once the bars disappear, the recording is being processed by the server.

If your material is confidential, you may wish to wait until the upload has completed and select “Delete Local” to remove the local copy of the presentation from computer’s hard drive.
If using a lecture theatre PC, Panopto will continue to upload the presentation even if you log out of the computer, although you should not turn off the computer. If you are not on a lecture theatre PC, you will need to wait for the upload to finish before logging out.