This guide shows how to add a menu item weblink to Panopto on your Blackboard course that can point to any Panopto folder. This can be done multiple times, so you can have multiple menu links to different Panopto folders.
Start by loading up your Blackboard course that you wish to add a Panopto folder to.
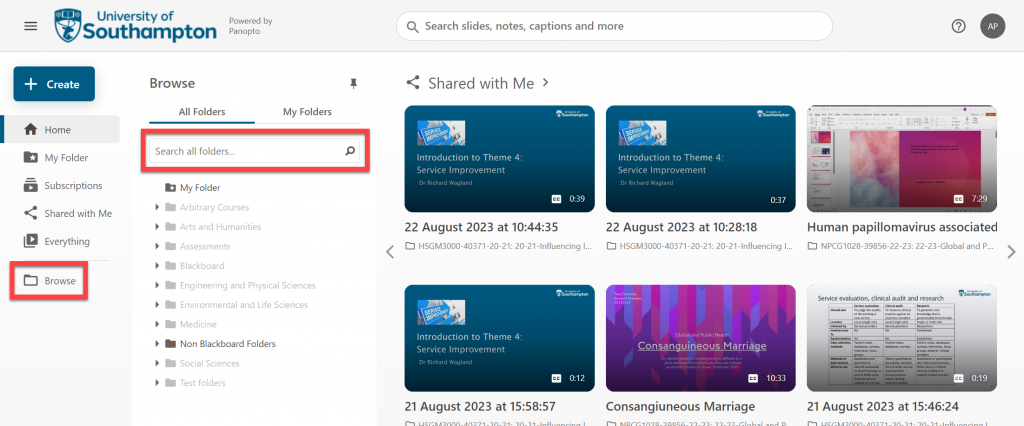
Next load up Panopto directly you can use this link: https://southampton.cloud.panopto.eu/
Once Panopto has loaded select the ‘Browse’ folder icon from the left menu. A new browse blade will show, at the top of this blade is a search box, in here type in the name/module code of the Panopto folder you wish to add.
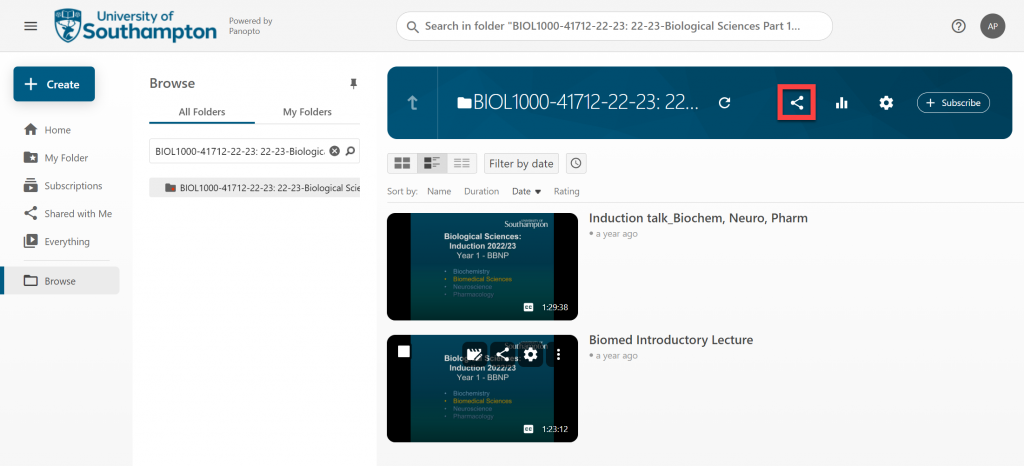
When you have selected your folder from the search list and it has loaded, look to the top folder icons and select the ‘Share’ icon.
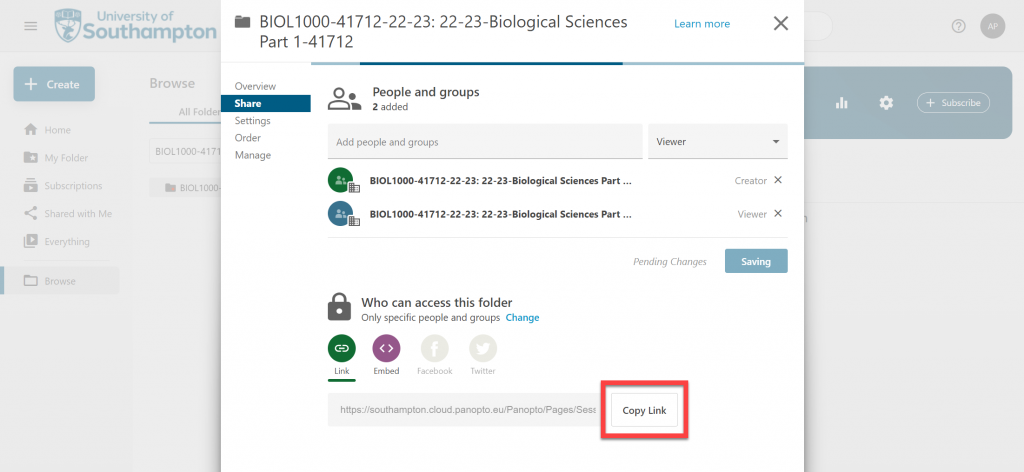
When the share page has loaded, look towards the bottom and select the button for ‘Copy Link’.
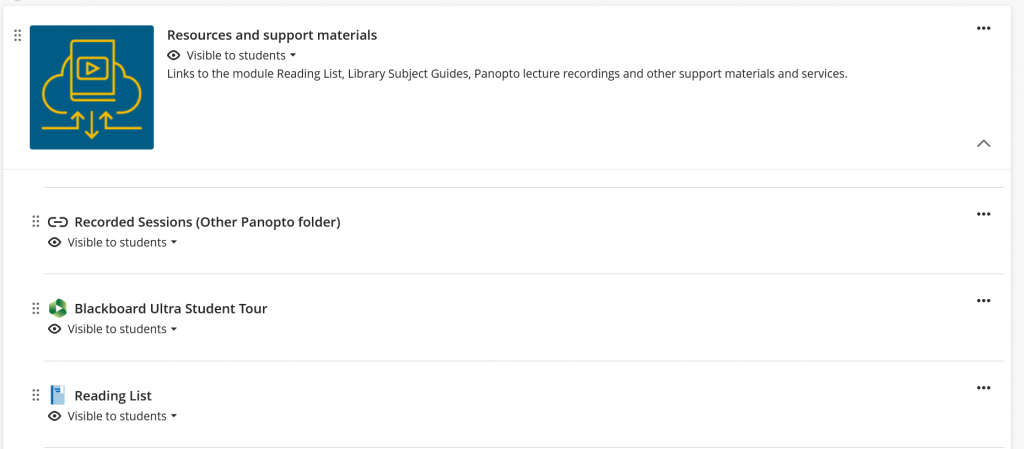
Now move back to your Blackboard course and from under the ‘Resources and support materials area’ in the top left, select the ‘Plus’ or ‘Pill’ icon to show some more menu options.
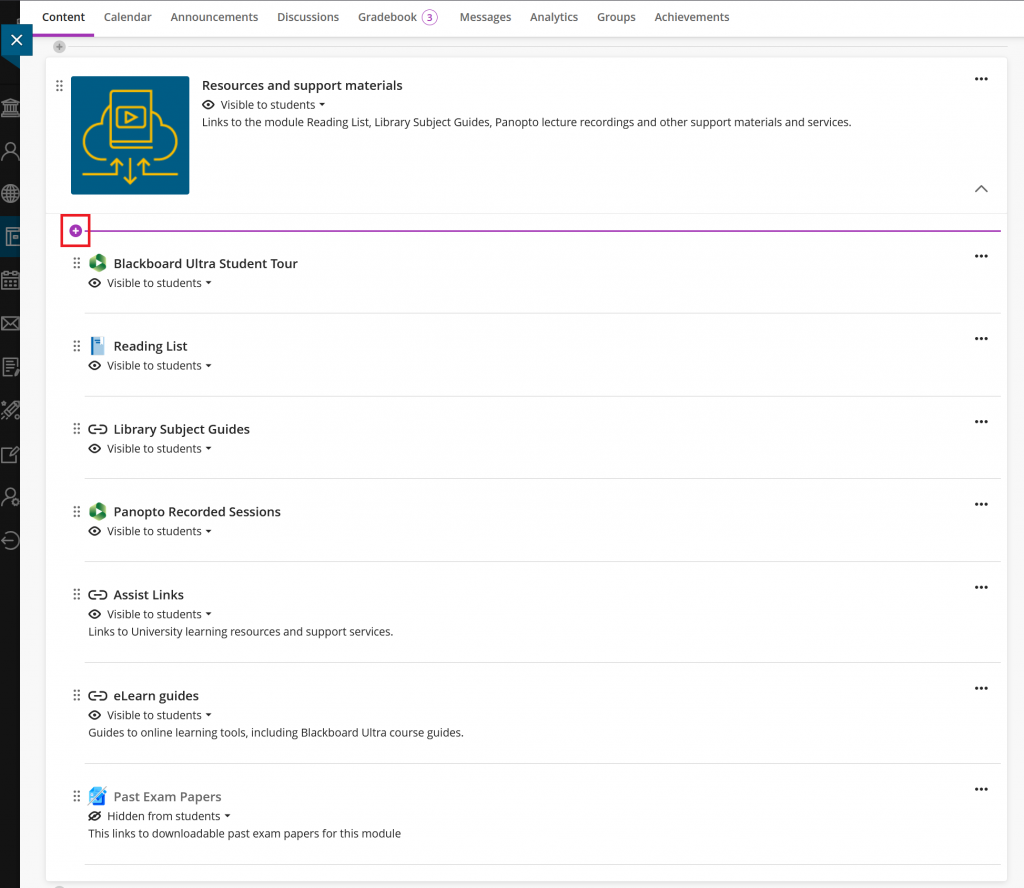
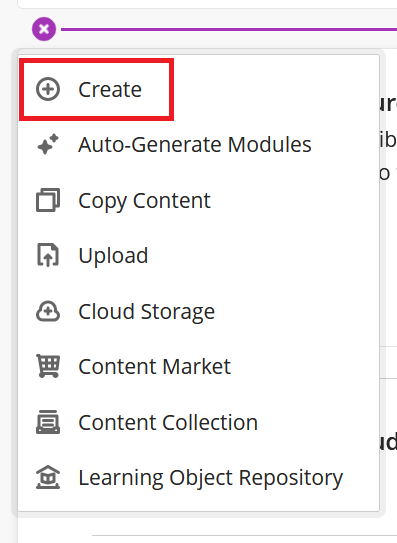
From the menu list that shows, select the ‘Create’ button.
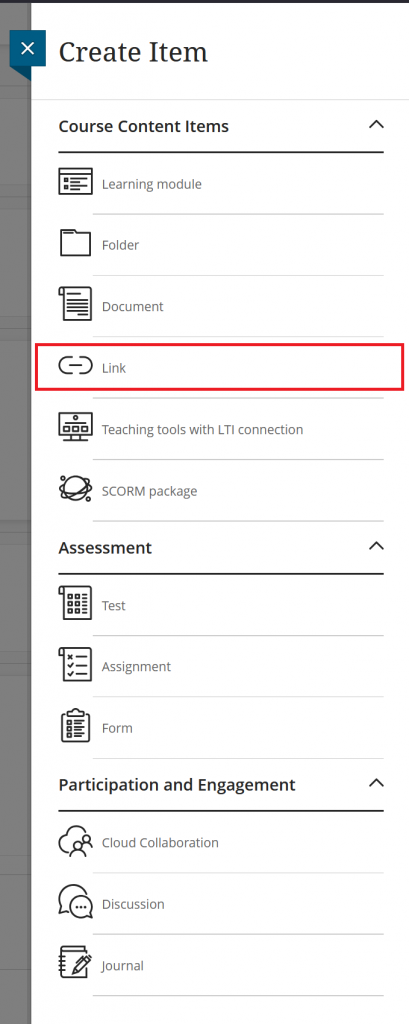
A new menu blade on the right will now show, from this list select the ‘Link’ button.
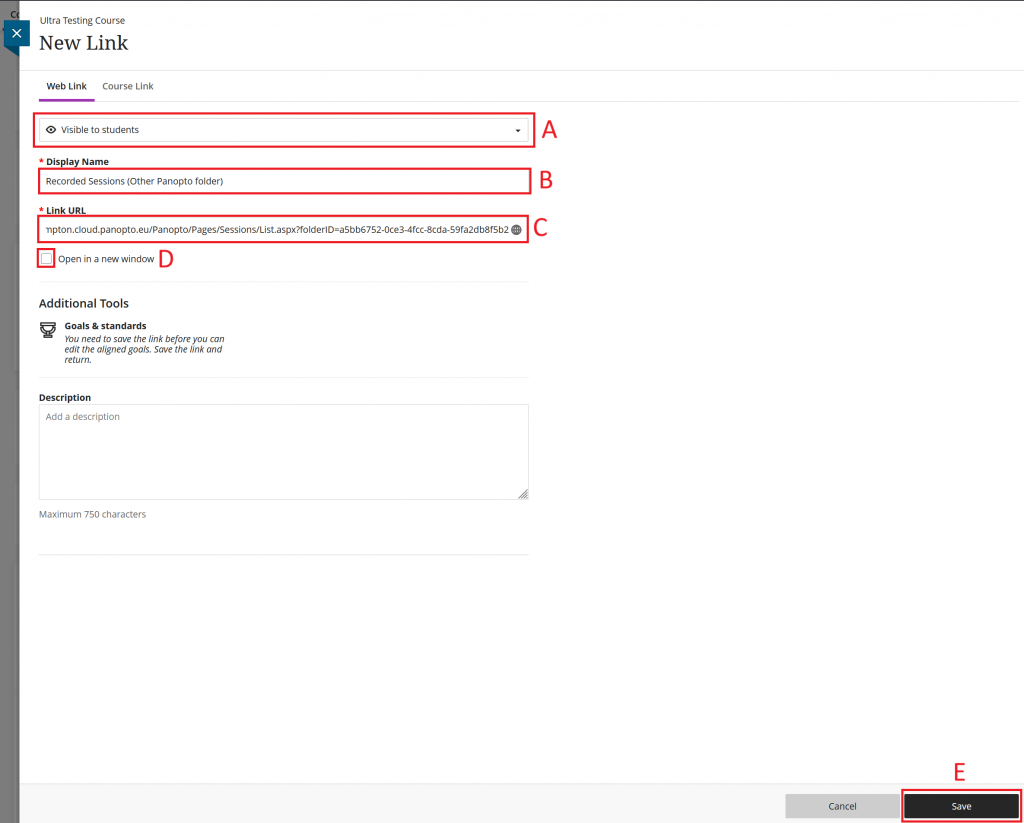
This will show the add new link menu option, and the link information for the Panopto folder can be added.
A) This is the visibility for students option; by default, it is set to be hidden to students. Change this to be visible to students.
B) Enter the name for the link that is being created. This should be on the line of ‘Recorded Sessions’ and additional context if it is for another course’s Panopto folder, and you plan to keep the current course’s Panopto folder as well.
C) Paste the Panopto web link that you have previously obtained.
D) Deselect the default tick, so that when students select the link it keeps them in the Blackboard course.
E) Once all the information has been checked, select the ‘Save’ button.
The link will show at the top of the content area by default; you can move this around if you prefer.