
Staff Guide: Set up your course using the template, enrol staff, and copy content from other courses using the 26-27 updated guidance.
Guide 1 of 3. These three quick set-up guides are designed to take you through the essential steps to getting your Blackboard teaching course ready for the next academic year.
Before you start: Key updates to the 2026-27 template and new rollover process (essential)
26-27 Blackboard module courses are provisioned with an updated template designed to support course design in line with student expectations and Blackboard Universal Standards.
What’s in the 26-27 template?
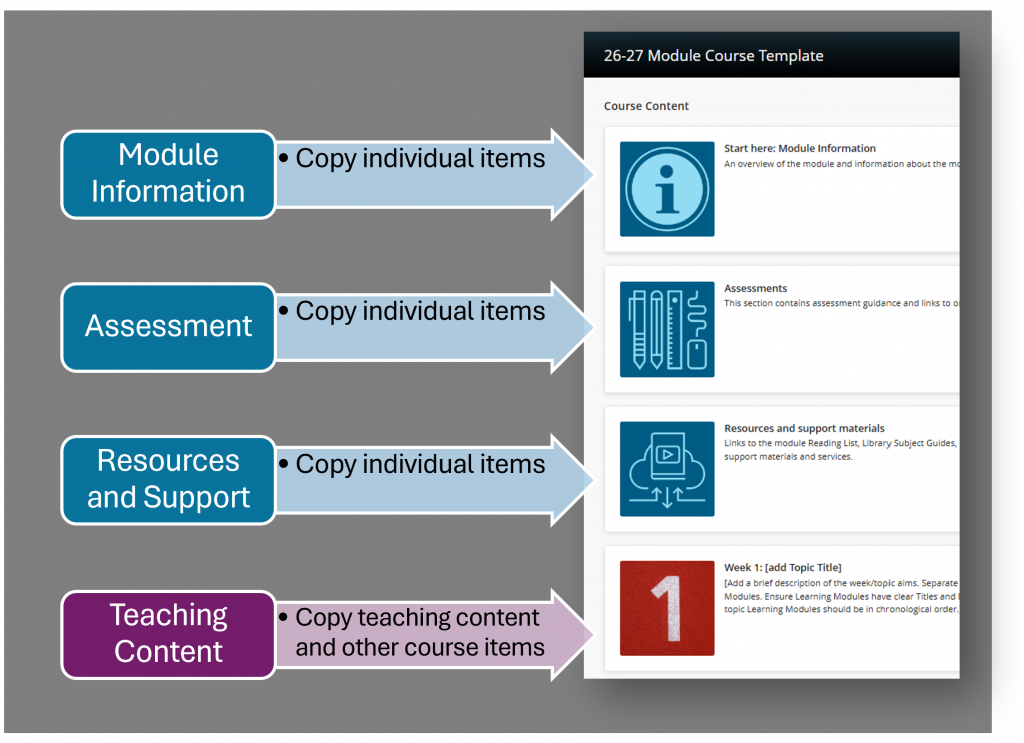
There are 3 core Learning Modules in the 26-27 template.
- Module Information.
- Assessment.
- Resources and Support Materials.
These have been updated for the 26-27 template, so don’t copy over the template Learning Modules from previous courses.
- Follow the guidance in the Quick Setup 2 guide to ensure your template is in place and contains all the key information and links students expect.

Why the course template matters to students
Students tell us they value consistency across modules.
- The Template helps them:
- Find key information quickly.
- Focus on learning.
- Also supports accessibility and inclusivity.
This academic year (2026/27), the use of the course template is encouraged and tracked.
New: Copy Content (Rollover) guidance has changed this year
Follow the guidance in the Copy Content section below and selectively copy content into the course template, using the 2-step approach:
- Step 1.
- Copy items selectively into the 26-27 Template Learning Modules.
- Only copy items you added or modified in last year’s Template.
- Step 2.
- Copy all teaching content.
- Copy other Course Items (Discussions, Announcements, Banner image..).
This process:
- Supports a consistent experience for students.
- Improves accessibility and usability.
- Reduces time spent fixing inherited issues during teaching.
1. Confirm you are enrolled on 26-27 courses
Courses linked to Banner modules are automatically created in Blackboard.
Who is automatically enrolled?
The Module Coordinator listed on Worktribe/CRUMS and the Primary Instructor listed on the Banner module delivery (if different), are automatically enrolled.
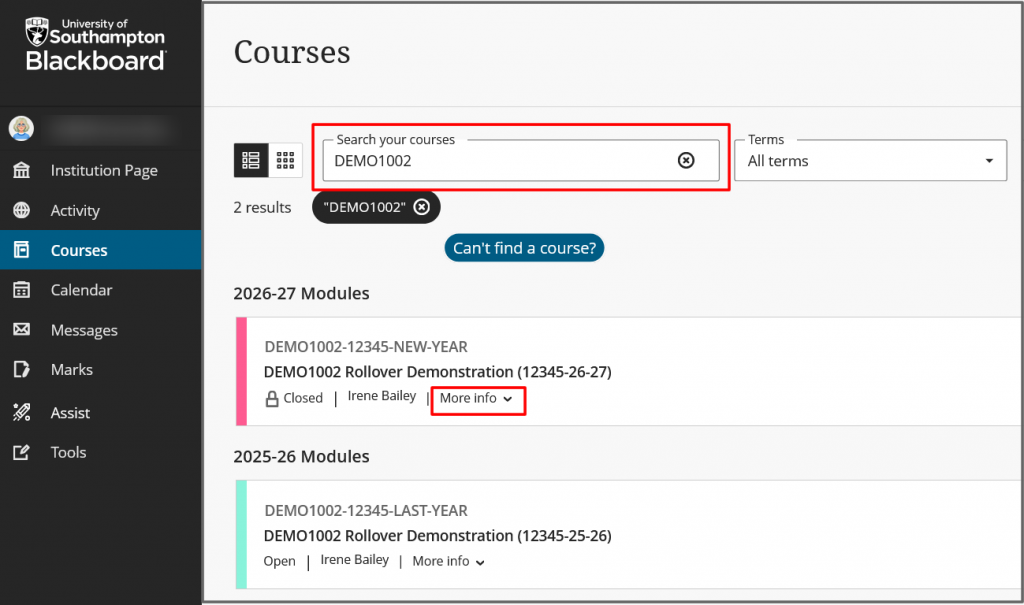
Find your module
- Search for your module in Blackboard and check that you are enrolled on your 26-27 course.
- Some modules have more than one delivery. See More information/Course Description for and delivery details, including campus, semester, and start date.
- NEW: following feedback from academic staff, we’ve added Campus terms, so you can clearly identify the correct campus course for your module.
- You can favourite your most used courses.
2. Check your course role and add other staff
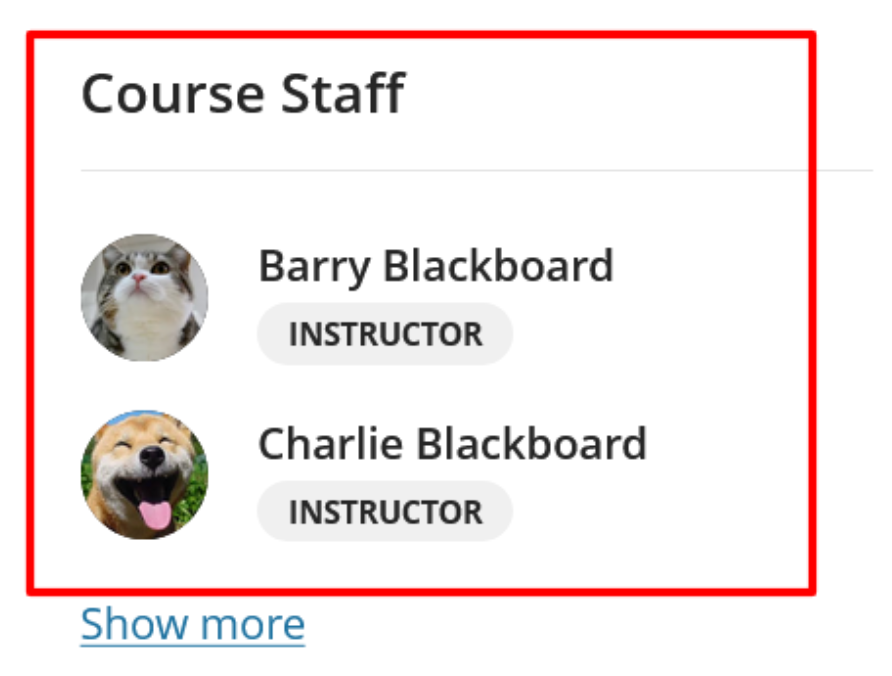
The Module Coordinator from Worktribe, and Banner Primary Instructor (if different), are auto-enrolled with the Course Role: Primary Instructor, and appear at the top of the Course Staff List.
- If you are the Module Coordinator, but not delivering the course, change your role to Instructor – hidden from students.
- Add other staff with an appropriate role:
- Only use the role of Instructor for academic staff directly responsible for teaching the course, as this role is visible to students in the Course Staff list.
- The role Instructor- hidden from students, has the same permissions as an Instructor, but is not visible to students.
- See the staff enrolment guide for details of available roles and permissions.
- Ask Instructors to update their Blackboard Profile to include an image and name pronunciation.
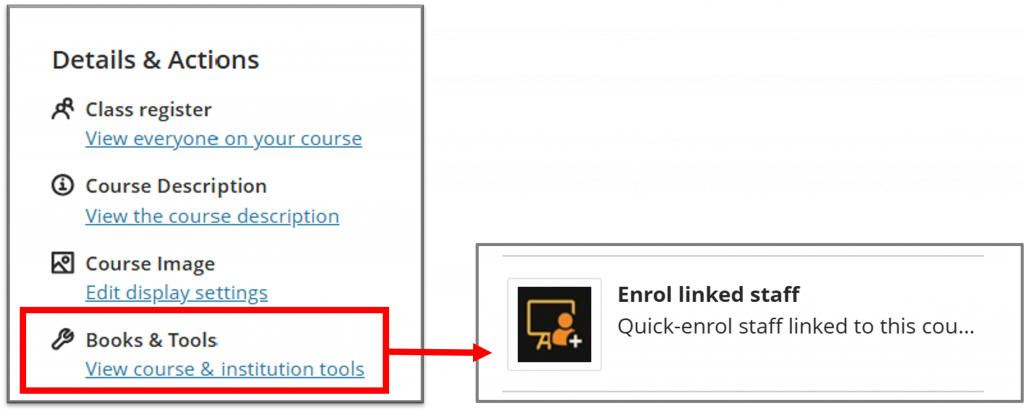
NEW: Use Enrol Linked Staff (in Books and Tools) to quickly enrol module staff from :
- Timetable (once the timetable is published).
- Worktribe (CRUMS).
- Last year’s Blackboard course.
3. Copy any content you want to reuse from other courses
Follow the updated guidance and Copy Content using the 2-step approach.
- Step 1.
- Copy items selectively into the 26-27 Template Learning Modules.
- Only copy items you added or modified in last year’s Template.
- Step 2.
- Copy all teaching content.
- Copy other Course Items (Discussions, Announcements, Banner image..).
4. Review copied content
You will need to:
- Remove duplicate template items.
- Delete and re-create Turnitin assignments.
- Check permissions on any embedded Panopto recordings.
See the next guide: Quick Set up 2, for further guidance on arranging and adding content to your Template.
5. Check you have a relevant course banner image
A course banner image will give your course page an identity and help students to locate the course in their Courses view.
- Add a Course Image if you see the blue holding image at the top of the Course Content page.
- The course image will automatically crop and resize for different devices, so avoid images with text.
- The Course title appears in the Banner, so no need to include this in the image.
It’s easy to add a banner image from the Unsplash image library or upload your own. You can also copy an image from another course.
Next Steps.
- Quick Set Up 2: Plan an effective course layout: review, replace, and create content.
- Quick Set Up 3: Check content and the student experience, welcome your students, and open your course.
Appendix
Need more support?
- See the Southampton eLearn guides for staff and student guidance on all online teaching tools.
- Blackboard’s help guides (be aware that some of our available tools and processes may be different at Southampton).
- Contact the iSolutions Education Services team via ServiceLine if you need assistance with Blackboard tools, processes, and course setup.
Rollover timeline 2026-27
Rollover is the annual preparation of Blackboard module courses for the next academic year.
- Early June: Courses linked to Banner modules are added to Blackboard.
- Blank course shells are created each year with an updated University Template.
- The Module Coordinator /Primary instructor is auto-enrolled from Worktribe and Banner.
- Prepare courses for teaching.
- The Module Lead or teaching teams follow any updated guidance to review and prepare courses. This includes copying content from previous years, creating new content, and updating template items.
- 26th June: Students are auto-enrolled from Banner.
- Students are enrolled after the release of semester 2 marks.
- New students will be enrolled 24 hours after they subscribe to their IT account.
- Students taking supplementary exams in the summer will have their Blackboard enrolments updated after the Supplementary marks release (September for most programmes).
- After 26th June: Courses can be opened for teaching.
- Open your course anytime after students are enrolled (26th June), and the content is ready.
- If you want to start teaching a 26-27 module ahead of the 26th June, contact your CQA team about a Split Module (NS module) in Banner, or raise a ServiceLine ticket for advice.
- Jan/Feb: Staff and student consultation for the 2027-28 course layout and guidance.
- Look out for news of how to give your feedback on the template and guidance for the next academic year.
Request a “Sandbox” course if you want to start planning ahead of time, before courses appear in Blackboard.
Raise a ServiceLine ticket if this timeline doesn’t fit with your delivery.
Glossary of terms
| Term | Description |
| Rollover | Rollover is the annual preparation of Blackboard module courses for the next academic year. |
| Blackboard Module/Teaching Course | Found on the Courses page in Blackboard and hosts all your teaching content for students. |
| Module Delivery | These are the dates when you are teaching this module e.g. Semester One, Full Academic year. |
| Blackboard Programme Course | A Blackboard Programme Course can support Programme Leaders to open a communication channel, develop an online community with students, and share programme-level content. |
| Blackboard Learning Module | A Learning Module contains a section of teaching content e.g. week 1 teaching; assessment information. |
| University Template | The content that is automatically added to new taught courses created in Blackboard. |