Blackboard allows you to add a “page” to your course. Student users must click on the link to view the page. “Pages” are different from “items” in that the text of items is shown within the parent folder while the text of a page is shown only once the page is opened.
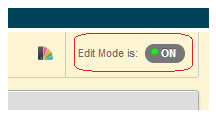
1. Check that Edit Mode is turned ON. This can be switched by clicking ON or OFF.
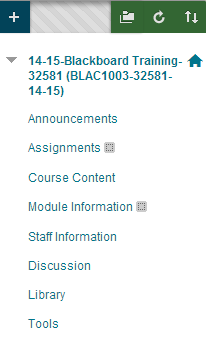
2. Choose the Content Area into which you wish to add your content. All the content areas work in the same way, if you have renamed or added content areas to your Blackboard course the screenshot above may vary from what you see.
3. Hover your mouse pointer over Build Content and then click on Blank Page.
4. Enter the title of your page.
5. Pick a colour for the title if you wish.
6. Enter the page content.
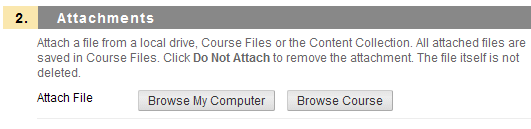
7. Add file attachments if you wish.
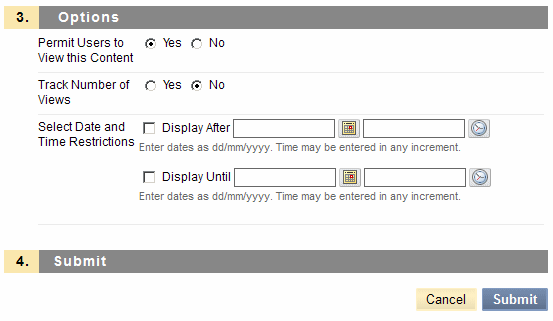
8. Set the options according to your preferences.
Permit Users to View this Content
Do you want students to be able to access this content? Selecting No would prevent your students from viewing it, but you would still be able to view it while Edit Mode is ON. The date restrictions option below is a more powerful way of doing a similar action. The default for this option is Yes.
Track number of views
Select Yes to indicate that the system is to track the number of times a user accesses this item. Select No to indicate that the number of times this page is accessed will not be tracked. Only use this option for materials for which you particularly require tracking information. A general report on Course Statistics provides tracking information for the whole course and is available from the Control Panel. For more information about this feature check the link on the right under “What’s Related”.
Select Date and Time Restrictions
If you wish you may restrict when this content will appear. Tick the boxes and determine times and dates as appropriate. Ticking Display After will mean that the content will appear from the time and date that you select. Ticking Display Until will mean that the content will no longer appear (disappear) after the date and time selected has passed. This only affects the way the material appears to students. As a course instructor you can change this setting at any time and the content will always be available to you.
9. Click on Submit to finish.