Using Course Files you may add a batch of files to your Blackboard course at once.
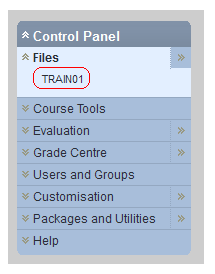
1. From the Control Panel click on Files and then either the right pointing arrow or the course id (shown in screenshot).
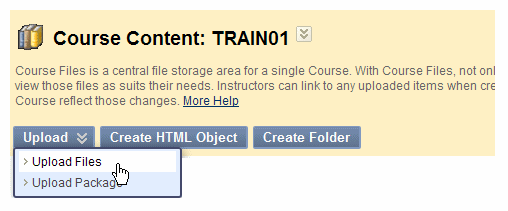
2. Hover your mouse pointer over the Upload button and select Upload files.
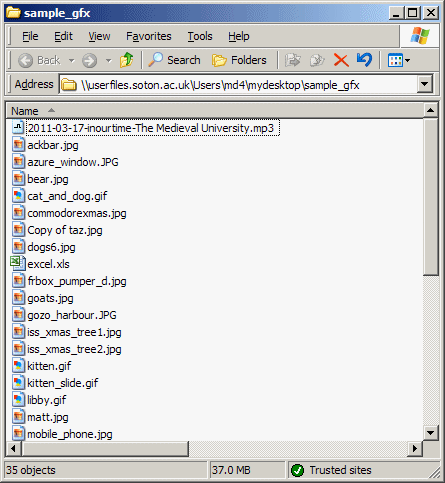
3. Outside of Blackboard open the directory/folder on your computer that contains the files you wish to upload.
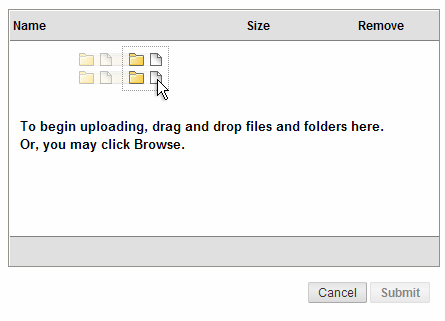
4. This is the box now shown in your Blackboard screen.
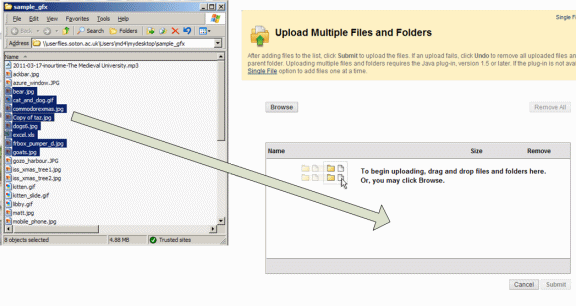
5. Drag and drop the files from your computer into the Blackboard screen as shown.
6. You can continue to drop more files from other directories if you wish.
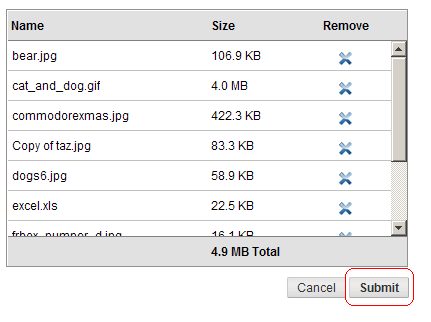
7. As you add files to the box their details are listed. If you wish to change your mind and remove a file click on the corresponding X icon beside it.
8. Click on Submit to upload the files to your course’s Course Files area.
9. The files are now in the Course Files area.

10. The next slides will show you how to add any number of files from the Course Files area into a content area.
11. When you add an item or file you should see two buttons. Use Browse Course to attach files that you have uploaded to the Course Files area.
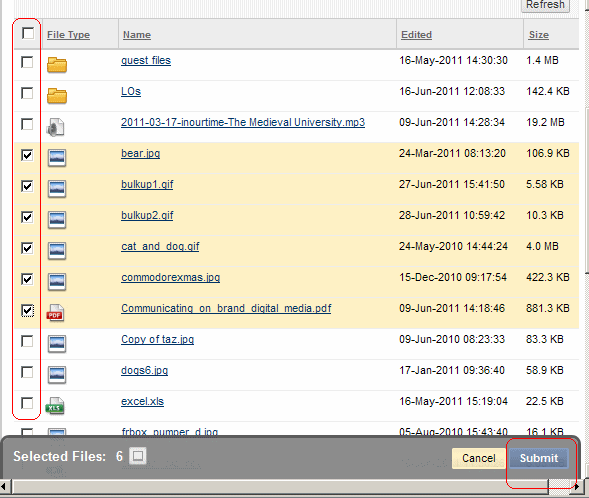
12. When you click on Browse Course a new window appears that shows your Course Files. Use the tick boxes to select the files you wish to attach. Note that there is a “select all” tick box too.
13. DO NOT select a folder. There is a bug in the current version of Blackboard that occurs when a folder is selected which will give students extra access to your course files area and present options that they should not see. They may be able to bypass adaptive release rules or view content not yet made available to them. This bug has been reported to Blackboard and will be fixed in an upcoming service pack.
If you wish to add a folder full of files, instead go into the folder and use “select all” on the files within it.
14. Click on Submit to finish.

15. You may be asked to confirm that by adding a link to these files you are allowing members of the course to read them. Click Ok.
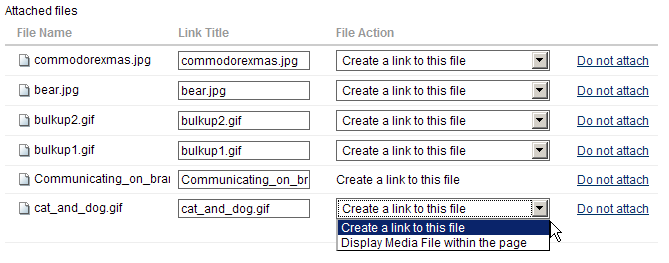
16. Back at the add content page you will see the list of files. You can choose to edit the link titles and file actions if you wish.
17. Fill in the other information as usual and click on Submit.

18. The files will be added to your course.
