Creating a Wiki
Please see Blackboard help for Wikis.
Layout
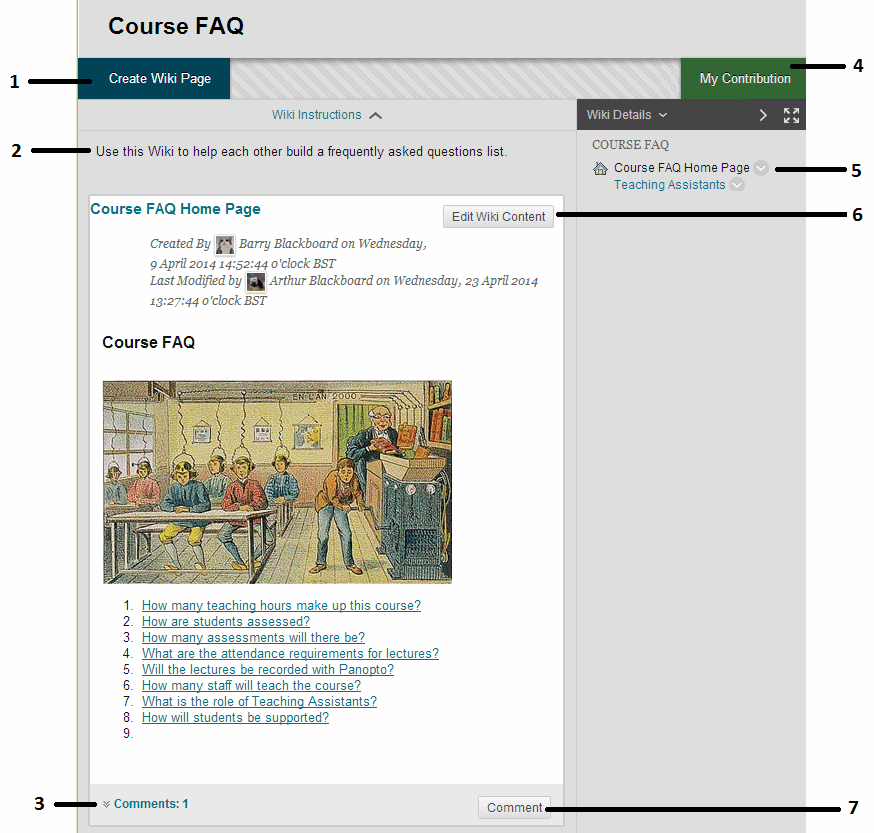
2. After the initial first page has been created a wiki will look something like this. Here follows an explanation of the icons and buttons.
1 – Create Wiki Page
Use this button to create a new page in the wiki. Once the page is created you can then edit an existing page to create a link to this new page.
2 – Instructions
Any instructions entered by the course instructor will be shown here.
3 – Comments
This shows if any comments have been added to the page. Click on the downward pointing arrow to reveal comments.
4 – My Contribution
Clicking on this button will show some details about your usage of the wiki. This information may not be 100% accurate due to technical reasons.
5 – Page list
All pages of the wiki are shown here. A modify button is beside each one. Clicking on this button brings up a menu allowing you to edit the page or review the history of how it was made.
6 – Edit Wiki Content
Click on this button to edit the current page.
7 – Comment
Click on this button to add a comment.
Adding a menu link
You can easily and quickly add a link in your course menu to the Wikis area of your course.
This will display all the wikis in your course including group wikis. This will make it easier for your students to find wikis, particularly if you have a number of wikis in different parts of your course.
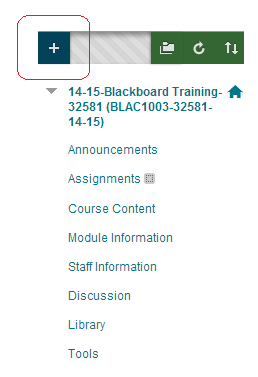
1. In your Blackboard course menu click on the [+] button.
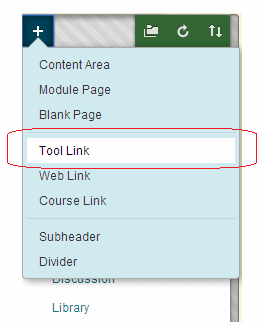
2. Choose Tool Link.

3. In the Name box enter text of your choice.
4. In the Type dropdown menu select Wikis.
5. Tick Available to Users.
6. Click on Submit.
7. If you wish you can move the menu item up and down the list by dragging with the up and down arrow to the left.
Marking Wikis
See Blackboard Help for grading Wikis.
Wikis in Groups
Group Wikis can be enabled when creating a Blackboard group. See the guide under what’s related for more information on setting up groups. If you have already made a group and want to enable a wiki for that group follow the guide below.
Be aware the group wikis are not private to the group unless chosen specifically.
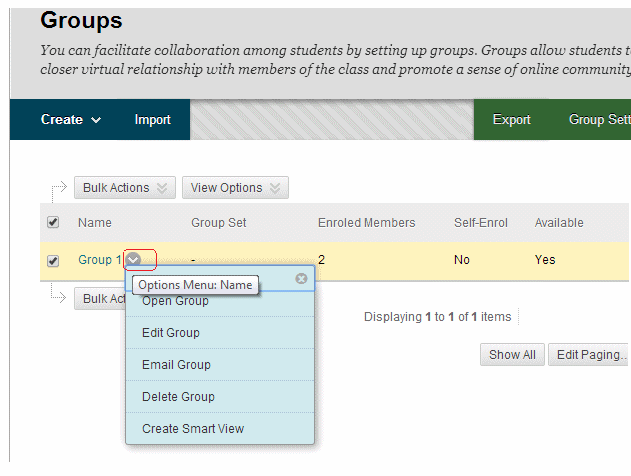
1. Find the group for whom you wish to enable wikis in the Groups area (found via Control Panel -> User and Groups -> Groups), click on the Modify button beside the group and click on Edit.

2. Under the Tool Availability section tick Wikis.
3. If you wish you can choose to have a Grade Centre column added for this wiki.
4. Click on Submit.
How to access Wikis
Group Wikis can be found in the following ways.
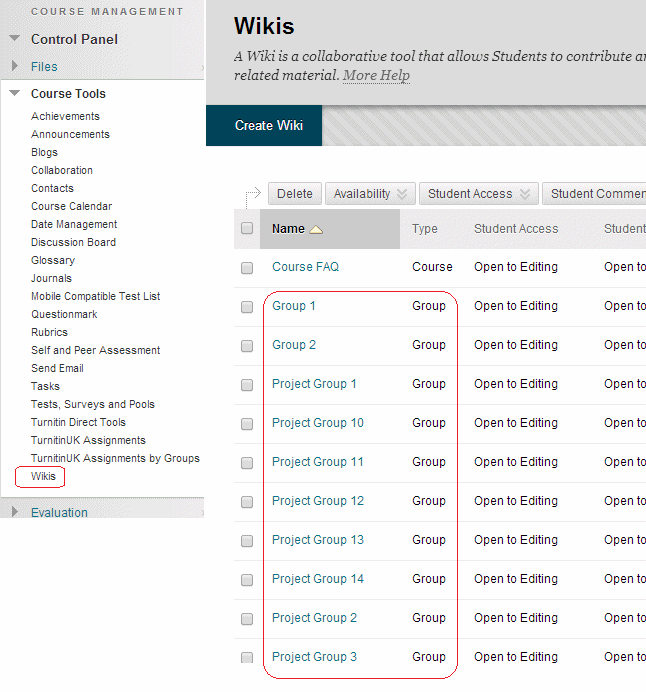
1) From the general wikis area accessed via Control Panel -> Course Tools -> Wikis. (This applies to Instructors only.)
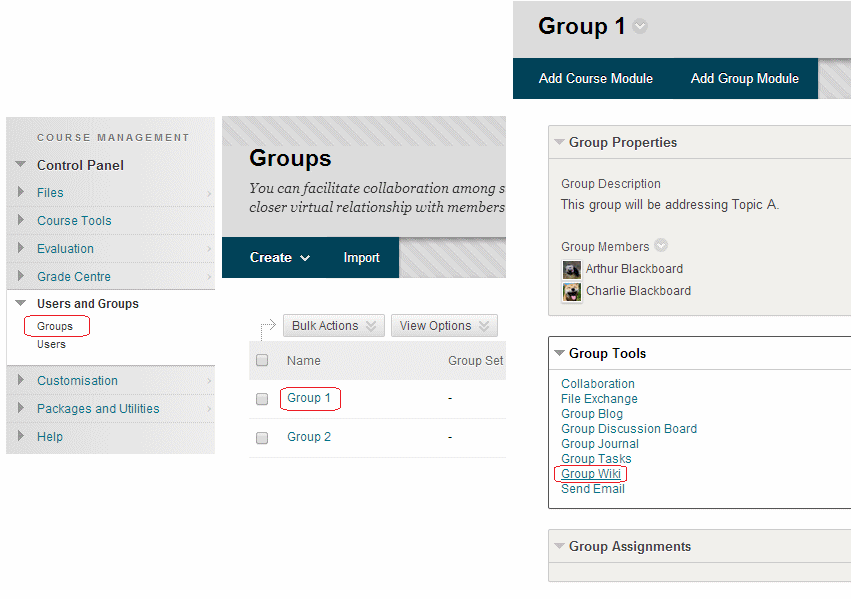
2) From the Control Panel – Users and Groups – Groups menu. (This applies to Instructors only.)
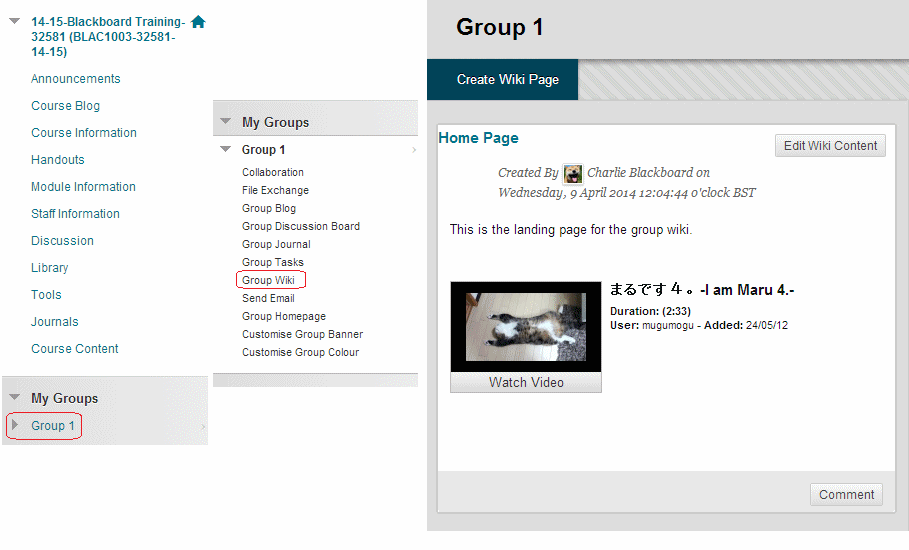
3) Students and instructors who have been made members of the group can access the wiki also in this way.
Note that if you wish to change the behaviour of the wiki a number of options are available. To get to these options follow these instructions:
Edit Wiki Properties
1) From Control Panel expand Course Tools and click on Wikis.
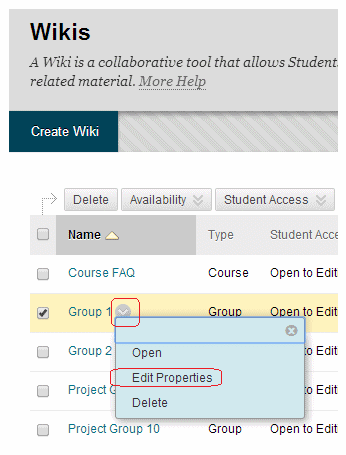
2. Identify the Wiki you wish to change and click on the Modify button beside it and choose Edit Properties.
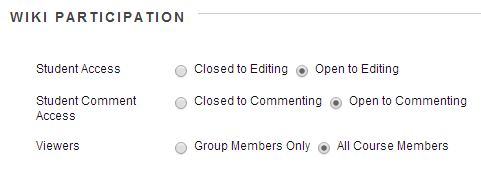
3. Scroll down to section 3 where the following options are available:
Student Access: whether students are able to edit the wiki or not.
Student Comment access: whether students are able to add comments or not.
Viewers: whether non group members can view the wiki or solely group members.