Staff Guide: Find and personalise a Blackboard Ultra course and check Enrolments
These three quick set-up guides are designed to take you through the essential steps to getting your Blackboard Course ready for teaching:
- Quick Set Up 1: Personalise your Course and check Enrolments.
- Quick Set Up 2: Plan the Layout and Add Content to your Course.
- Quick Set Up 3: Review Content and Engage with your Students.
- For more information on Assessment, see the Overview of Assessments eLearn guide.
This guide will take you through the steps to find your Blackboard module, check enrolments and personalise with a course image.
Find your 2025-26 courses
Blackboard courses linked to Banner modules are automatically created in Blackboard.
- Log into Blackboard and select the Courses menu to see a list of the courses you are enrolled on.
- Use the Search to find a course by name, module code, or CRN (5 digit reference number), or filter your list to a specific Term.
- You can favourite your most visited courses so they appear at the top of the page.
- New: See More information/Course Description for the course overview from CRUMS and delivery details, including campus, semester, and start date.

Can’t find a course?
Use the search bar to search for the course ID or name on Blackboard. The code at the top is the course ID and the longer text below is the course name. If you can’t see a course, clear your filters. If you still can’t see a course, select the Filters dropdown “Hidden from Me” then you can select the three dots and Show Course to put the course back in your Courses list.
Check Staff Enrolments
- Instructors will appear to students in the Course staff list, so this list should be accurate and contain only staff who directly support students.
- View and edit all course members via the Class Register.

New – Who’s enrolled on 25-26 Blackboard courses?
- You’ll be automatically enrolled as the Blackboard Primary Instructor if listed as the Module Coordinator in Worktribe (CRUMS), or Primary Instructor in Banner.
- The module lead, programme lead, or Blackboard course instructor/teaching assistant can add any staff member (with an appropriate role) to a course.
- All students continue to be enrolled on Blackboard courses via Banner.
Check Your Role
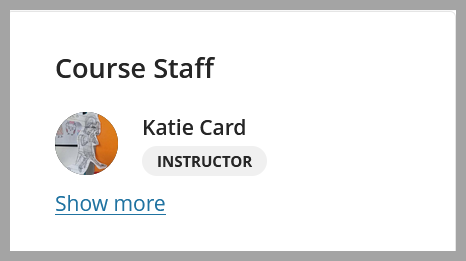
Staff enrolled on a course as an Instructor are visible to students under the Course Staff menu with the Primary Instructor appearing at the top.

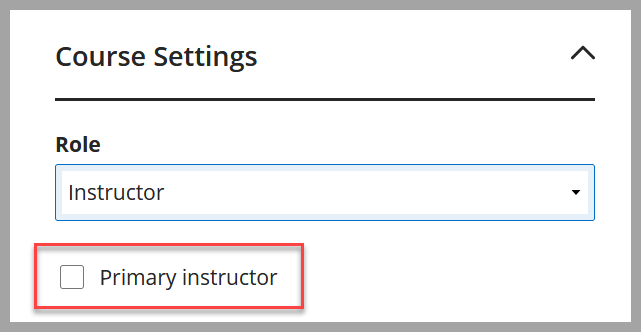
How to tick/untick yourself as the Primary Instructor
The Primary Instructor(s) appear at the top of the Course Staff list.
- Go to the Class Register,
- Select the three dots next to your name (Member Information).
- Under Course Settings, tick/untick Primary Instructor, then select Save.

How to change your role
You can request to change your course role if it is not appropriate.
- Any course Instructor, Teaching Assistant or Module Administrator can change your role, as well as any Programme Lead in your department.
- You can change to a more appropriate role, for example:
- Instructor – visible to students.
- Instructor – hidden from students (same privileges as instructor but not visible in Course Staff).
- Teaching Assistant – not visible to students.
- Course Builder – can edit content but has no view of student data.
Enrol additional staff
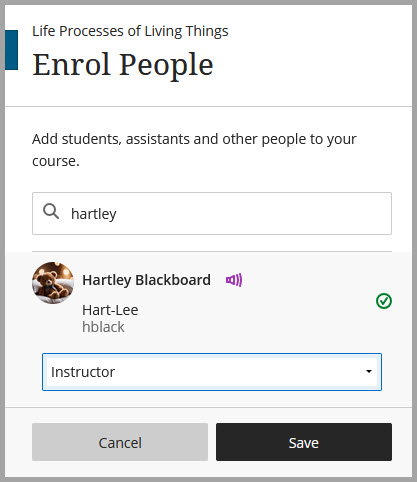
- Go to the Class Register, select the plus icon to Enrol People.

- Search for and add additional staff with an appropriate role.
- Select Save.

Some staff can use Staff Enroller to self enrol onto Courses, including Programme Leads, Auditing instructors, library staff and Learning Support Assistants.
Review student information, including Student Support Recommendations
How are students enrolled?
Students will be enrolled from Banner from the 1st July.
Merge enrolments: If you are teaching closely related courses, Blackboard enrolments can be merged into a single Blackboard parent course.
How to view student information
Use the Class Register to see who is enrolled on your course.
Go to Books and Tools to find:
- Photo Roster to view student photos, find ID numbers, and basic profile information, print and export class lists.
- Student Support Recommendations – it’s important to familiarise yourself with any so that you can support all students taking your module.

You can use the Ally report to make simple checks and changes to improve content accessibility for students.
Course Banner
If you are copying content from another course, the Course Banner will be copied over.
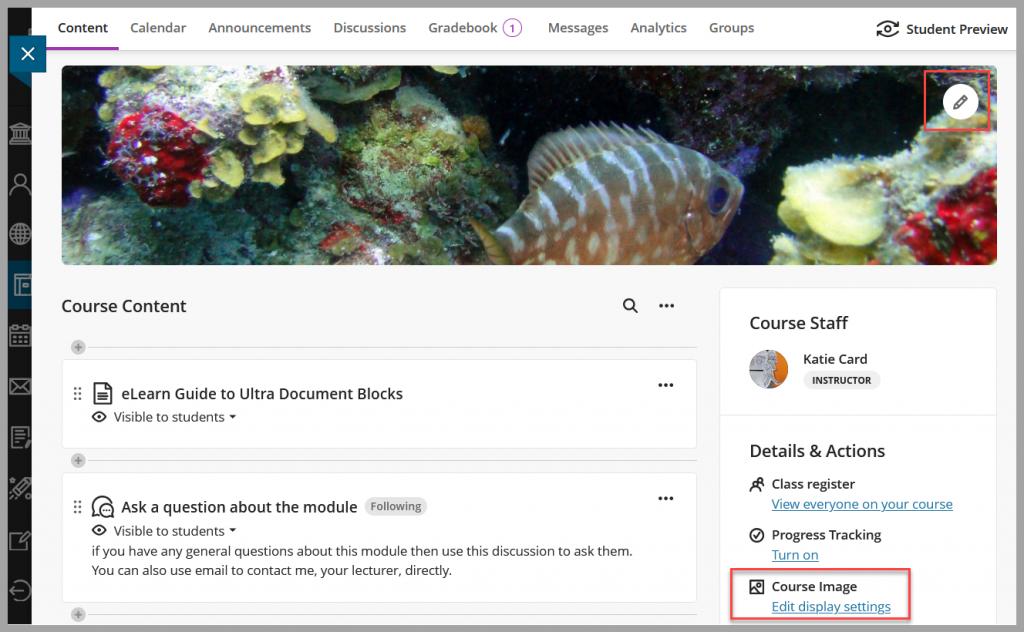
Blackboard Courses are provisioned with a generic course banner image, which we recommend you change to personalise your module with a relevant image. You can do this from your Course by selecting the pen icon on the Banner image or Edit display settings in the Details and Actions menu.

It is quick to search for an image in the built-in Unsplash image library, but you can upload an image or copy a Banner from another course.
You may also want to:
Merge Modules: If you are teaching closely related modules, Blackboard enrolments can be merged into a single Blackboard parent course.
Create Student Groups: Are you teaching via seminar groups or planning group assignments? Automatic groups for each student cohort are now created if you merge courses.
Personalise your Blackboard Profile: Have you added a picture or a name pronounciation so students can get to know you?
