Adaptive Release of Content provides controls to release content to users based on a set of rules you create. The rules may be related to date and time, individual users and groups, scores or attempts on any Grade Centre item, or review status of another item in the course.
Basic Adaptive Release allows for one rule per content item, although this rule can be based on multiple criteria.
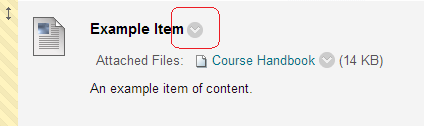
1. Begin by identifying the content item for which you wish to enable Adaptive Release
2. Click on the Modify button beside it.
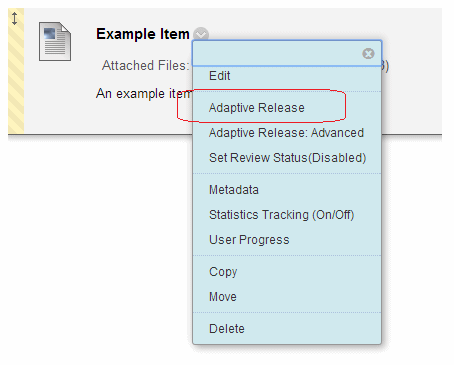
3. You should see a set of options like the one above. Click on Adaptive Release.
4. The criteria to choose from will be listed.
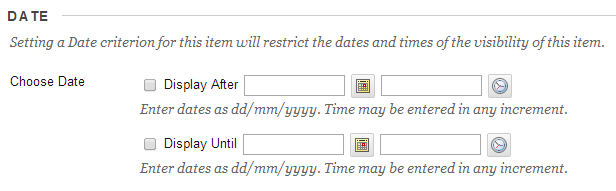
5. The first setting is date. If you wish to apply a date restriction to the criteria you can do so here.
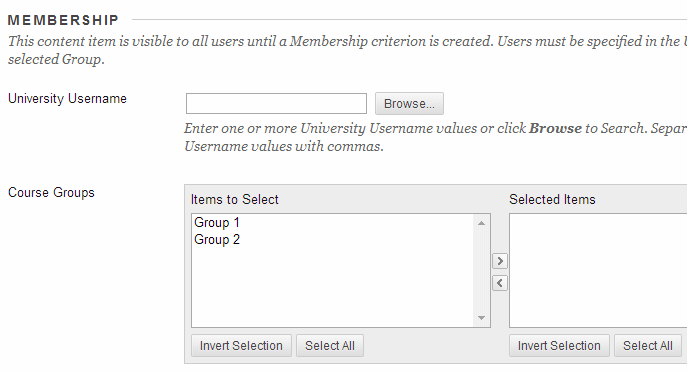
6. The next setting is membership. You can set this to restrict content to a user by their iSolutions username – you can click on Browse to find users on your course. Multiple usernames may be listed with a comma between them e.g. “abc123,def456,ghi789”.
7. If you have set up course groups you can choose to restrict access to course groups.
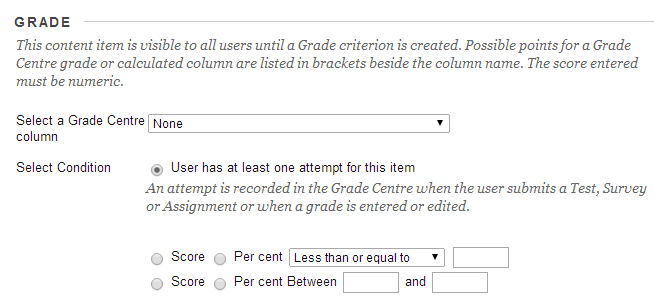
8. You can also restrict access by Grade Centre item, for example restrict the content item to students who have achieved a certain score in a quiz. If you wish to use this option, select the quiz concerned from the drop down list and then select the appropriate criteria.

9. It is possible to keep the item invisible to students until they mark another piece of content as “reviewed”. If you wish to use this option, use the Browse button to open a course map and then locate the piece of content that you wish students to mark as reviewed before the further content is viewable by them. This will turn on Review Status for the content item if it is not already enabled.
Further information on review status.

10. Click on Submit to finish.
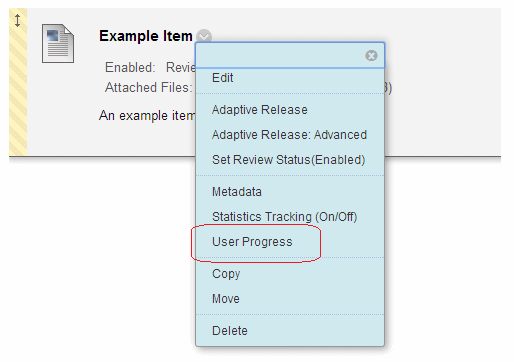
11. To see which material is viewable by students. Click on User Progress from the Manage options page.
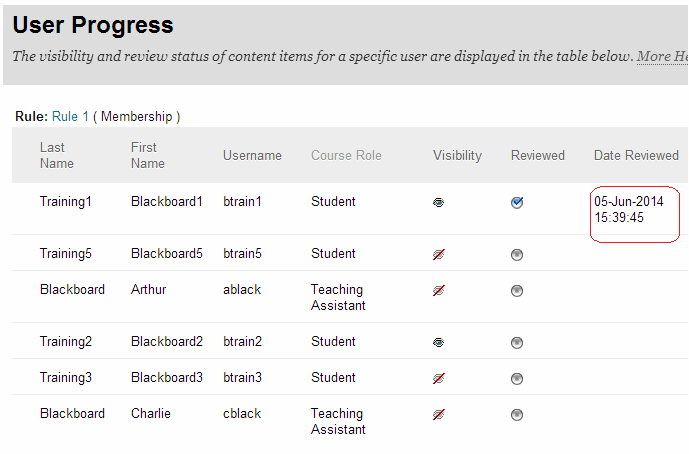
12. This screen shows content availability to each student on your course. A closed eye icon means the content is not currently visible to the student, while open eye icon means the content is visible to the student.