
This guide explains how to use MS Teams for large presentations or information sessions where attendees primarily watch and listen rather than actively participate.
It covers two approaches:
Create a standard Teams meeting and restrict attendee permissions when you want a meeting that behaves more like a presentation.
Create a Teams Town Hall for a dedicated one-to-many event.
Recommendations
If you intend to use one of these approaches for delivering a session, you should make sure that you have created a MS Teams Class based on your course’s Blackboard enrollments. This will make scheduling and inviting your students easier. We have an eLearn guide that shows the steps to do this.
It is also recommended that you activate the Teams to Panopto integration so any meeting videos from a course are automatically uploaded to Panopto.
Standard Teams meeting with restricted participation
The first step is to create a Teams meeting through Teams itself rather than Outlook; this is so the fine-tune options can be done pre-meeting. This can be done via the Teams calendar or via a Blackboard enrollments-created Team. Create a meeting as normal, then select ‘More options‘.
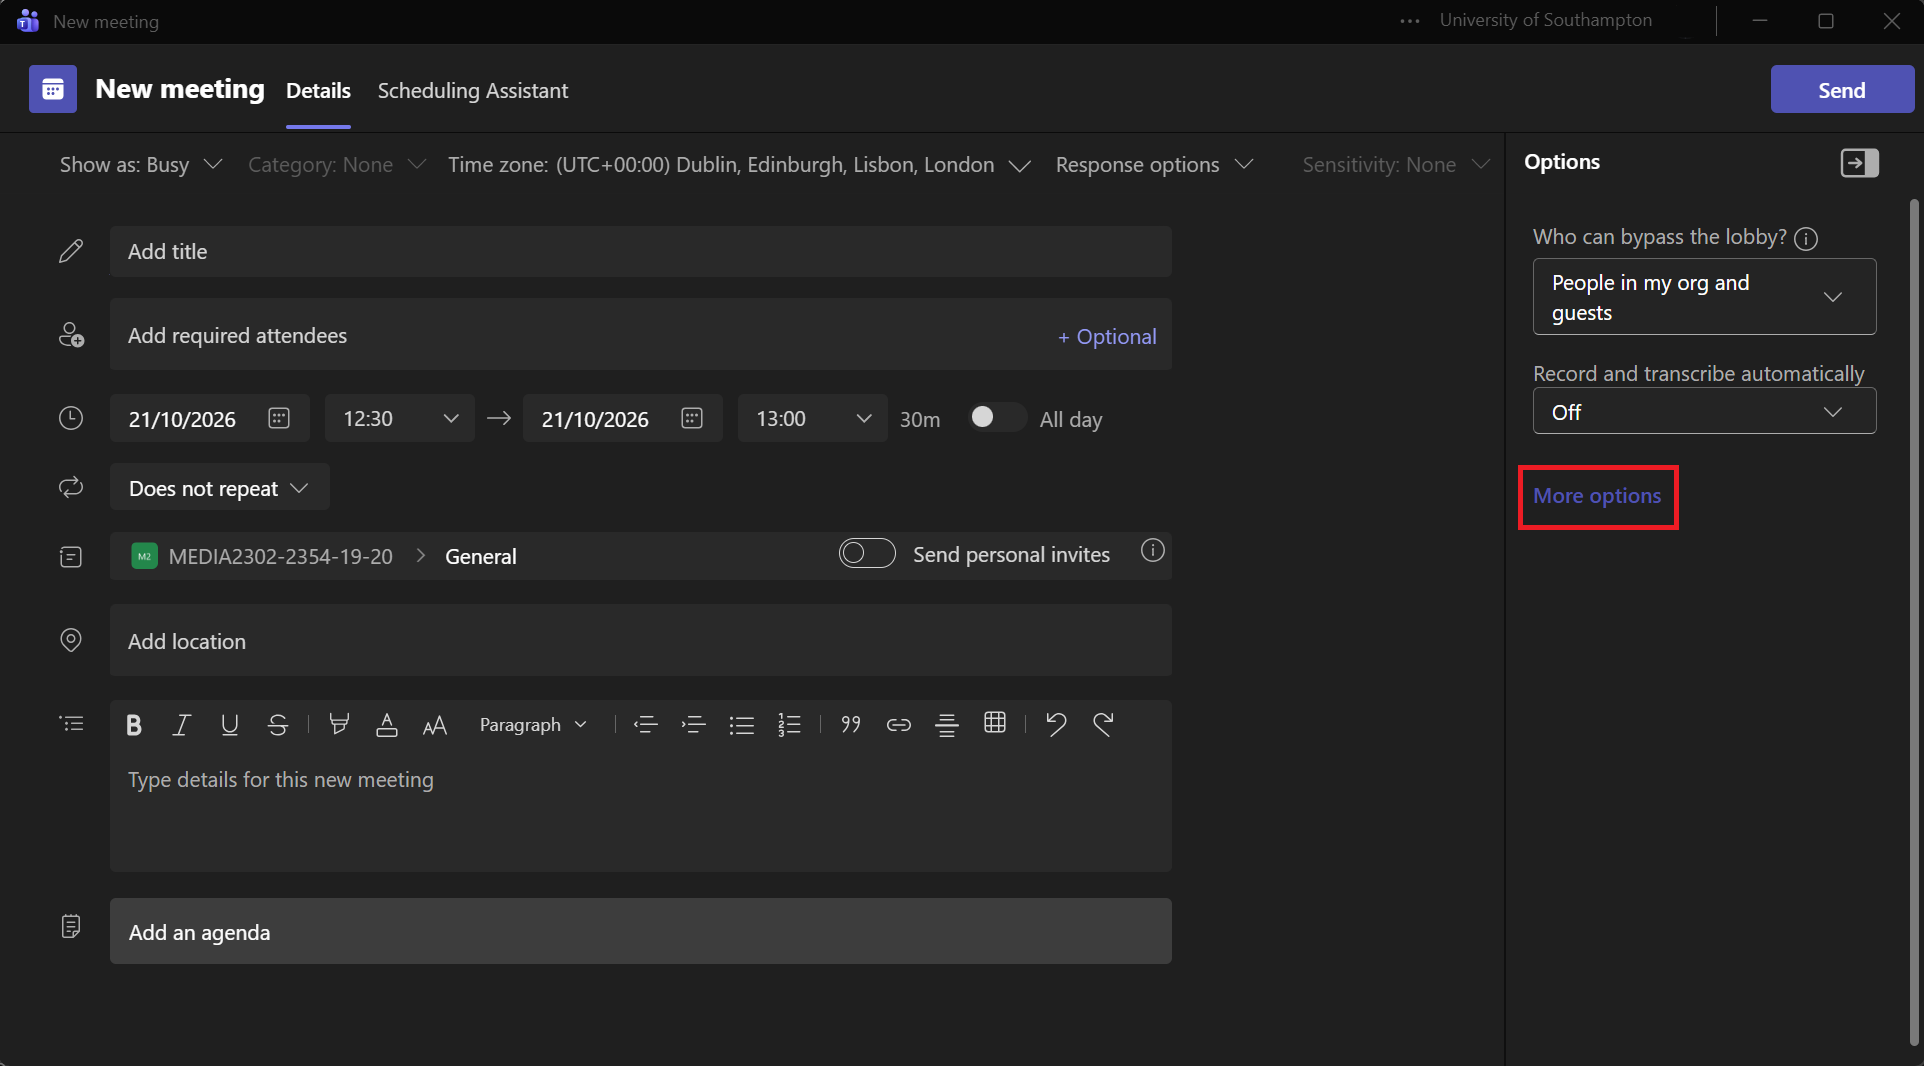
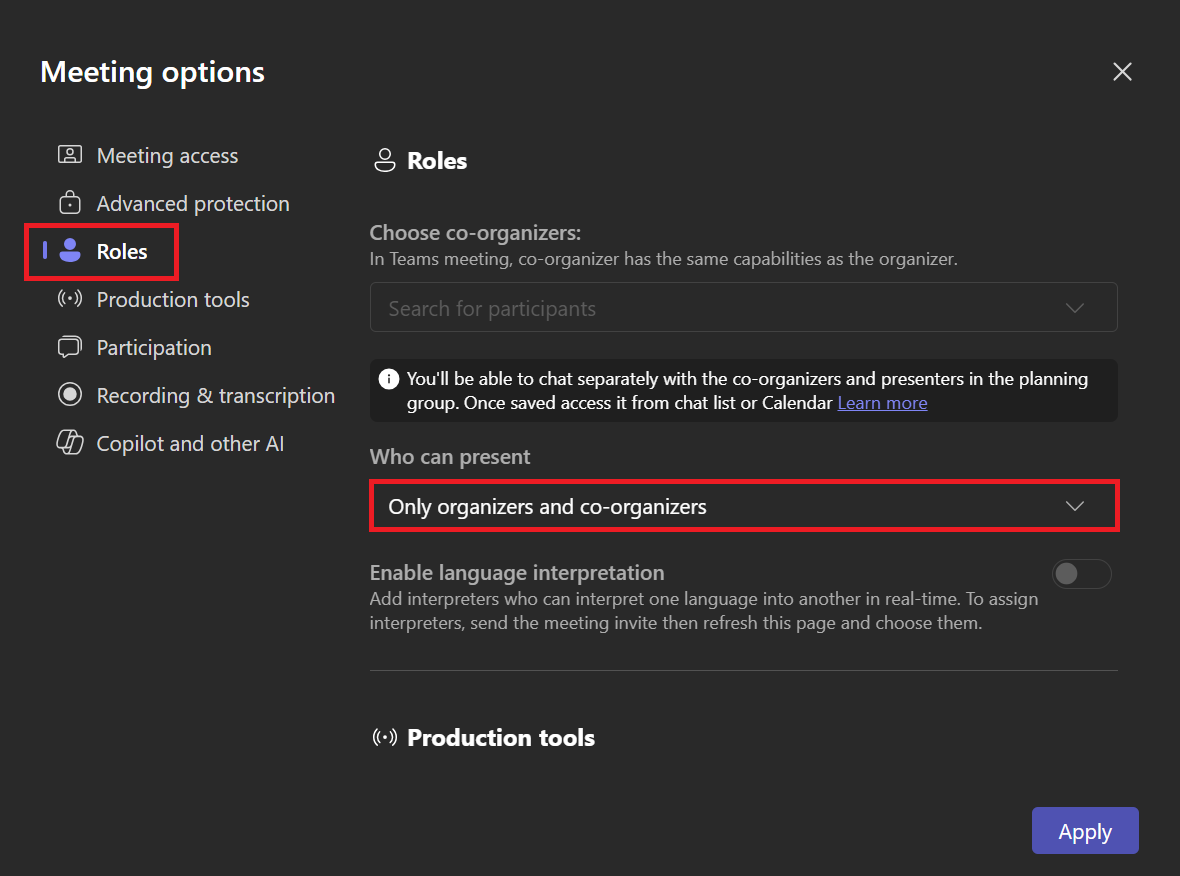
A new window will show for ‘Meeting options‘. On this window, select from the left list ‘Roles‘. When the ‘Roles‘ area shows, look for the dropdown menu under ‘Who can present‘, and select the option for ‘Only organizers and co-organizers‘. This stops students from taking over the screen share or presenting their own feed.
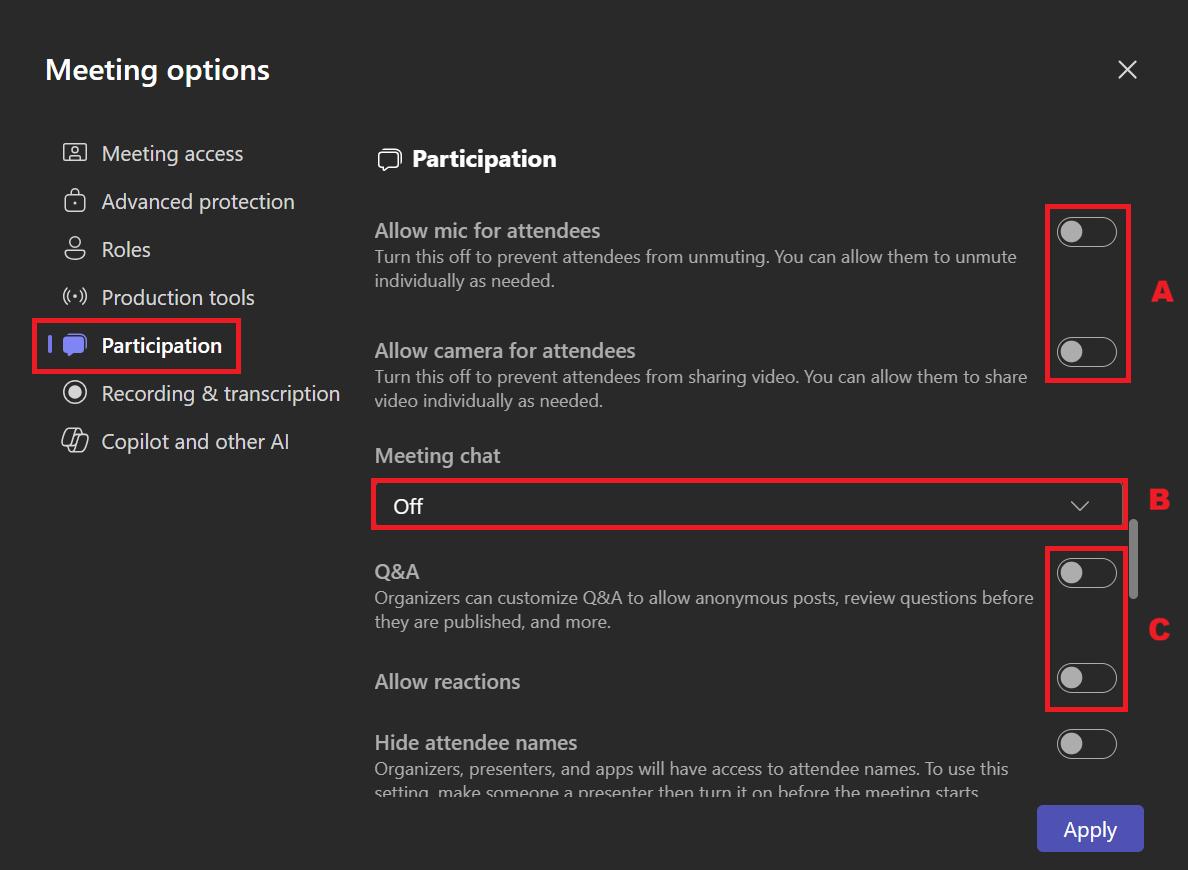
Select ‘Participation‘ from the left-hand menu. Turn off ‘Allow mic for attendees‘ and ‘Allow camera for attendees‘, then set ‘Meeting chat‘ to ‘Off‘. Turn off ‘Q&A‘ and ‘Allow reactions‘.
Once you have made all of the setting changes, you can then select the ‘Apply‘ button in the bottom right of the window, after which it will take you back to the meeting creation area. You can then invite attendees as needed and send the invitation out.
Town Hall
A Teams Town hall is designed for structured one-to-many events where attendees primarily watch and listen. It can be useful for large sessions or where you want to restrict attendee interaction.
To create a Town hall, open the Teams calendar, select ‘New‘, then select ‘Town hall‘ from the drop-down menu.
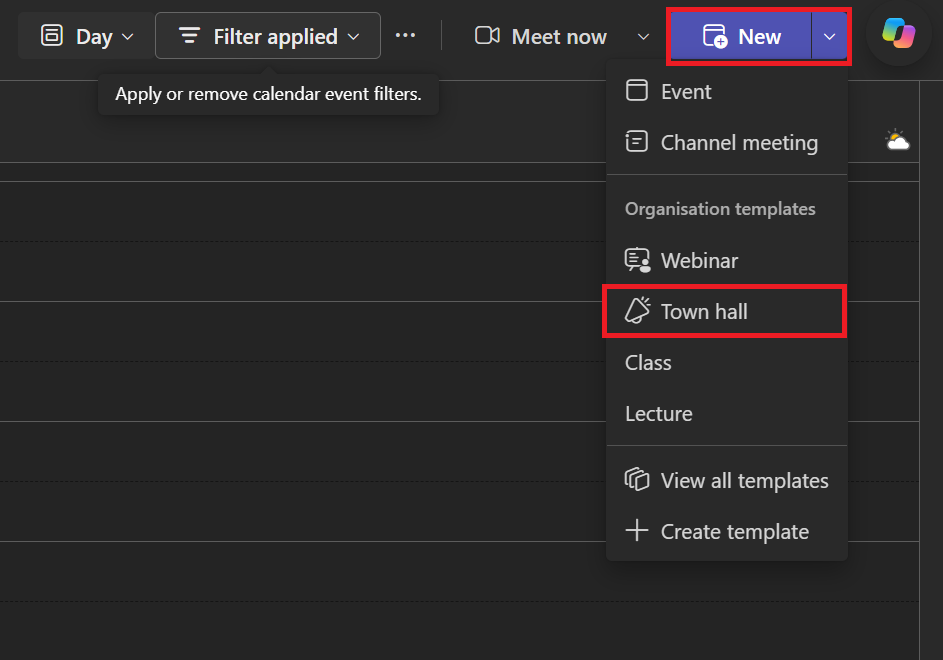
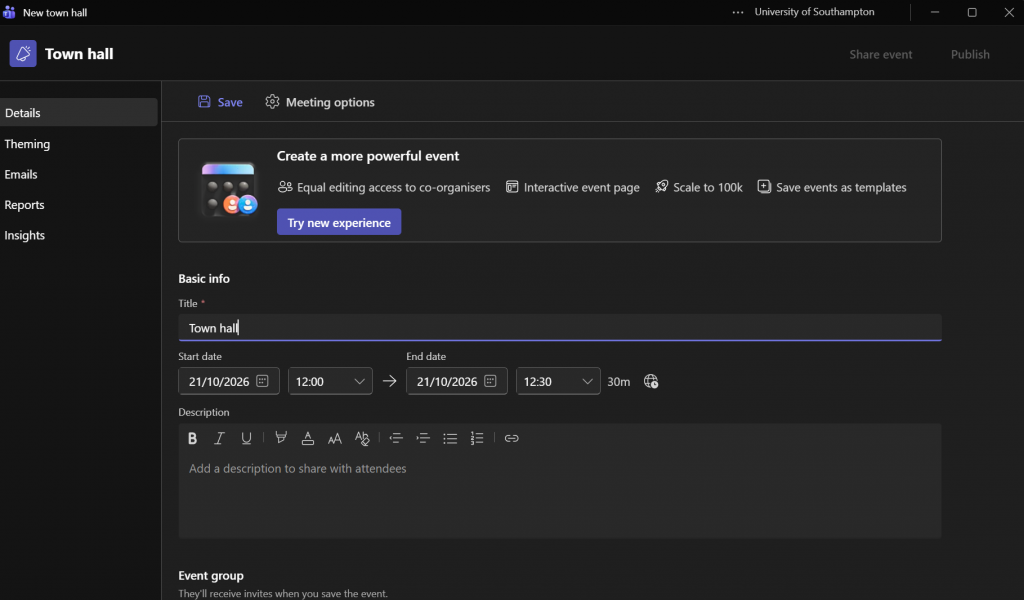
This will then show you a familiar meeting creation page, where you can select the event name, date and time.
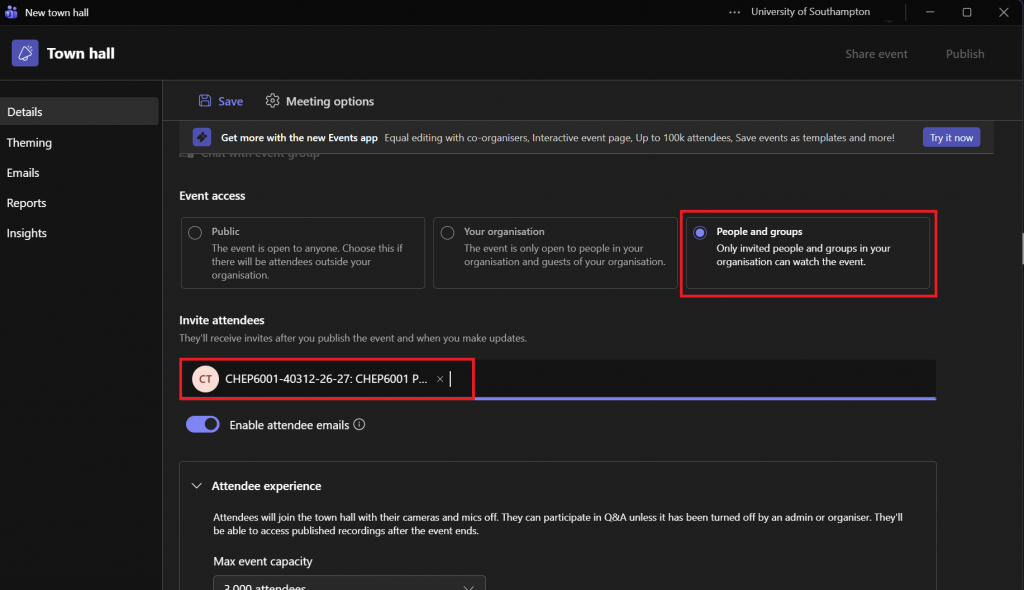
Once you have the basics set up scroll down to find the ‘Event access‘ area. From the top three options select ‘People and groups‘ if you wish to invite specific university users. If you need to invite people outside of the university then you would need to select ‘Public‘.
Below that is a text entry section that can be used to search for Teams group made from Blackboard enrollments and individual users etc.
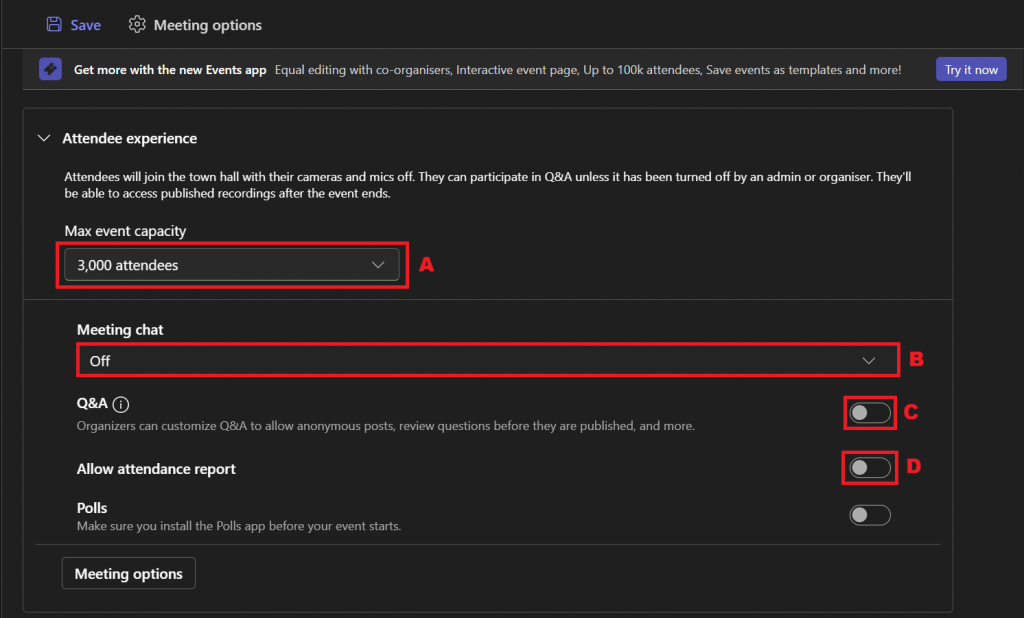
Then scroll a bit further down and this is where you can set the maximum number of attendees and other session options.
Under ‘Max event capacity‘ (A) change the dropdown default option to be 3000 attendees, unless you beleive you will have more than that attending.
After that under ‘Meeting chat‘ (B) change on the dropdown default option to be set to ‘Off’.
Finally next to ‘Q&A‘ (C) switch the toggle setting to be off.
There is the additional option toggle for ‘Allow attendance report‘ (D), which you may choose to activate so you effectively have an autogenerate register of attendance.
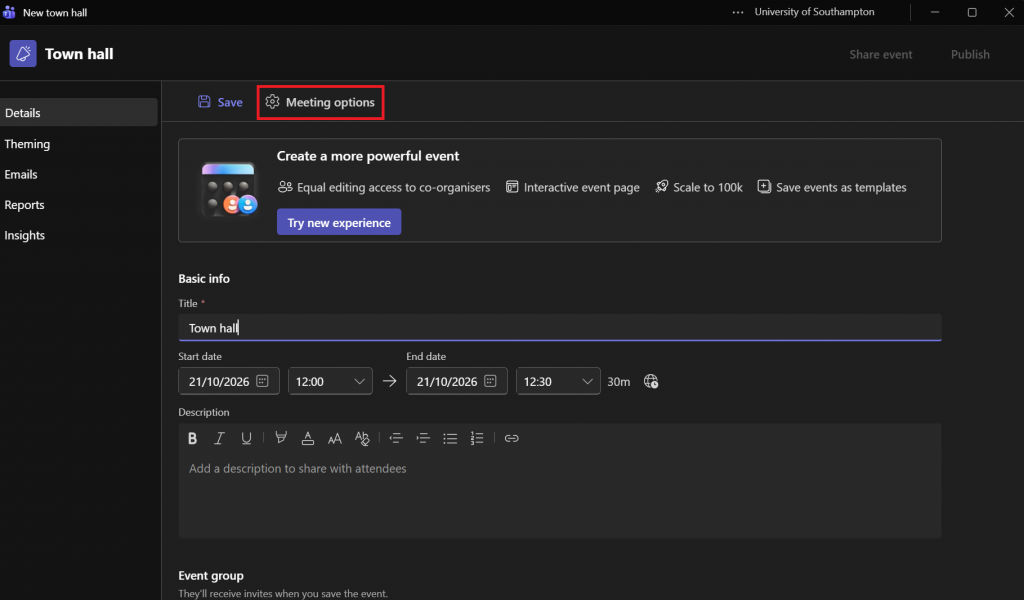
After those settings scroll back to the top and select ‘Meeting options‘.
From the new menu window that opens, from the left-hand side select ‘Participation‘. On the toggle options that show, make sure that ‘Allow reactions‘ and ‘Allow raise hands‘ are deselected. This stops people potentially misusing thumbs up, heart etc reactions along with the hands up notification.
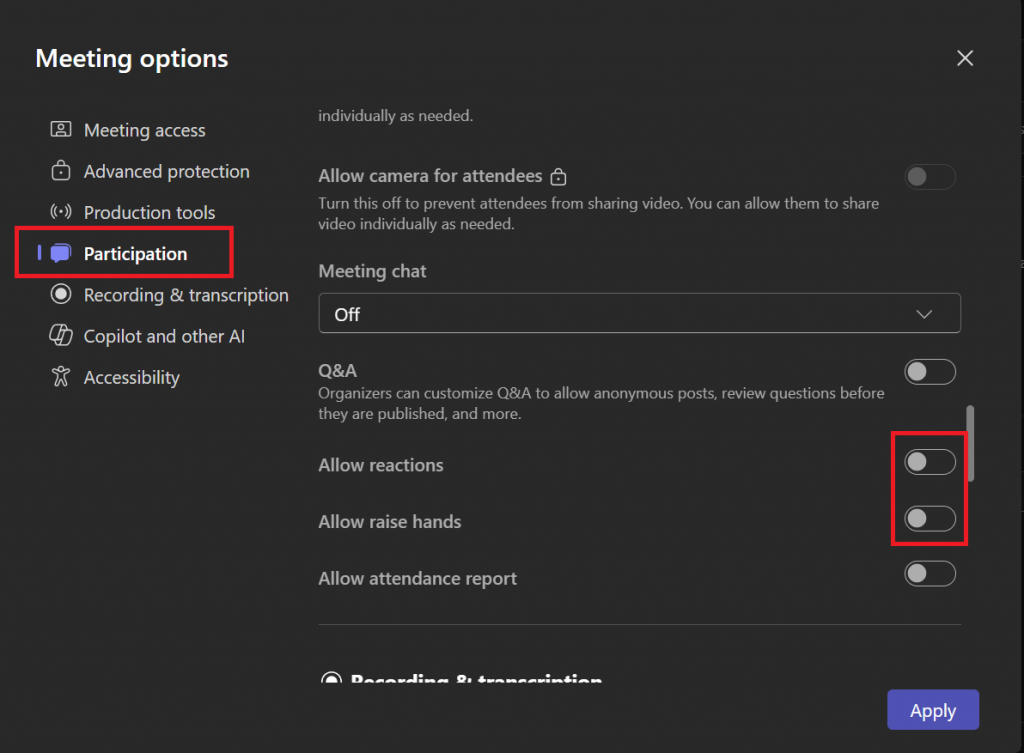
Finally, select the ‘Apply‘ button in the bottom right of the window, after which it will take you back to the town hall meeting creation area. You can then check details as needed and send the invitation out.