Staff Guide: Use meetings in Teams to schedule online sessions and discussions for your whole class. Set them up in a Class Team Channel to ensure all team members are invited and have access to recordings.
Create a Channel to hold online sessions and meetings.
Why is it important to include a Team channel in your meeting invite if you are scheduling a meeting for a whole class?
- All members of the Team are invited.
- Meetings will appear in Team members’ Outlook Calendars (this is only true for a Class Team, for other types of Team, members need to select the link to the meeting in the Channel and RSVP in order to see the meeting in Outlook)
- Any member of the Team will be able to view meeting recordings – even if they did not attend the meeting.
- Recordings will be saved in the files area of the channel.
You can schedule a meeting in any channel, but it is a good idea to create a channel specifically for online sessions to make it easy to find meeting invites, recordings and chat. See this guide for more on Team Channels.
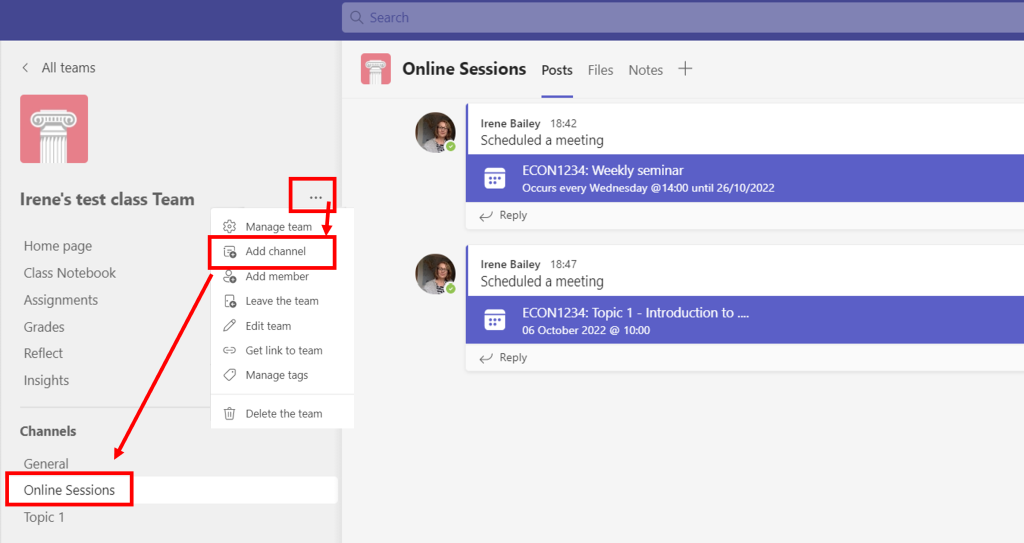
How to add a new channel to a Team
- Select the 3 dots next to the Team name (for more options) and choose Add channel.
- Name a channel where you will schedule meetings and online sessions.
- Tick the option to Automatically show this channel in everyone’s channel list.
Schedule the meeting and add a Team Channel
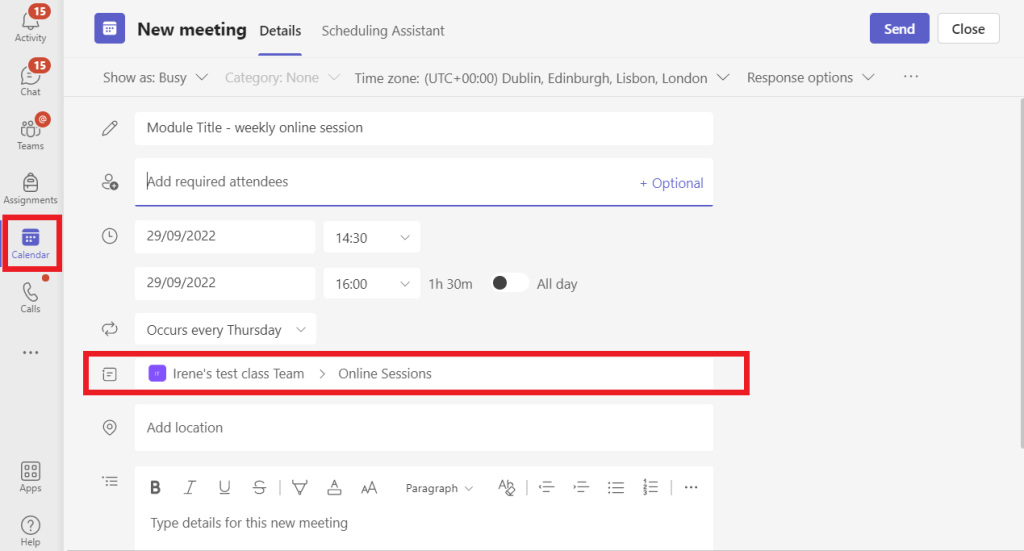
- From Teams, select the Calendar
- Select + New meeting.
- Give your new meeting a title and include the module code at the start of the title. For example -ECON1234 Week 1 Lecture: Topic Title
- You can add attendees who are not Team members. You can include the emails of external guests. Add guests to the team if you need them to have access to the meeting chat.
- Add the date and time.
- You can set any meeting to repeat daily, weekly, monthly, yearly, or on a custom cadence. Note if you set a repeating meeting for weekly sessions, all recordings and chat will be accessed via a single link in your Team Channel. Schedule separate meetings if you want to split links by week or topic.
- Select Add channel to see a list of your Teams. Select your Class Team and the channel where you want the meeting to appear. Note: When you select a channel in a class team to host a meeting, all students with access to the channel are able to join the meeting. Also, all resources shared and any recordings taken during the meeting are saved in the channel and the channel files area.
- Take a moment to review your meeting details. When you’re done, select Send. This adds your meeting to your calendar and your students’ calendars.
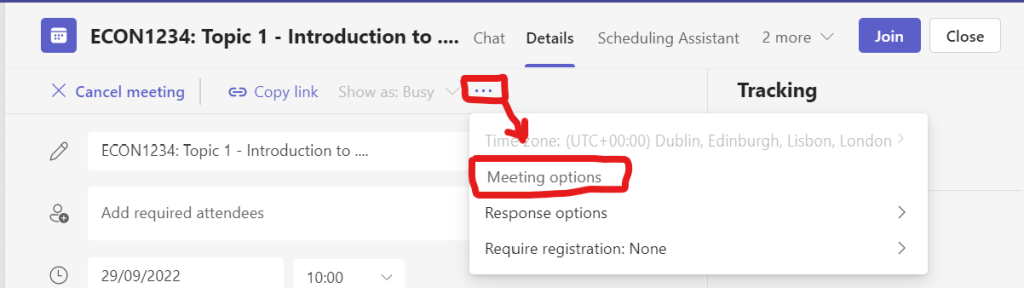
Check and edit meeting options
Change joining settings and permissions for the meeting, for example, who can bypass the lobby, who can present and share content. You can also assign other co- organisers.
To change meeting options and permissions:
- Open the meeting from your calendar or from the link in the Team Channel.
- Select Meeting Options.